Category Archives: robots

First experiment in pyBullet and first publish at github

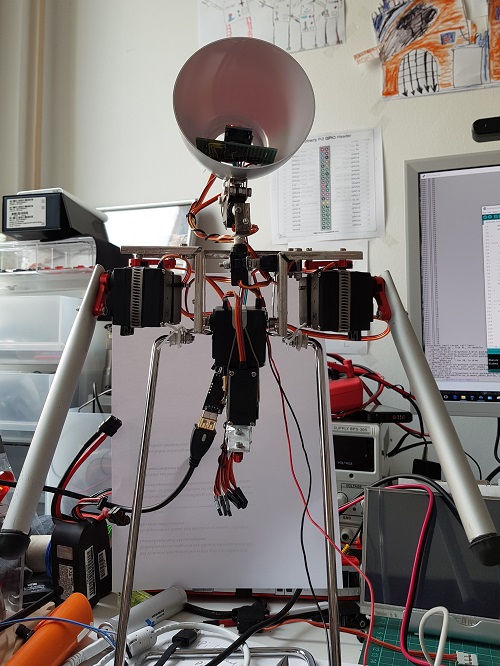
Walking robots are one of my favorites. There was a brave Korean gentleman that designed a simplified version of Boston Dynamics’ Spot mini, called the spot micro. I needed to build that:

When working on my version of the spotmicro, I noticed that the community is developing the gait patterns and inverse kinematics using simulators, here’s an example:

I’ve also read about pyBullet, Gazebo, MoJuCo but never was sure what they actually do and how deep they go, not only in terms of physics simulation but also for sensors / cameras as well as the learning of motor patterns or visual processing.

So I decided to take a little dive into that matter especially into pyBullet since it is a python wrappter / front end to Bullet. So you have a python script that loads the GUI as well as objects that are defined via links. These links can have motor functions. The motor functions can be controlled in the python script and thus also be computed by neural networks, state engines etc. Finally, you also have access to simulated sensors.

The nice thing is that you can really define the size and orientation as well as weight and other physical properties of the elements of the robot. The physics engine will then take care of computing the orientation and also collisions with other objects.

One way of defining the elements is using URDF, the Universal Robot Definition Format as defined by ROS, the Robot Operating System.

However, it was hard for me to find a simple example that was interesting enough to play with. Either the robots / objects were complex in definition or the python scripts were complex. This is why I collected some scripts and URDF files, simplified them to a very simple scenario that is interesting but also understandable in every file.

And I did my first publish on github! Clone the repository here:

https://github.com/assadollahi/pyBulletIntro

The files / scripts / examples were found at:

Pimping the Omnibot 5402, pt 2: making the arms move

I always wanted the Omnibot to be able to actually grab and lift objects. So I started with the arms and recycled the 2 DoF shoulder servo pack from Trashbot.

The original two arms of the Omnibot 5402

The goal was to get the should parts replaced in a lean looking way. However, the original arms only move forward but not sideways, i.e. Omnibot cannot hug. Adding a second degree of freedom will thus inevitably broaden its shoulders:

Increaing distance between arm and body when using two servos

One trick was to hide the hugging servo within the body as good as possible. A next iteration could also hide the lifting servo a bit in the upper arm. For the current version, I chose to add it on a newly designed base plate that is at least slimmer than the inner should cover (compare it to the underarm):

Close up of the 3d printed 2 DoF shoulder joint on the Omnibot 5402

Here’s an earler version of the design, before I moved the should into the corpus:

Trashbot’s shoulders re-used in the Omnibot 5402

Software wise, I had to slow down the servo speed as otherwise Omnibot would move like this:

Single arm of the Omnibot 5402 moved by two servos without speed control

The final result are the two arms, each controlled by a thumbstick of the Bluetooth game controller. I added the Adafruit servo HAT to the stack that was using the motor stack before:

Omnibot 5402 moving two arms on two different axes using a bluetooth gaming controller

As usual, I’ve uploaded the two 3d files (.STL) on thingiverse, let me know, when you’re trying these out!

One of the things that are not making me happy is that Omnibot’s belly is to bold that it can’t close the arms and the arms are so short that they can’t lift anything that is in front of it. Fixing these two “bugs” would mean a complete redesign of the arms, I fear.

Pimping my favourite 80’s robot: Omnibot 5402 (Pt 1: driving)

When i was a child, I was dreaming of the Omnibot 5402, I loved its size, its ability to be radio controlled, it could speak and it could record movements on a built-in tape recorder and it could carry things. A perfect companion!

When you get older, you can make some of your youth dreams come true. So two years ago, I was lucky to get not only one, but two Omnibots on Ebay for 99$ (tax and shipping summed up to another 200$, though 😀 ):

I cleaned the battery compartments of the remote control and the white one and made sure that these work properly, I replaced the original batteries with 2S 7.4V LiPos and bucket converters (max 20 Amps for the Omnibot itself):

1800mAh 7.4V LiPo and bucket converter and barrel connector for the Omnibot 5402
Battery and converter built into the Omnibot 5402

But the real fun starts with the yellow Omnibot:

  • I wanted to have a Raspberry Pi controlling it,
  • a decent Bluetooth remote control with more options,
  • the arms moving,
  • a camera for computer vision
  • USB sound card with a loud speaker and a microphone
  • LED matrix eyes for emotional expressions and to indicate where the robot’s looking at

So, the journey starts with decomposing it and enjoying how it is constructed:

Base of the Omnibot 5402 including all wheels, gearbox and motors

That’s the lower part containing the four wheels that are driven by two motors in the gear box.

The four wheels of the Omnibot 5402, the belts light greay have flattened over the years.

Of course, we want to keep the robot as original as possible, so I needed a H-bridge controller to control these two motors.

Omnibot 5402 gearbox and motors open
Omnibot 5402 gears taken out for cleaning
Omnibot 5402 gearbox connected to the Adafruit Motorshield and the Raspberry Pi 3

I took the original cable from the Omnibot’s motherboard and connected it to a Motor HAT from Adafruit. In that way, it was easy to use their examples to control the motors using Python.

Omnibot 5402 gearbox controlled by Raspberry Pi and Adafruit motor HAT

Next I’d build this into the base, add LiPo power to the motor controller and USB battery power to the Pi:

Omnibot 5402 base drive test

Finally, I’d add some code to connect by 8bitdo sf30 Pro Gamepad via Bluetooth to it:

Bluetooth controlled base of the Omnibot 5402

I decided to use the D-pad to control the Pi since I wanted to use the thumbsticks for the arms. The D-pad can be used to drive the Omnibot like a tank, forward lets both motors go forward, rotation on the spot can be achieved by turning the motors in opposite directions. Since the motor control is PWMed, we can also set the speed so that the speed is independent of the battery level.

You can find a tutorial on how to read a gamepad via python here.

The next blog entry will cover the movement of the arms.

Trashbot upper body and neck servos revived

I recently split my Trashbot in half to finally get hold on the walking patterns of the lower part, as I changed the controller from Arduino Nano to Raspberry Pi. Here’s the upper part:

Trashbot upper body incl neck & head

Trashbot upper body incl neck & head

With the recent progress of running Oculus Rift from a Pi 3 and the experiments of streaming video from the stereo cam Blackbird 2, I thought it was a great idea to attach the camera to the upper part of Trashbot and send the Oculus head orientation to the neck controlling Arduino Mini Pro.

First step is to get the Arduino run with the PC again. But oh, that shitty servo:

So, before diving deeper into head synchronous robotic telepresence, I’ll need to fix that bugger…

minimalistic way of building a 2 DoF servo “cluster”

as you know i love to design minimalistic mechanics and always try to simplify my previous designs. many of the things in trashbot 6 have been redesign to reduce weight and the number of parts.

one study of reducing complexity was the robot foot made from two servos and coat hanger wire and it actually received quite some attention.

with the progress made on trashbot 6, i also wanted to have a compact, yet lightweight way of connecting to parts with two servos so that these two parts could move in two dimension: the shoulders and the feet. Continue reading

trashbot 6, quick video walk through

most of this work has been done over christmas, but only now i found the time to at least do a quick tour around the bot. here are some highlights:

  • arduino nano changed to raspberry pi 2 & wifi
  • moved controller from back to hips
  • added 16 channel i2c servo controller
  • new foot construction adding an additional degree of freedom (DoF)
  • reconstructed legs that are lighter and now take up new batteries
  • power distribution board including i2c current / voltage measurement
  • accelerometer and gyro sensor (i2c) moved to “belly” instead of neck
  • added arms with shoulders (two DoF)
  • changed spine, reduced complexity
  • removed head for now (being redesigned)

designing a robot foot from a coathanger

I always love to obey to minimalism and I always love to construct stuff with a minimal amount of material and complexity. Of course, the question is then how replicable, durable and maintainable the result is.

In the present case it became obvious, that at some point in time, Trashbot would need to have an additional degree of freedom on his foot, namely an ankle that allows him to lean forward. The present prototype is acutally from August last year. But now I’m revisiting my designs as Trashbot recently got the long awaited additional hip servos and the logical next step is to add the ankle servos.

So let’s start with the layout:

t-shaped servor layout Continue reading

Trashbot 5, new hips, first movements

Last week I added three degrees more to Trashbot, two hip servos for forward movement (“kicking”) and one to the bone.

This week I found some time to do the first single servo movements and tests to check out the new geometry of the bot since the broader hips will affect the Center of Gravity etc. Here’s the first attempt to do what the normal gait would do: shift the body to one foot:

So, definetly software teaching me how to improve hardware… Next draft iteration: Continue reading

Working on more Degrees of Freedom in the legs of Trashbot

I’ve been working on Trashbot for quite a while now, but the basic gait mechanism is still the same as in version one. The hips’ movements and the distance between the legs define the possible step length. This is annoying since the robot is rather tall and you’d expect that he’ll walk a bit faster than he actually does. However, moving faster induces stronger vibrations in the skeleton and makes him fall much easier.

trashbot 4 in full length

Also, the upper part of the body will tilt “stronger” when Continue reading

trashbot 4 and more

this time it took really long to make more progress on trashbot but i had the feeling that there were many little improvements that made the bot better and somehow it felt like none of them were big enough to be worth a post.

now in the end i learn that quite a lot happened during the last 8 or so weeks and over easter i invested some time also into the cleanup of the software.

first of all, i added shins to the legs so that he wouldn’t swing too much when shifting his weight from one foot to the other. i used some screw / hooks that you use to hang wired lamps and have a tension on the wires:

IMAG0948r

next i couldn’t resist to Continue reading