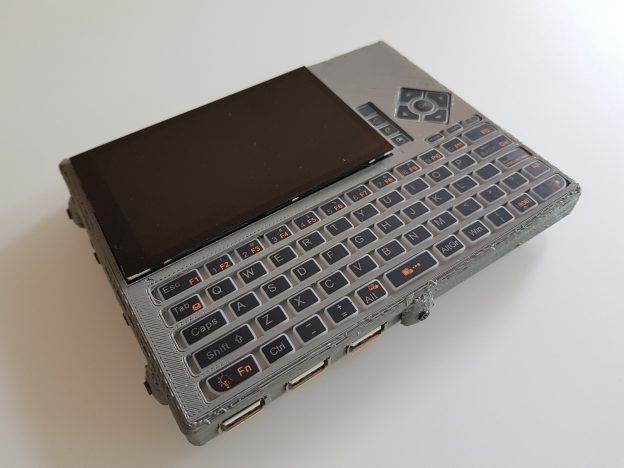

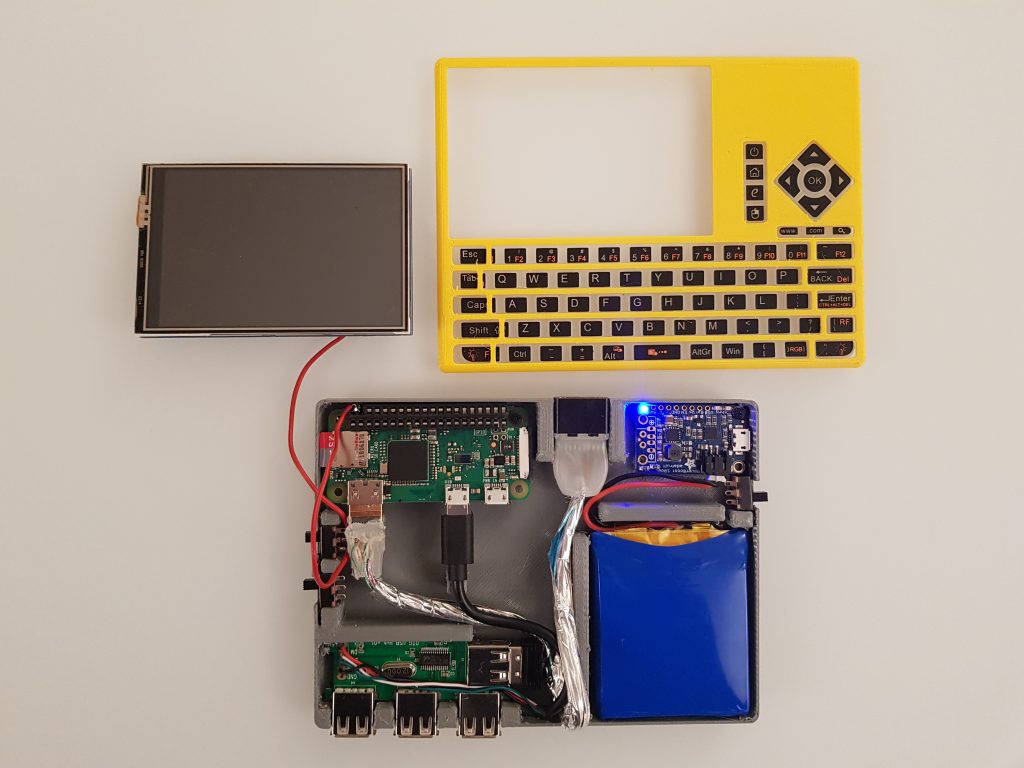
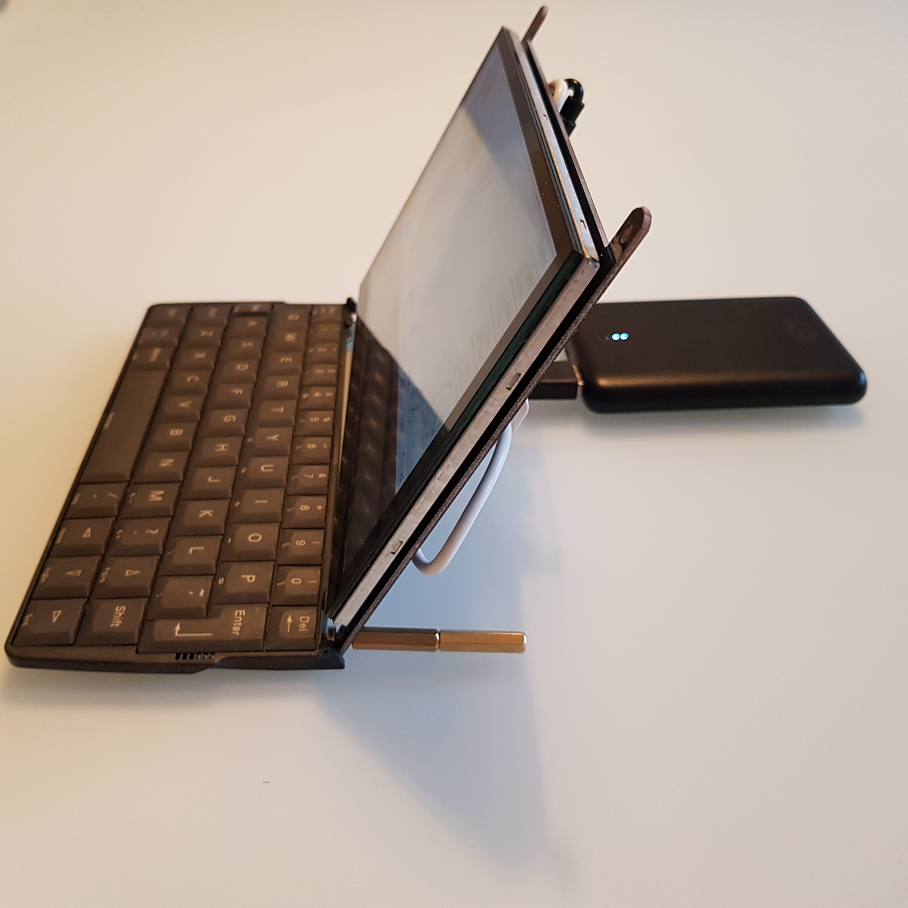
TL;DR: 14x11cm portable Raspberry Pi Zero W with 3000mAh Adafruit powerboost 1000, Hyperpixel 4inch display, a keyboard and a4 port USB hub. Scroll down for videos, STL files, shopping list.
I always want to be able to carry a little computer around that reduces the outside distractions, like no email, ideally no browser, no messaging, etc. Actually, I enjoy the “silence” that I have with the Raspberry Pis. They allow me to focus on writing software for robots and the like.
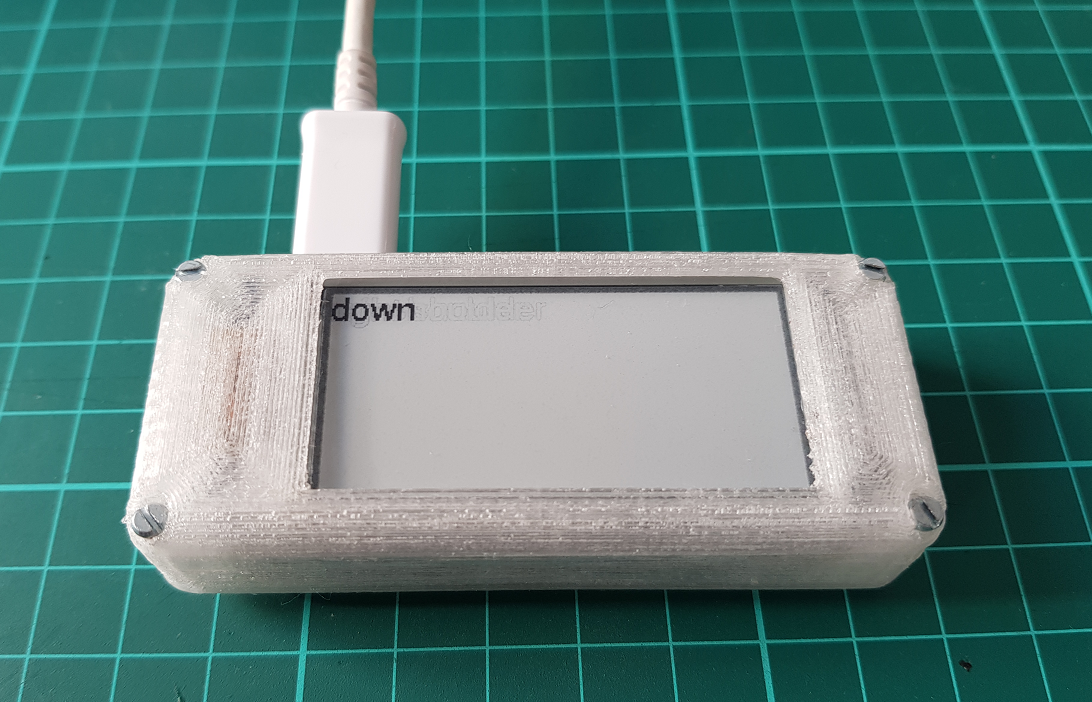
Sometimes, you want to code on the go. My second shot in that direction is the StickPi, a little computer without battery but with an e-paper display and a couple of buttons. I actually keep using it, it’s my most used self designed computer.
My first shot hasn’t been published yet: the SlatePi. It is a 5inch computer with a small keyboard and a 4000mA battery, but it seems to be to large for every day use.
So I did another computer: today’s PocketPi. It is the symbiosis of the first two: portable but still a full keybard and a battery included.
It all started with the idea to build a Pi Zero and a display into my favorite mobile keyboard:
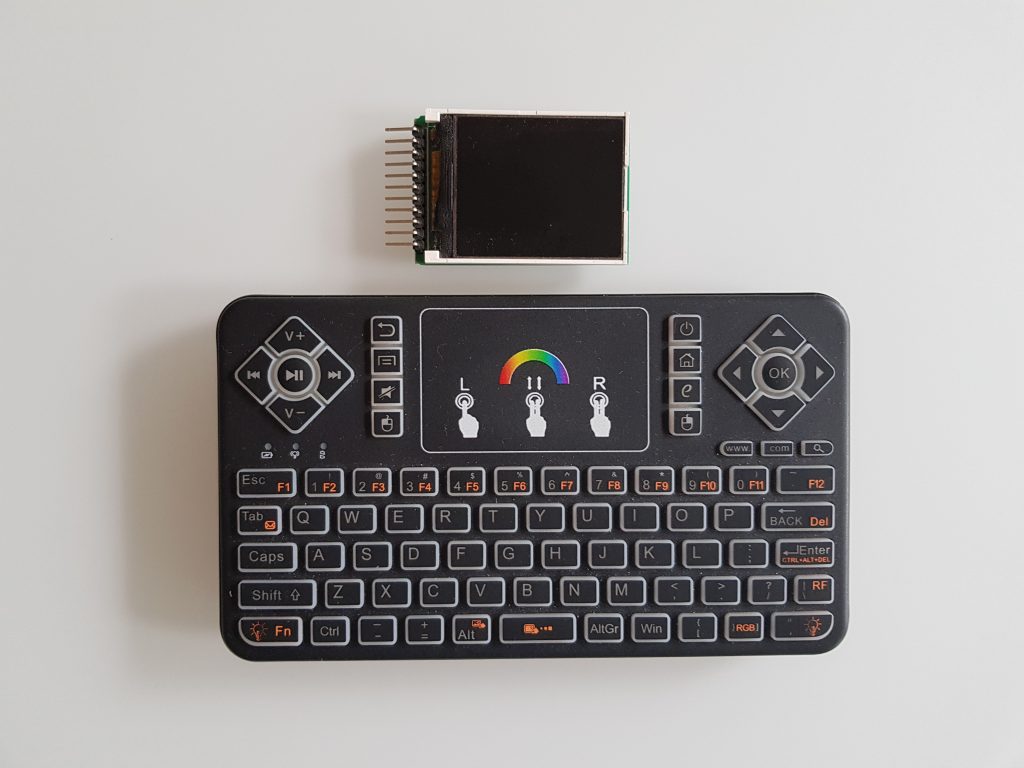
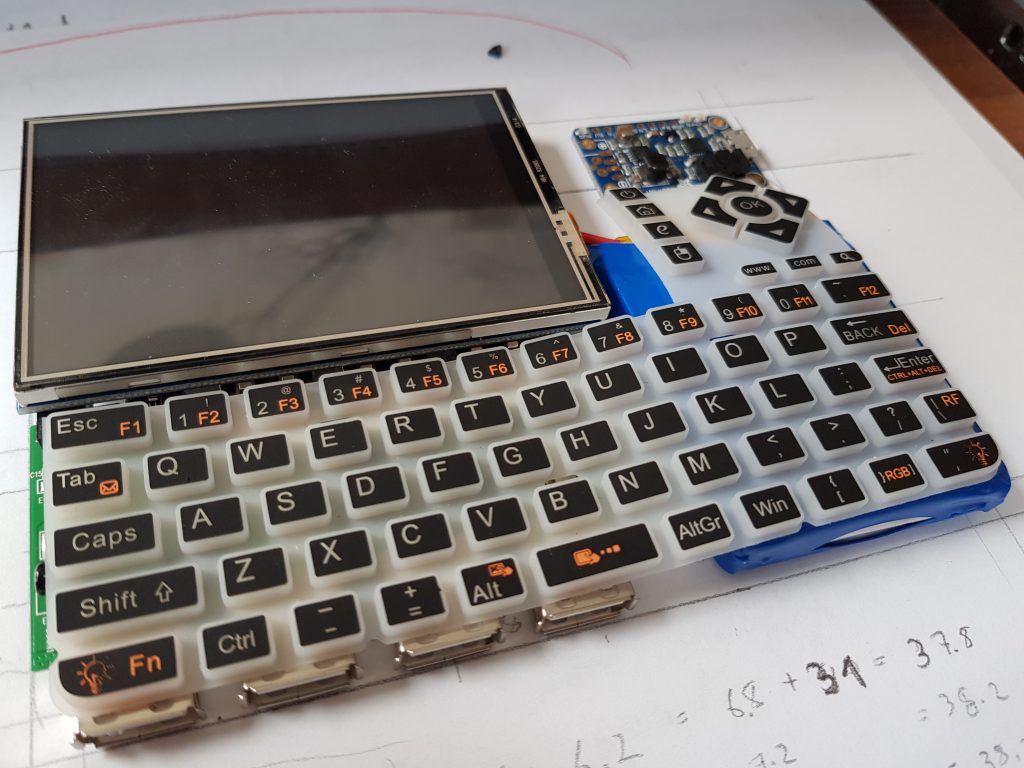
So at some time, I started to decompose that keyboard to understand how much space is there to actually fit in a Pi Zero W, battery and the display.
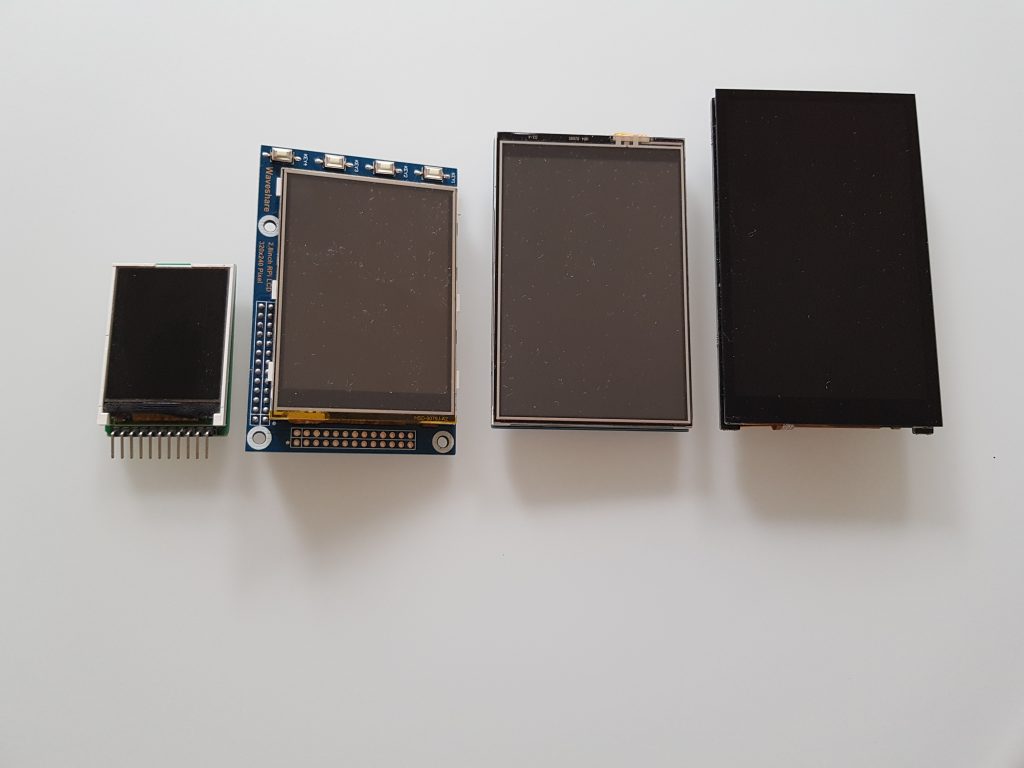
I quickly learned that a) the inclusion of the driver for a ST7735 1.8inch display is cumbersome and the resolution might actually not be nice for really working with it (128×160), it may be better suited for a retroPi machine.
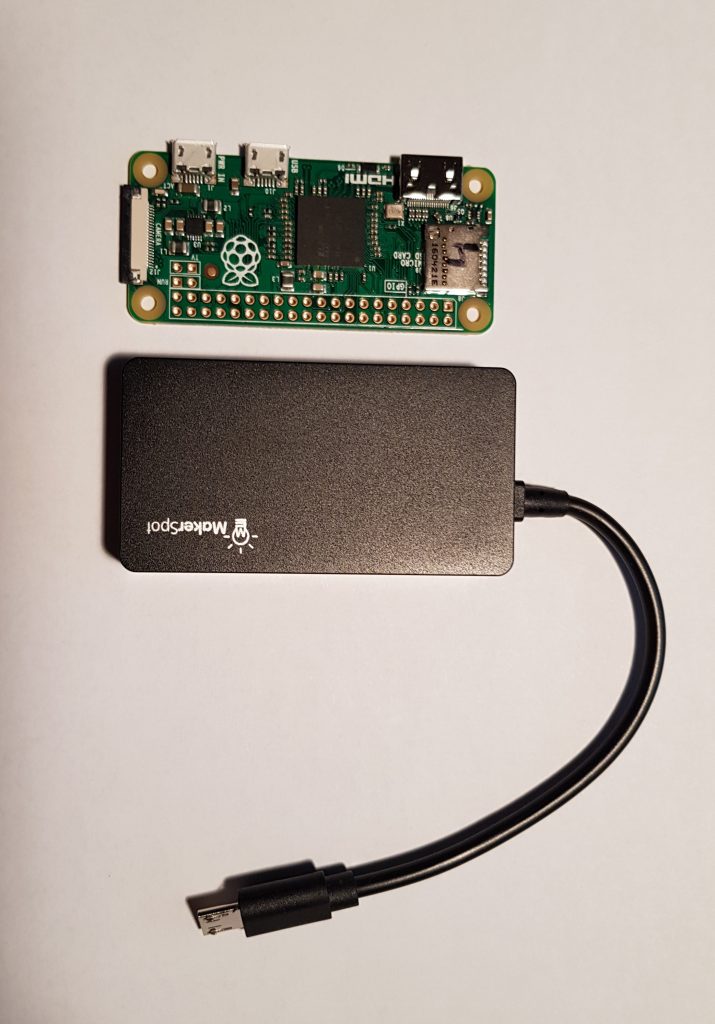
So I decided to use another display that I had at home already which is a 3.5inch display for the Pi (without HDMI) and some more decent 480×320 resolution.
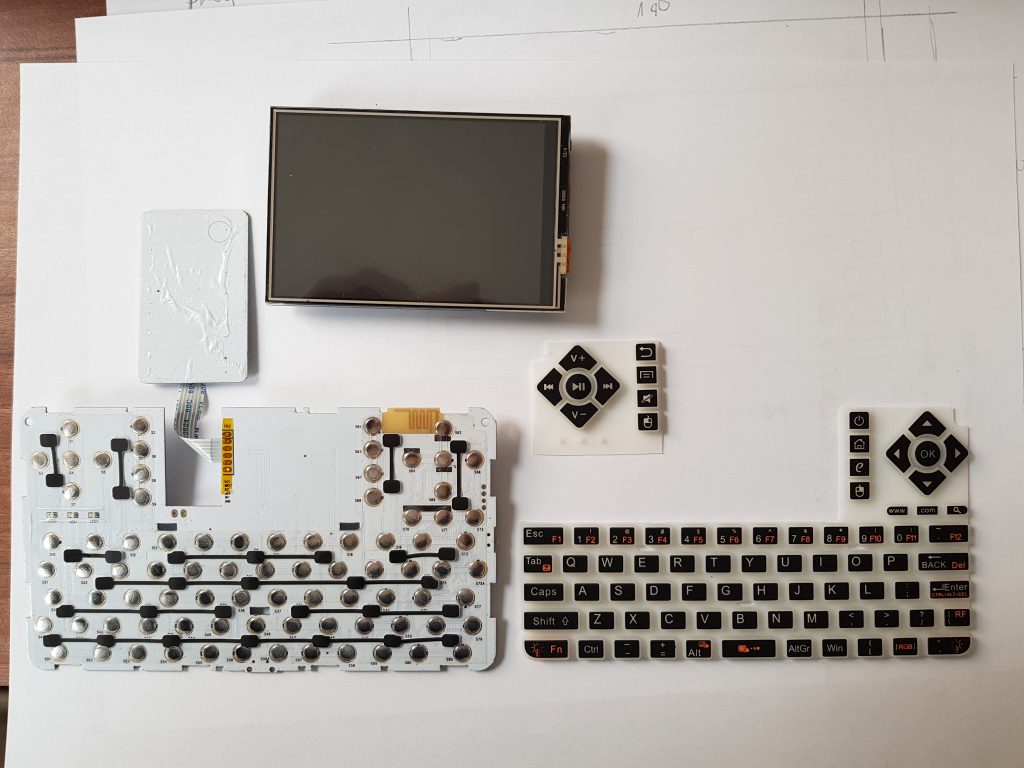
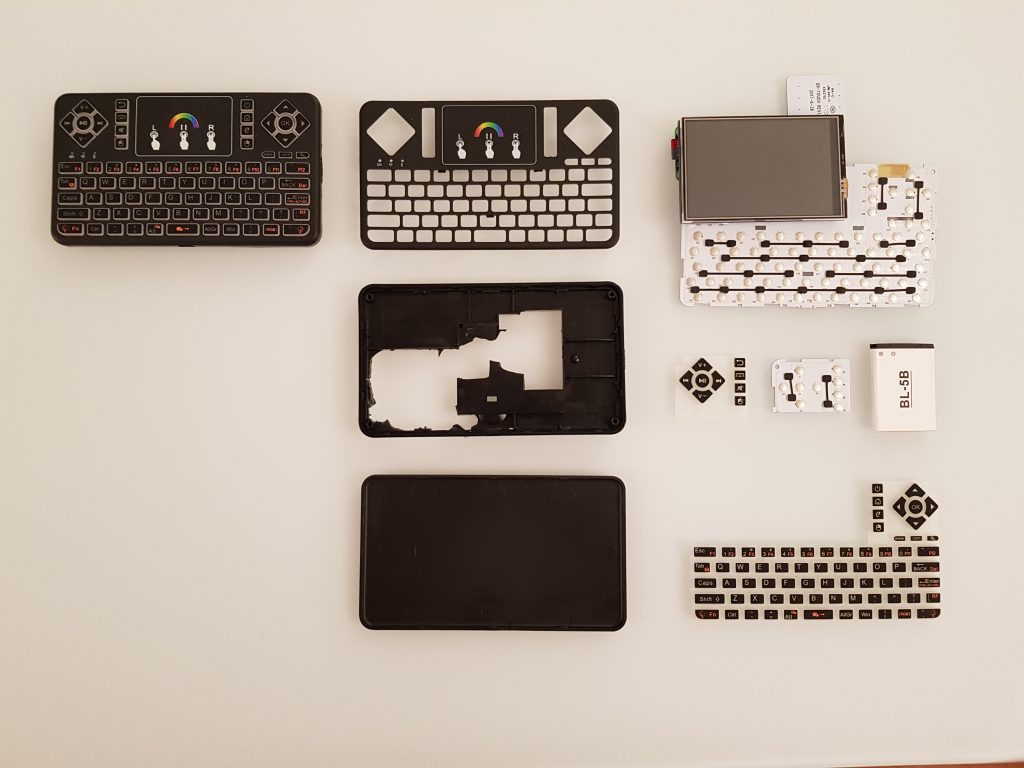
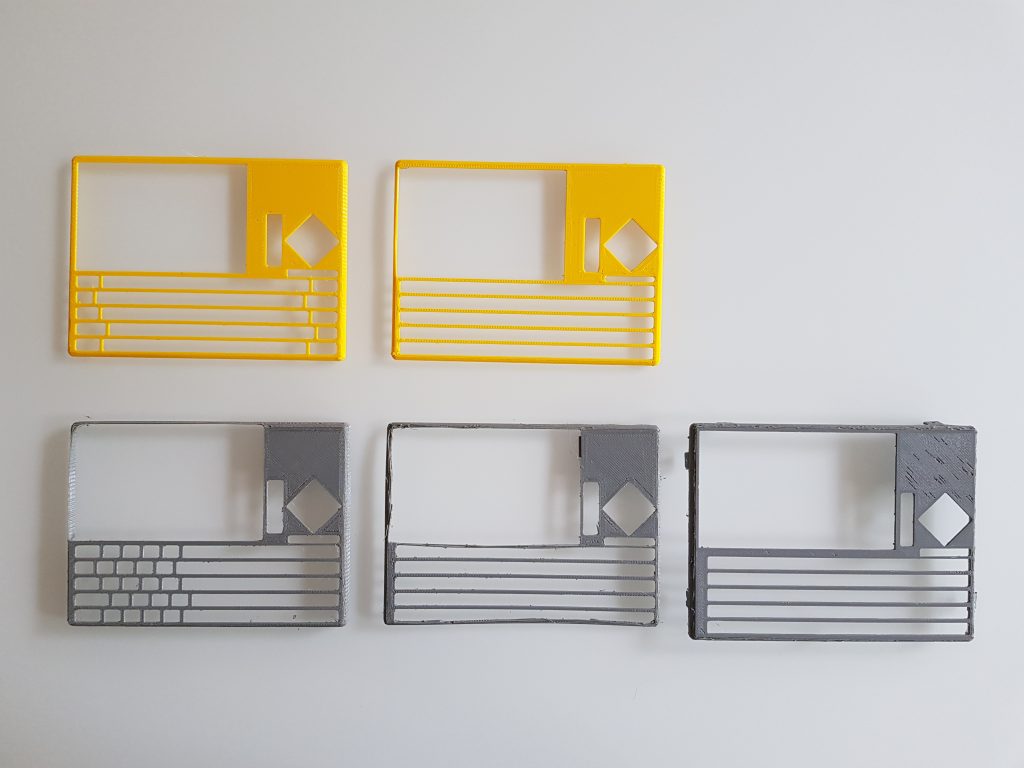
However, I didn’t want to increase the size of the device by the height of the diplay and thus decided that I don’t need the left (media-related) buttons of the keyboard:
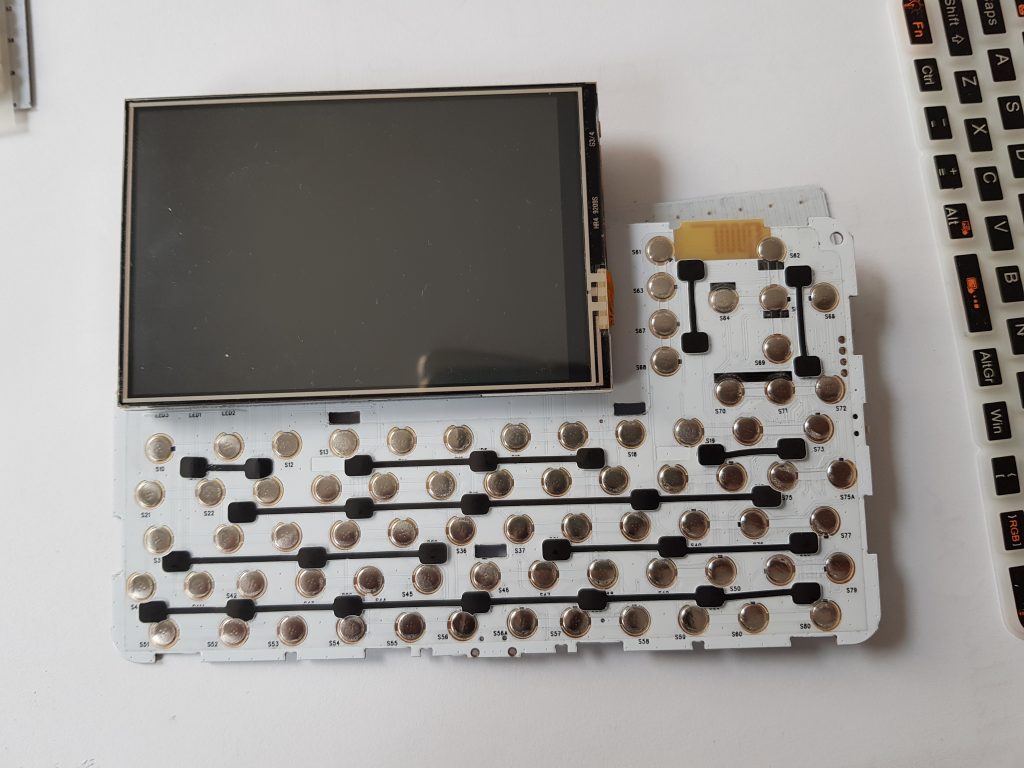
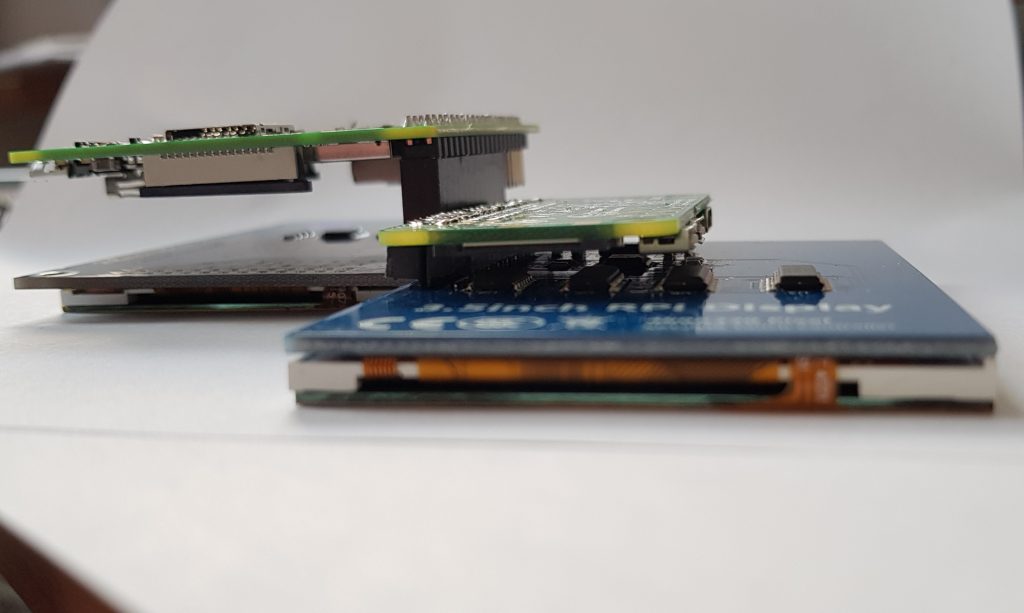
Another thing was to ideally keep the height of the original keyboard which is about 12mm, but looking at the standard plugs of GPIO displays, it became clear that I need to apply some tricks:
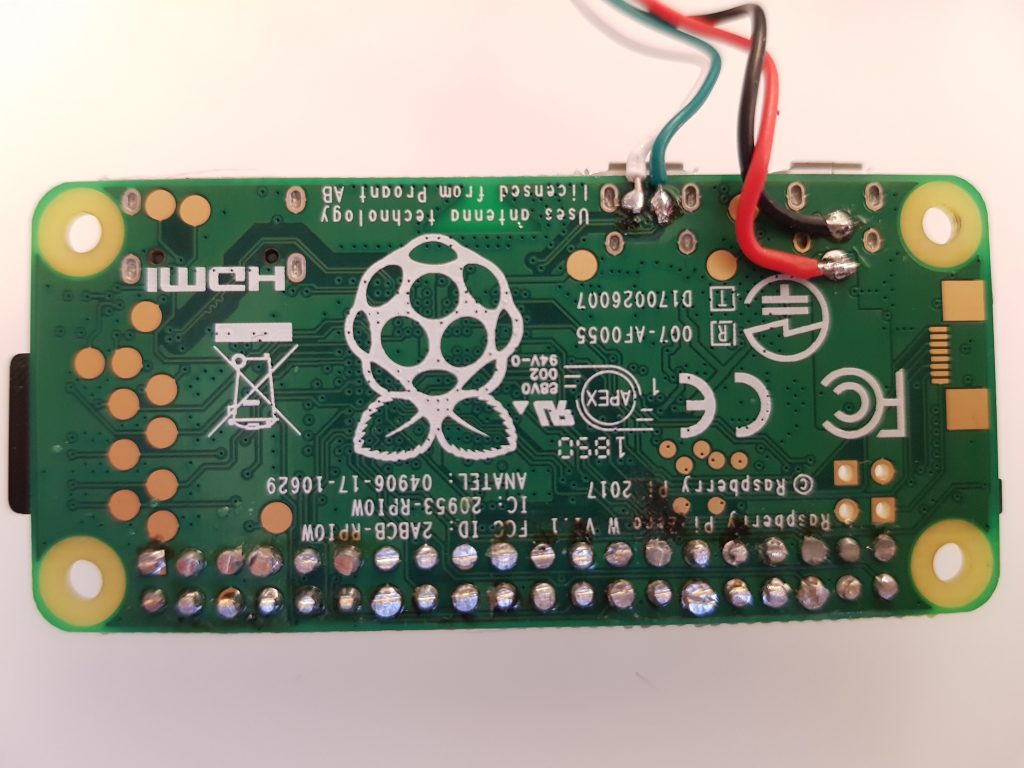
I soldered the rails of a DIP plug to the pi, took away the whole plug from the display cutting off the pins to a bare minimum.
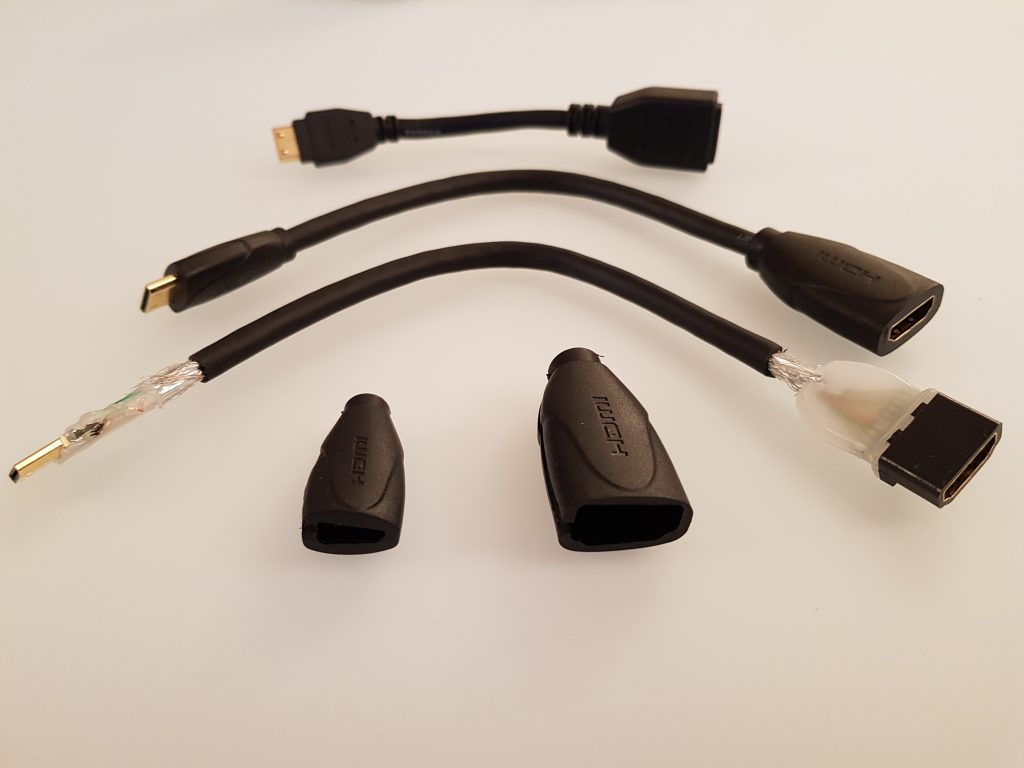
I also decided that I wanted to have a full size HDMI out so I bought shorter and more flexible cables than I had at home and dismantled them:
Finally, i also wanted to add a decent non-OTG USB to the machine as OTG adaptors simply SUCK.
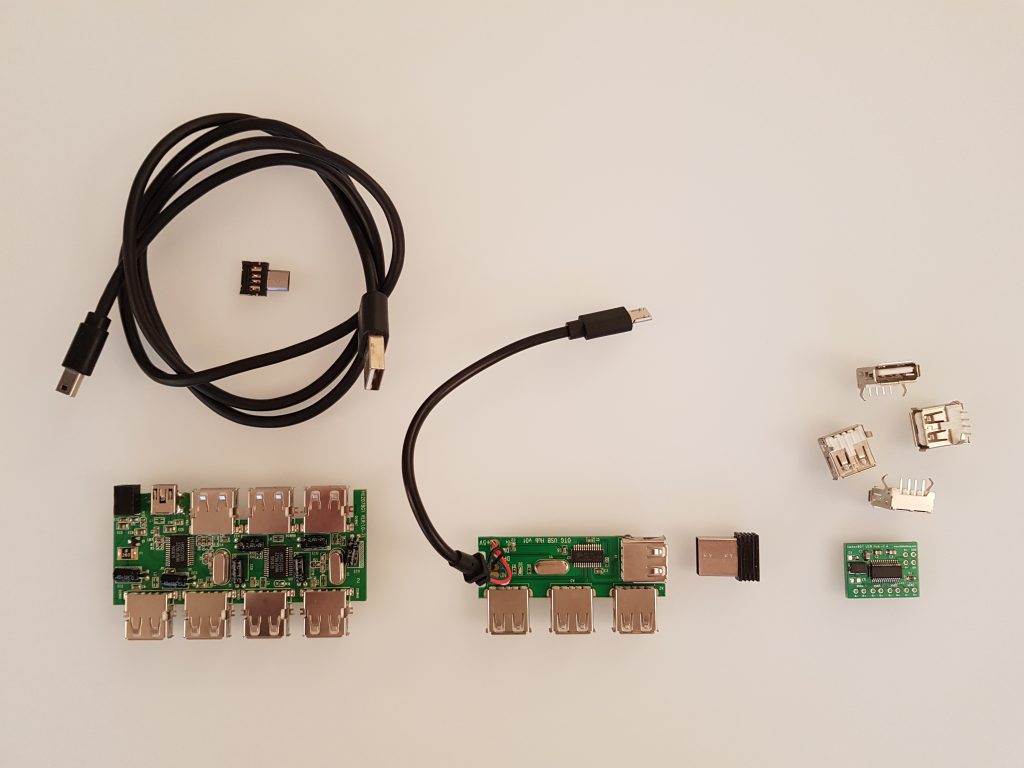
I actually went with a little board that included the OTG “logic” already and had one USB on the side to actually keep the keyboard receiver and stay within the devices case.
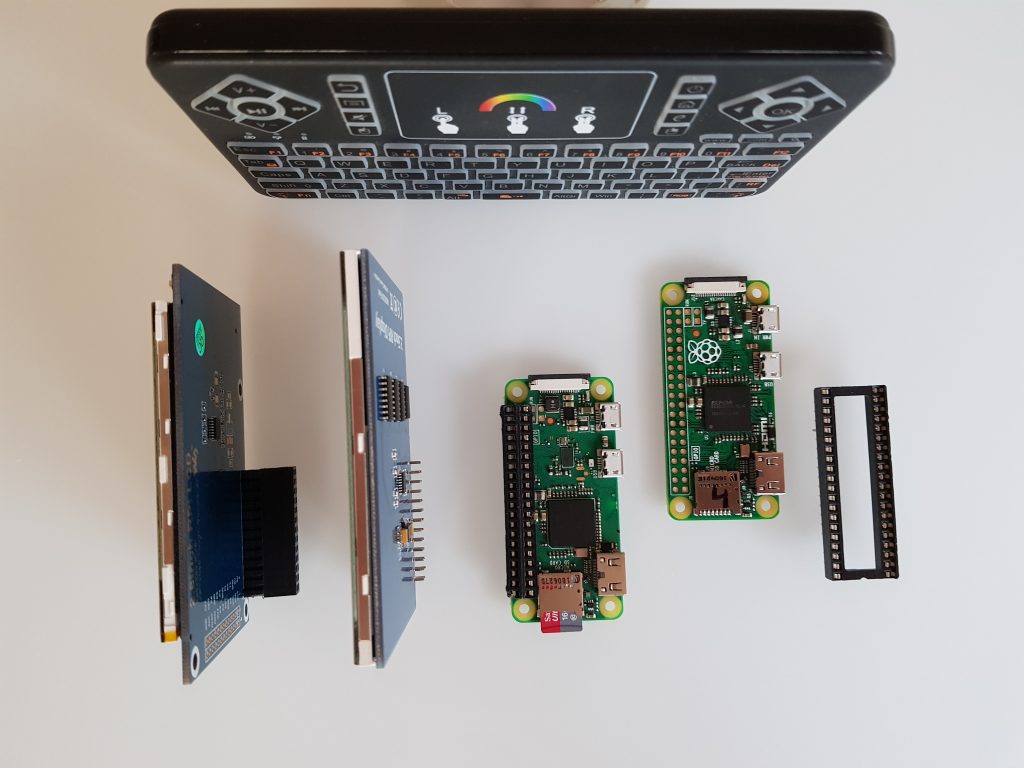
During the journey, I decided to upgrade to the final Hyperpixel 4 inch display, with a decent 800×480 resolution. The advantage is the little increased size (4mm) compared to my 3.5inch before plus it can be switched off via GPIO. So this is the evolution of the displays over the project:
I also added the Adafruit Powerboost 1000 and a rather flat 3000mAh LiPo to the mix. The Adafruit is rather expensive (20-30€) and only supports 1A charging current, I’d love to have a cheaper charger board with 2A at some point in time.
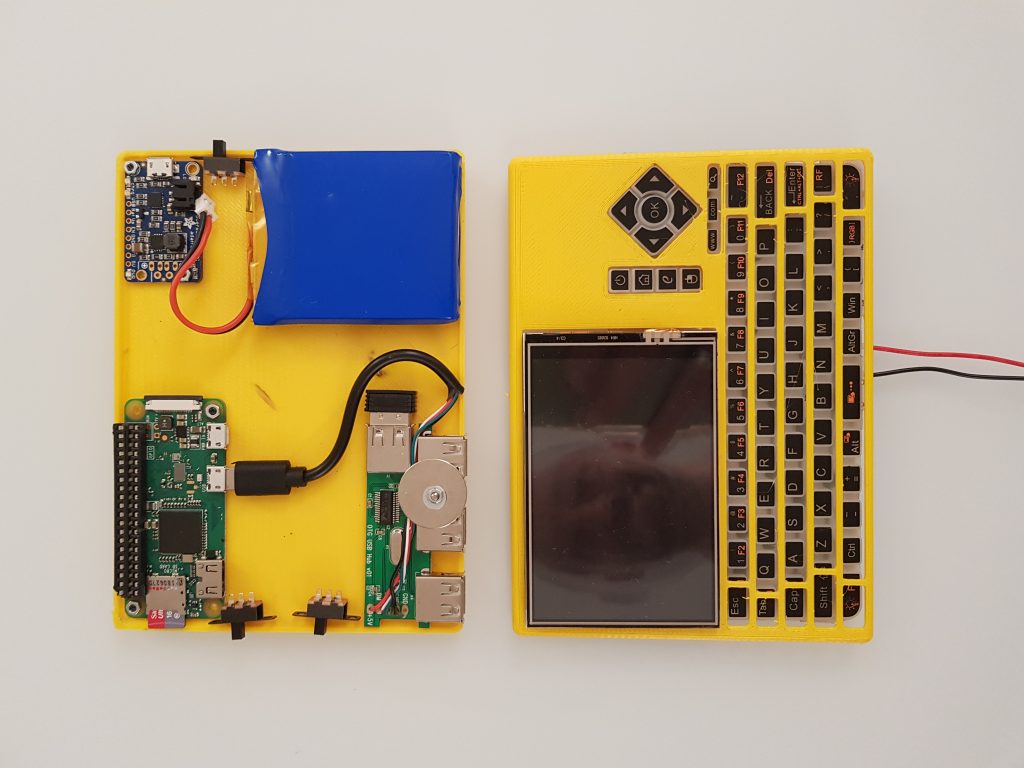
With the power source in place, it was time to wire it all up. Note that I added another switch to the keyboard so that I could switch off the keyboard but let the Pi run for background computations.
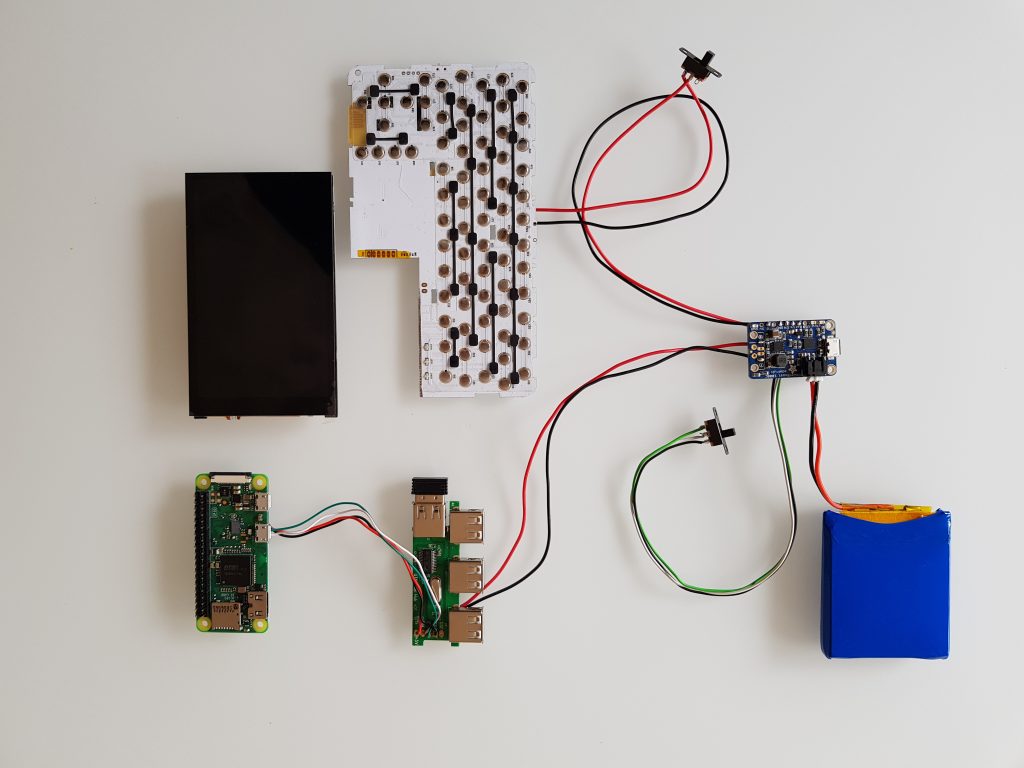
As you can see, I wired the USB hub directly to the Pi to save some more weight and space:
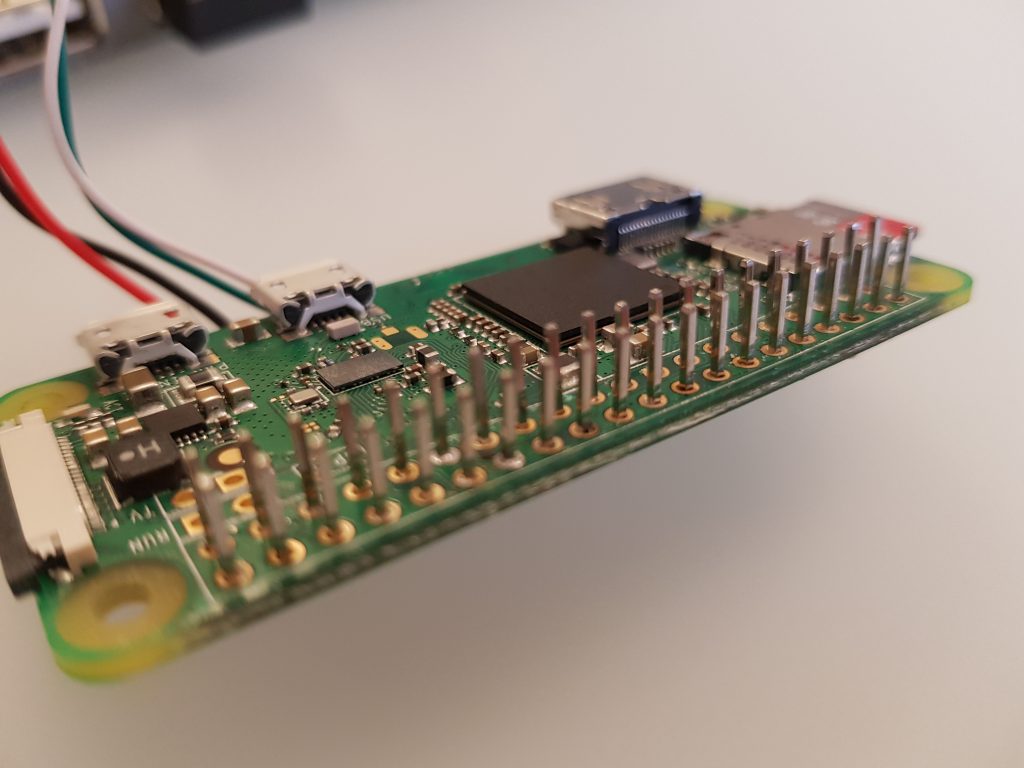
Another trick to save height with also the new Hyperpixel display (the plug of the screen is okay, so I needed a new Pi Zero without the DIPs and just short pins), is to solder the pins with the plastic spacer from behind and then remove it plus the excess pin lengths on the back:
After the system was established, it was time to design the case and get a feeling for the locations of everything:
A later version then had spacing elements between the components to hold them in place. Also the HDMI output cable was added then:
As mentioned before, the screen switch for the 3.5 inch didn’t work as you could switch it off (cutting off 5V with the physical switch) but not on again since the OS wouldn’t re-recognise the screen then.
So the whole case design (TinkerCad) underwent a couple iterations:
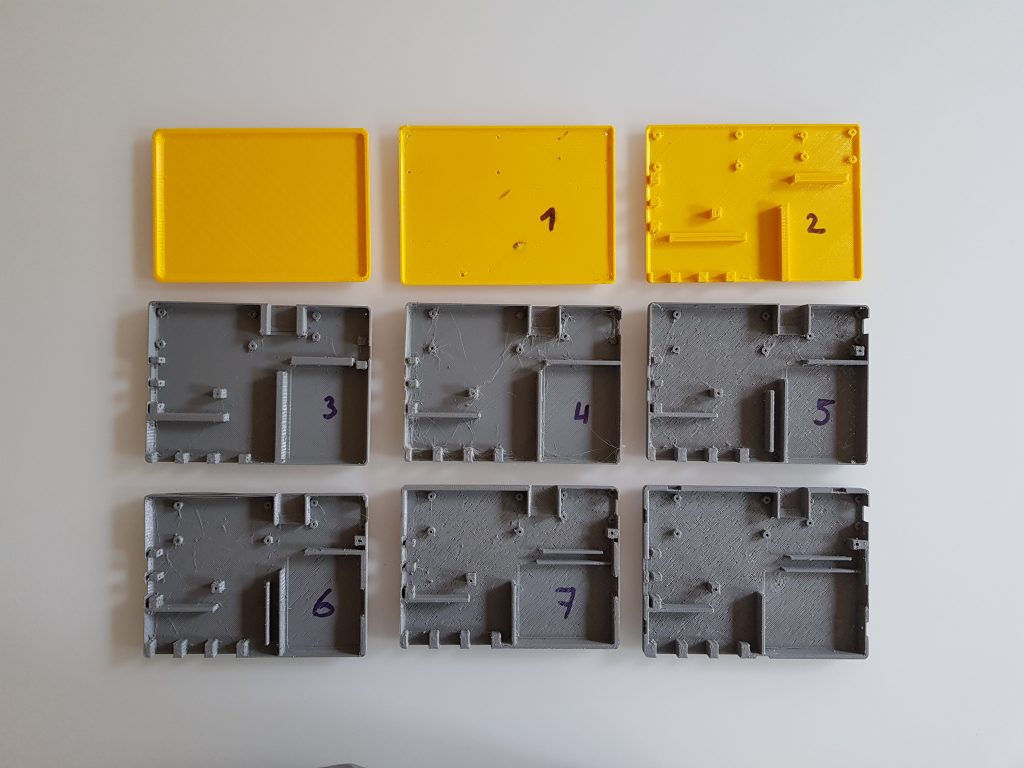
As you can see in iterations 7 & 8, the battery was rotated 90° to landscape and the HDMI cable is going between battery and battery charger.
During these iterations the device grew a bit in dimensions to a final 11x14cm. That’s 3cm more than the original keyboard’s case at 8x14cm. But anyway that’s the price for a 4inch screen with a 800×480 resolution…
So that’s the currently final layout:

Time to look at the functionality in a video:
As I wanted to take the PocketPi to my easter holidays, I needed trade the flat screw “lips” to be bold and rounded to give the hole thing more stability:
I installed Raspbian Stretch lite and added the Pixel desktop plus Geany as python IDE. I also configured two of the buttons to zoom the text in Geany, the right mouse key on the keyboard is really handy, the touch screen works as left mouse button and I added multiple desktops to easily switch between apps. Here’s a video of the currently final device in operation:
As I have promised on the Facebook Raspberry Pi group, here are the STL files: https://www.thingiverse.com/thing:3623114
Here is the shopping list:
- Adafruit Powerboost 1000C: https://www.adafruit.com/product/2465
- Pi Zero W: https://www.raspberrypi.org/products/raspberry-pi-zero-w/
- Hyperpixel 4.0 display: https://shop.pimoroni.de/products/hyperpixel-4
- Q9 Keyboard: https://www.aliexpress.com/item/TZ-Q9-Mini-Keyboard-2-4GHz-Wireless-Keyboard-RGB-Backlit-Touchpad-for-Android-Google-Smart-TV/32823877761.html
- USB 4-port hub: https://www.amazon.de/gp/product/B075ZKJ76L/
- LiPo (has obviously changed, mine was 5x6cm):
https://www.amazon.de/gp/product/B00XYODE16/ here’s an alternative:
https://www.aliexpress.com/item/10-x-pcs-3-7V-3000mAh-Lithium-Polymer-Lipo-Rechargeable-Battery-cells-904260-For-Power-Bank/32879524062.html - Switches: https://www.amazon.de/gp/product/B008R50AA0/
- Black (!) screws: https://www.amazon.de/gp/product/B07748JK1H/
It’s roughly 130€ plus 3D print.
Woah! Featured in:
hackaday: https://hackaday.com/2019/05/16/pocketpi-is-exactly-what-it-sounds-like
hackster.io: https://blog.hackster.io/pocketpi-raspberry-pi-zero-w-keyboard-computer-is-an-iterative-success-981821d46c48
geeky-gadgets.com:
https://www.geeky-gadgets.com/pocketpi-raspberry-pi-pocket-computer-17-05-2019/

Pingback: PocketPi Raspberry Pi pocket computer with keyboard and screen - gadget update from firstpress
Love the project. A little filler and paint could go a long way if you want to import the case’s cosmetics but otherwise it looks excellent!
Pingback: PocketPi: Raspberry Pi Pocket-Sized Computer | Open Electronics
Cutting the left upper part of the keyboard PCB (a little bit above the 3 LEDs) results in an “ESC” key that does not work any more (They seem to have slightly changed the PCB layout ). Did you have a similar experience? Maybe I was cutting still too close to the LEDs.
Sorry to hear! No, all my keys work still after this year. I followed the traces on the PCB to be sure not to cut something important. Btw: fortunately, Hyperpixel driver was updated and the touch functionality works better now. I also updated the case design to leave out the outer knobs. If you’re interested, I can upload them on thingiverse. Please post some pictures of your build!