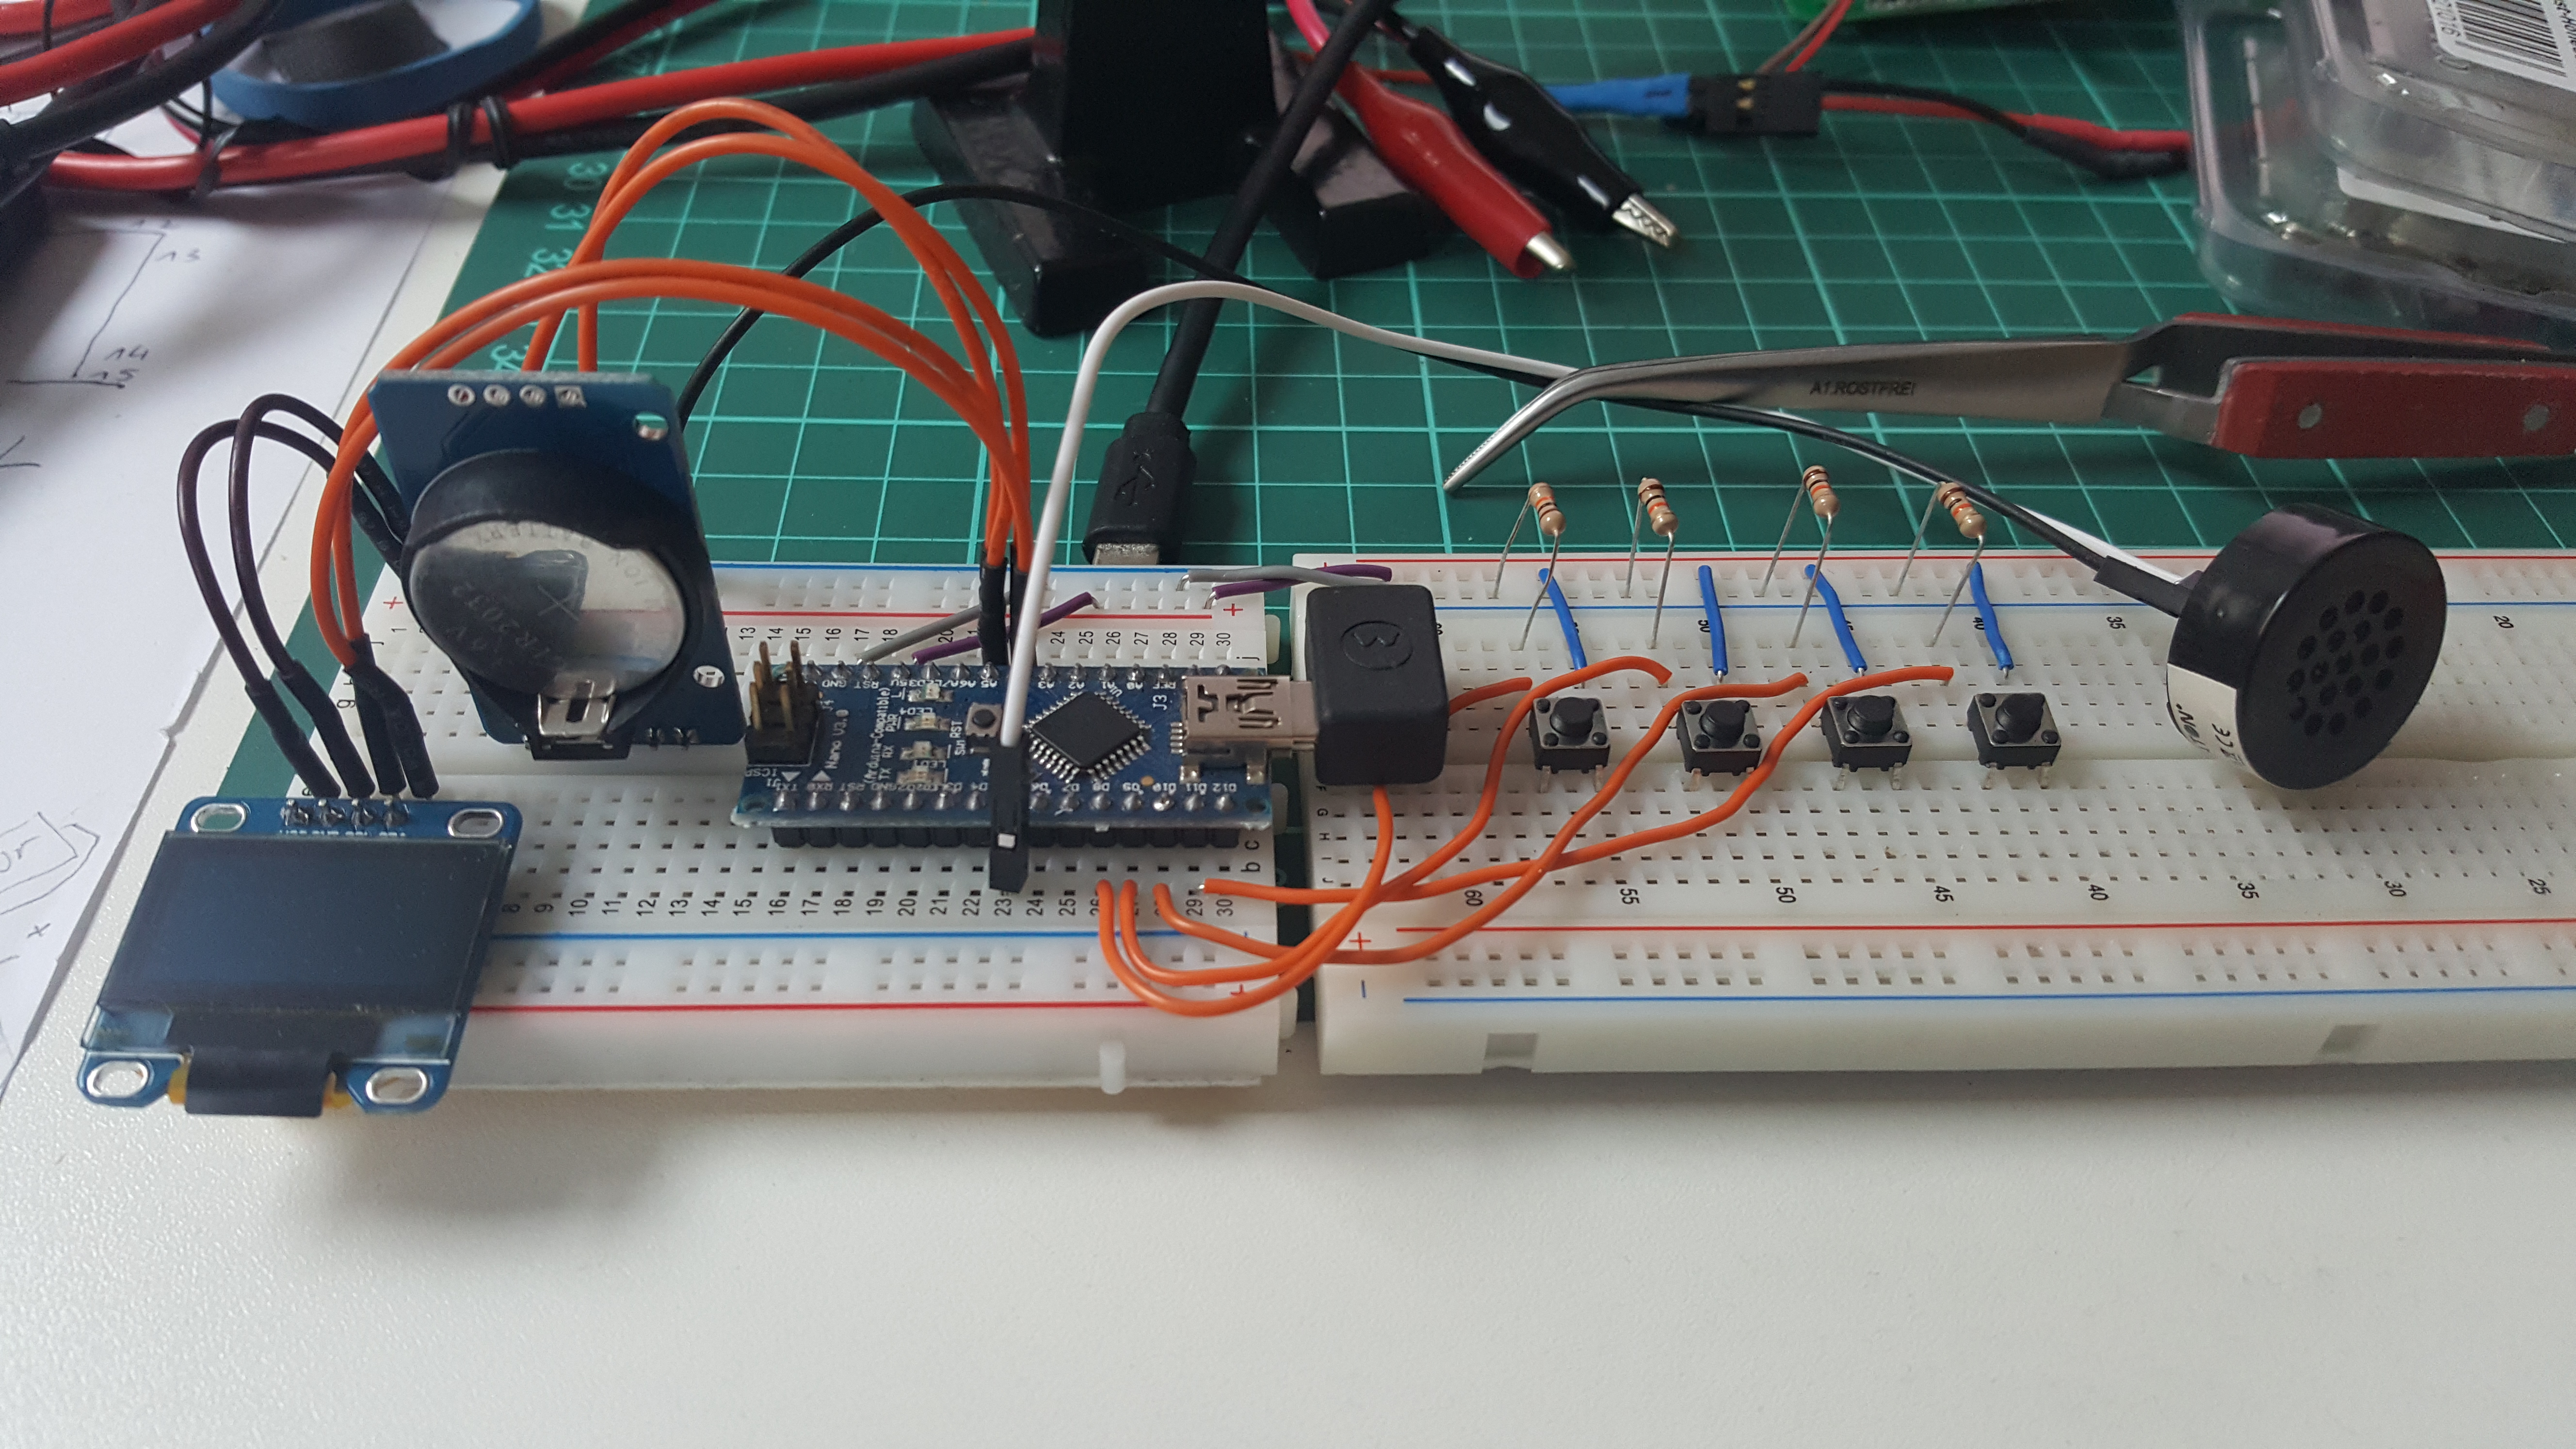
That was more intense and exciting than I anticipated! I thought building my first “homebrew Arduino” from an atmega 328p and controlling an OLED via I2C shouldn’t be too complicated.
In fact, it isn’t, but there are a couple of things you have to think of, especially when you do it in this contrained space.
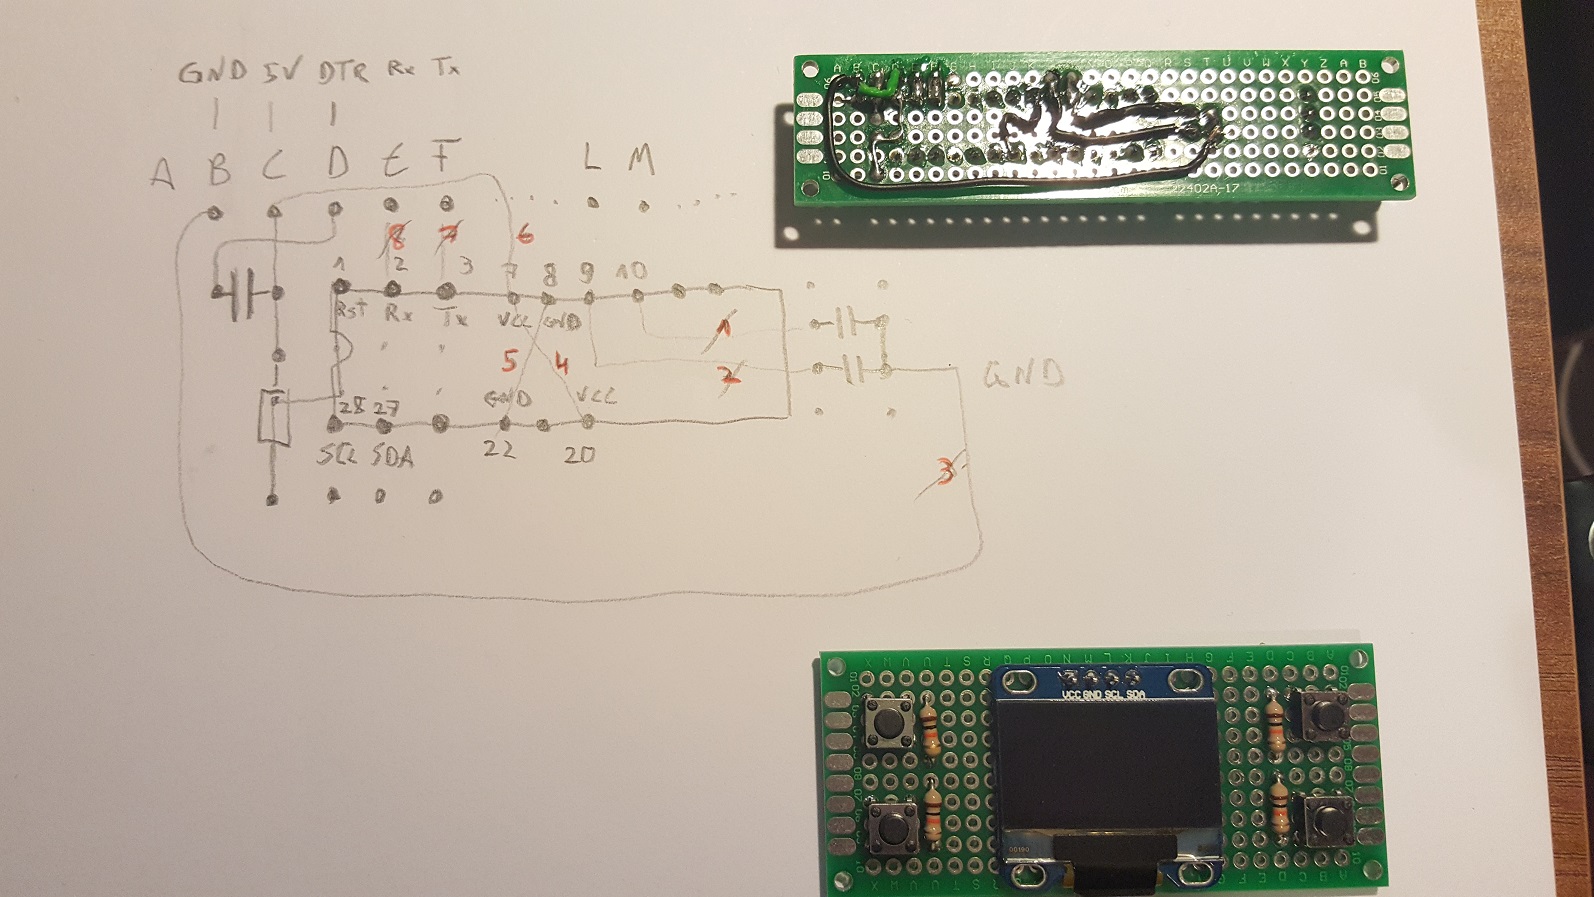 And actually, you can see the wiring mistake I did up there, I connected the RST of the chip and the DTR of the FTDI port wrong. But chip, FTDI and capacitor survived it…
I also did the buttons wrong as the buttons were rotated and always ON / HIGH. So, I changed the layout from this: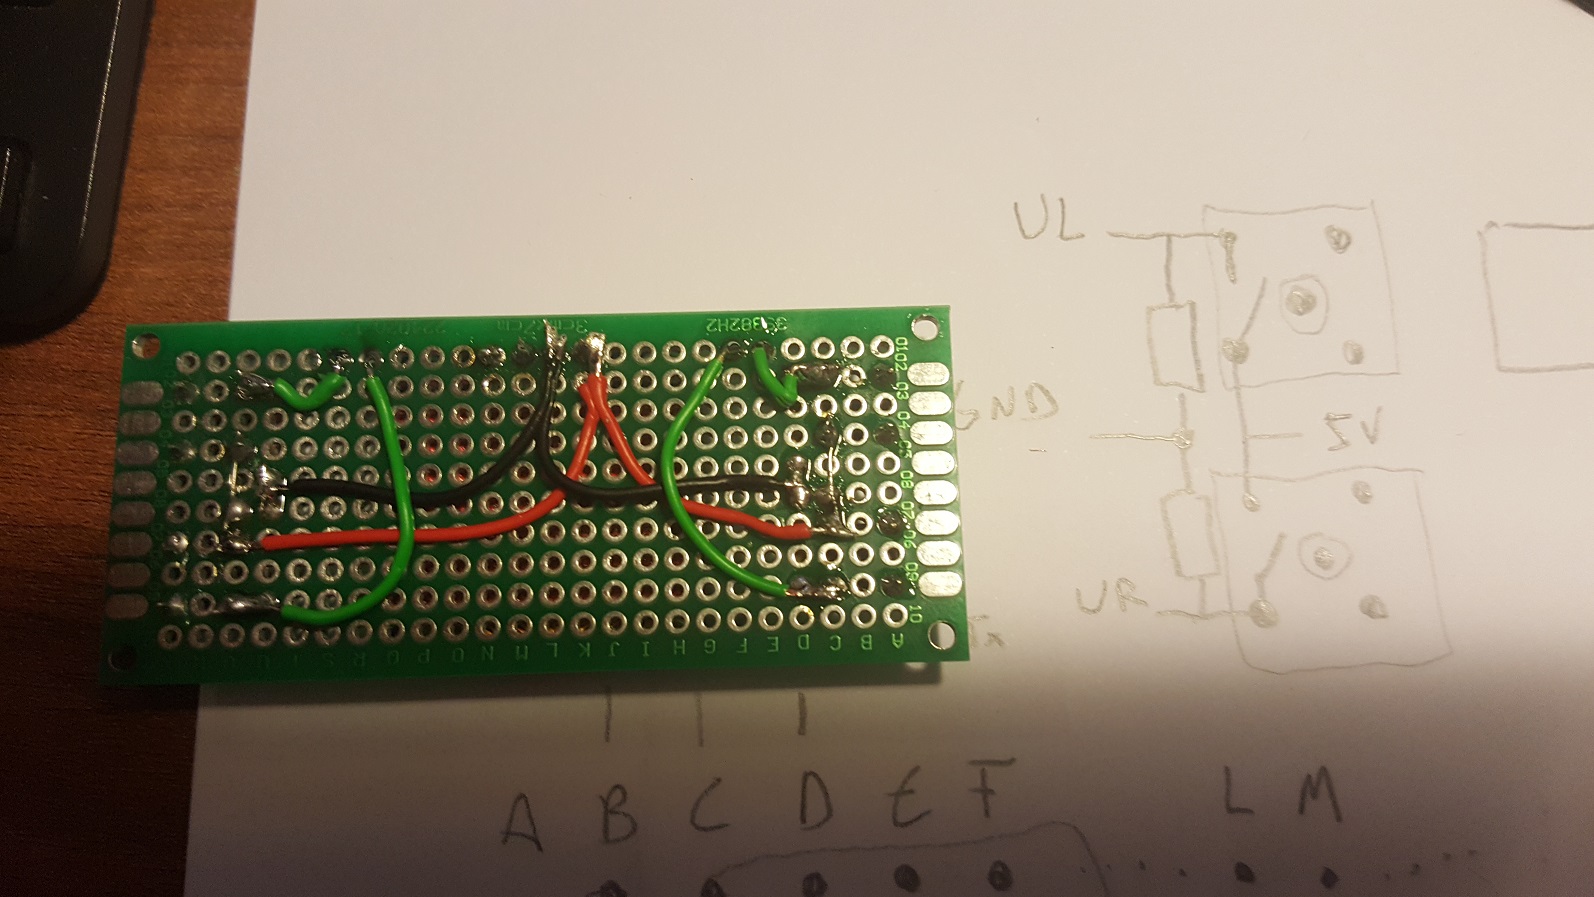
To this: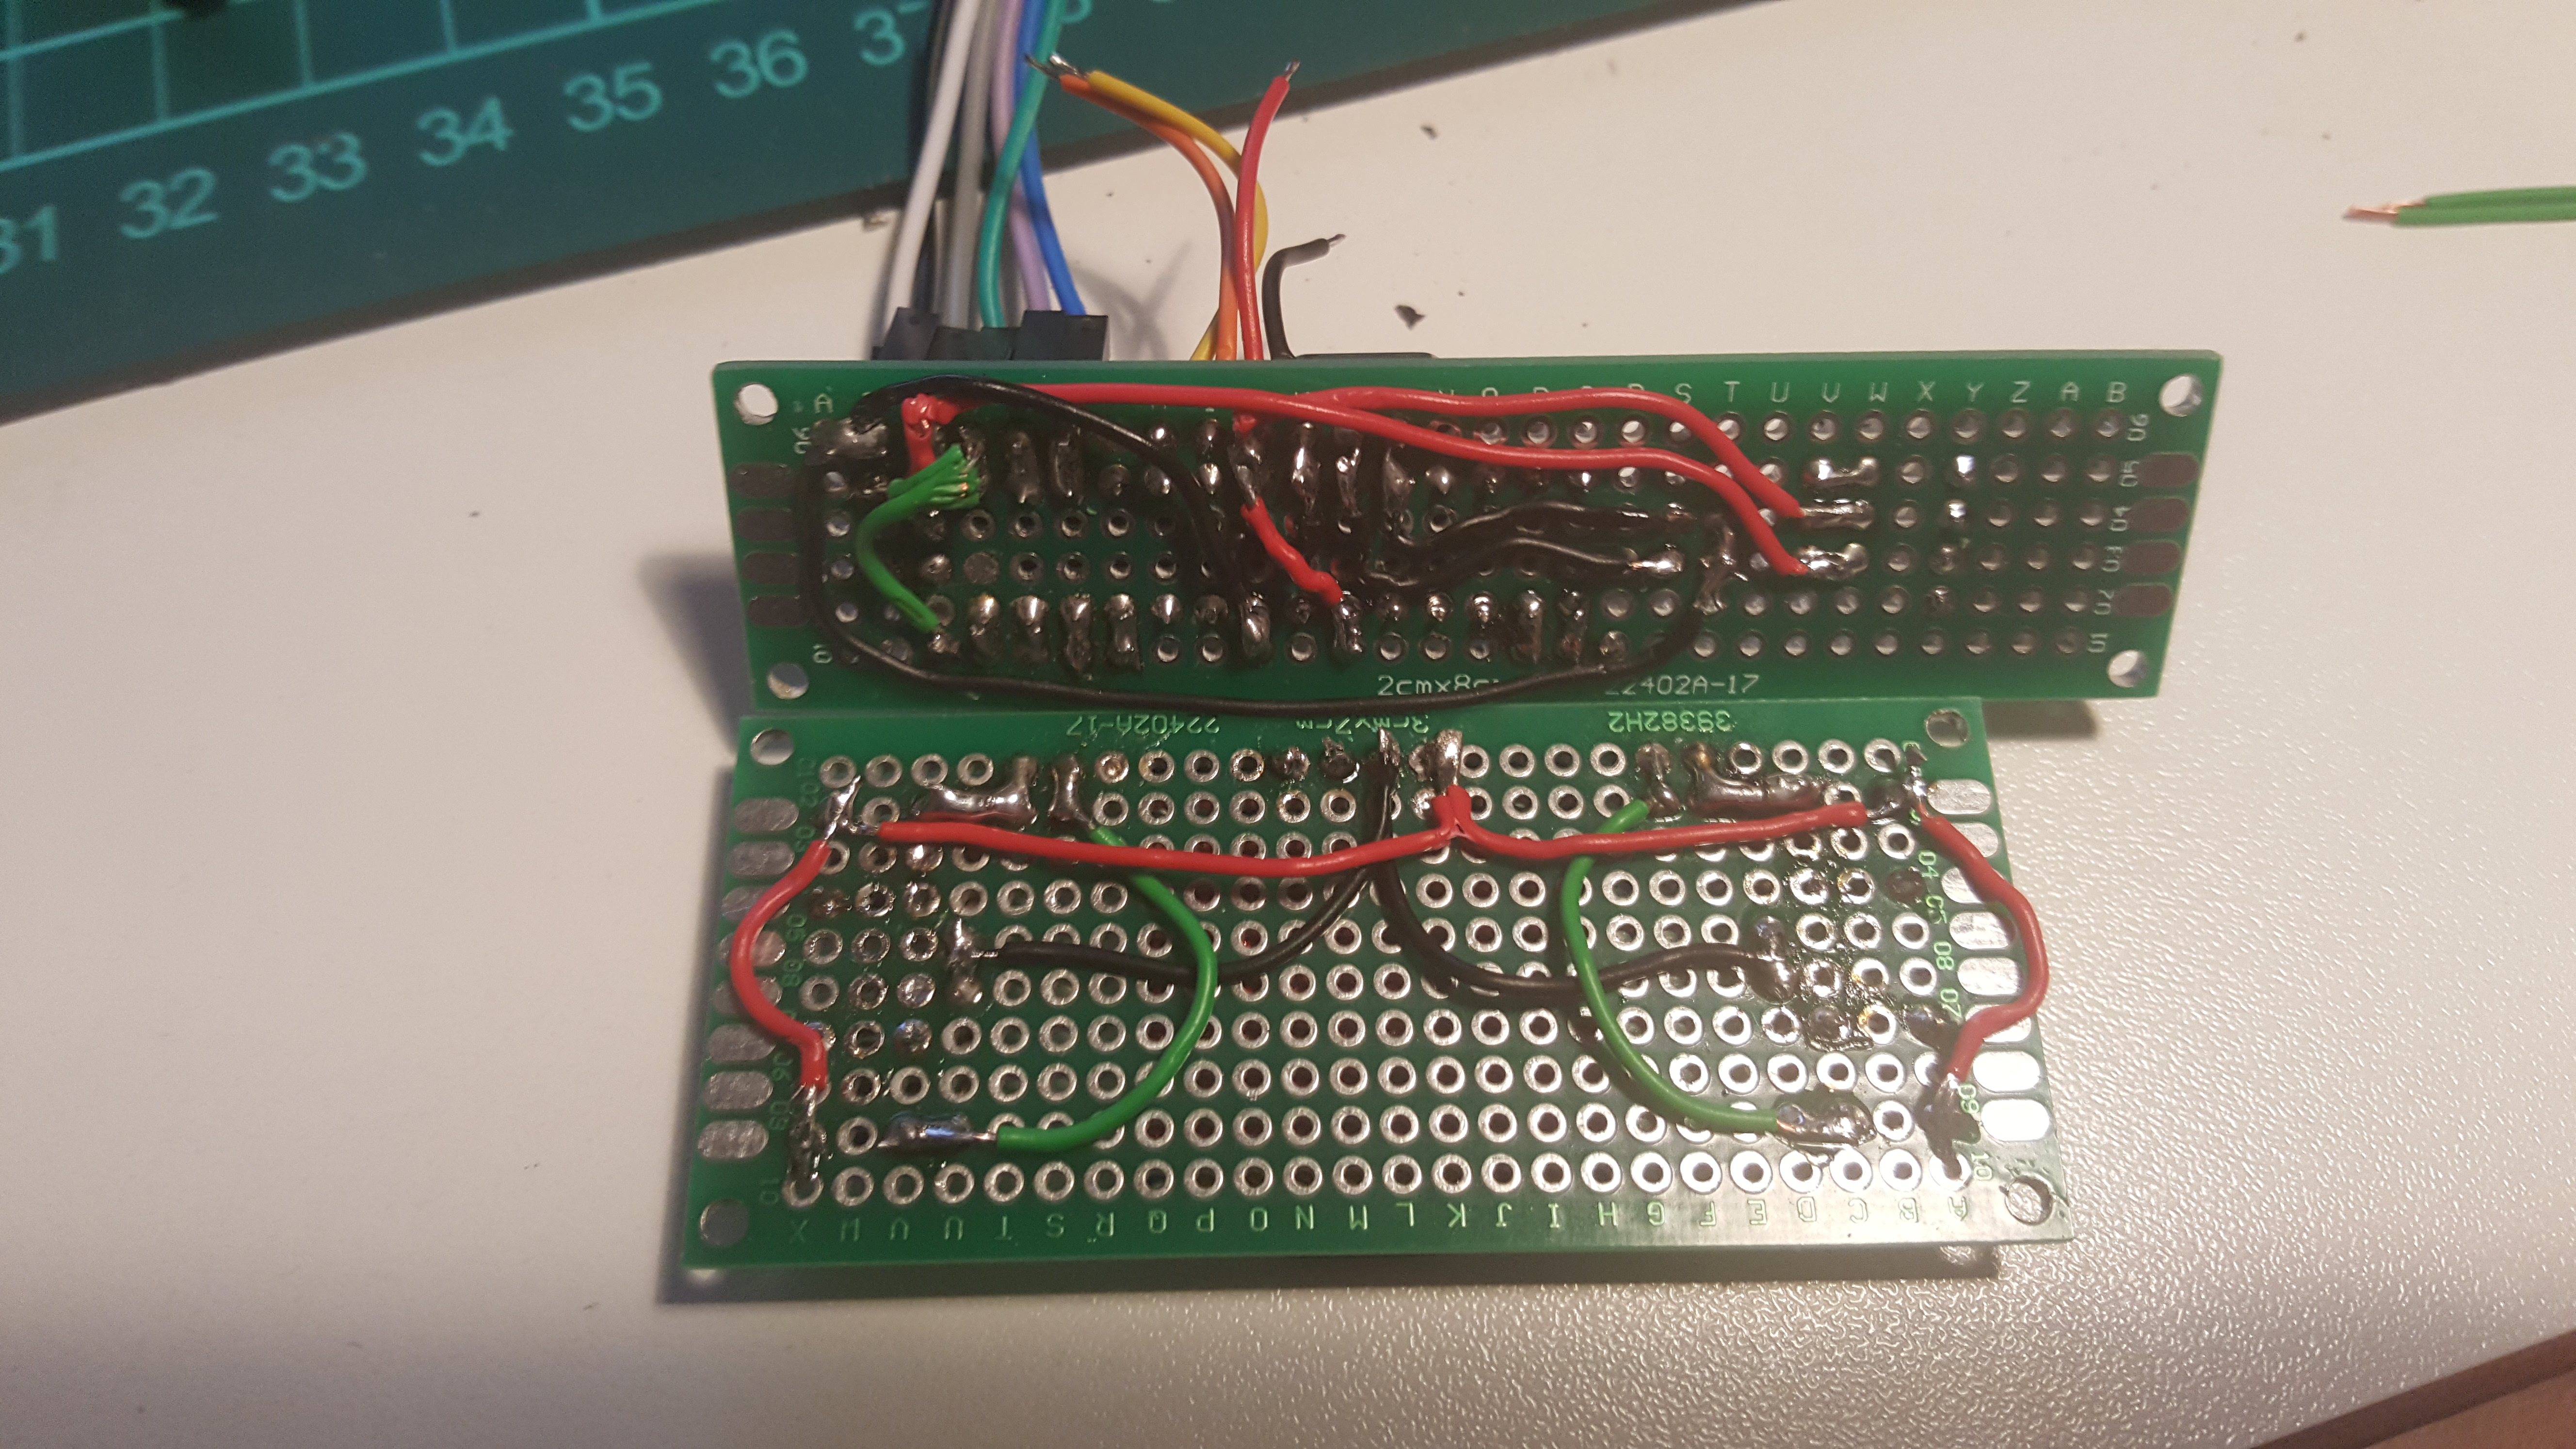 So now the power is on the upper part of the buttons, instead of the right (for the left buttons).
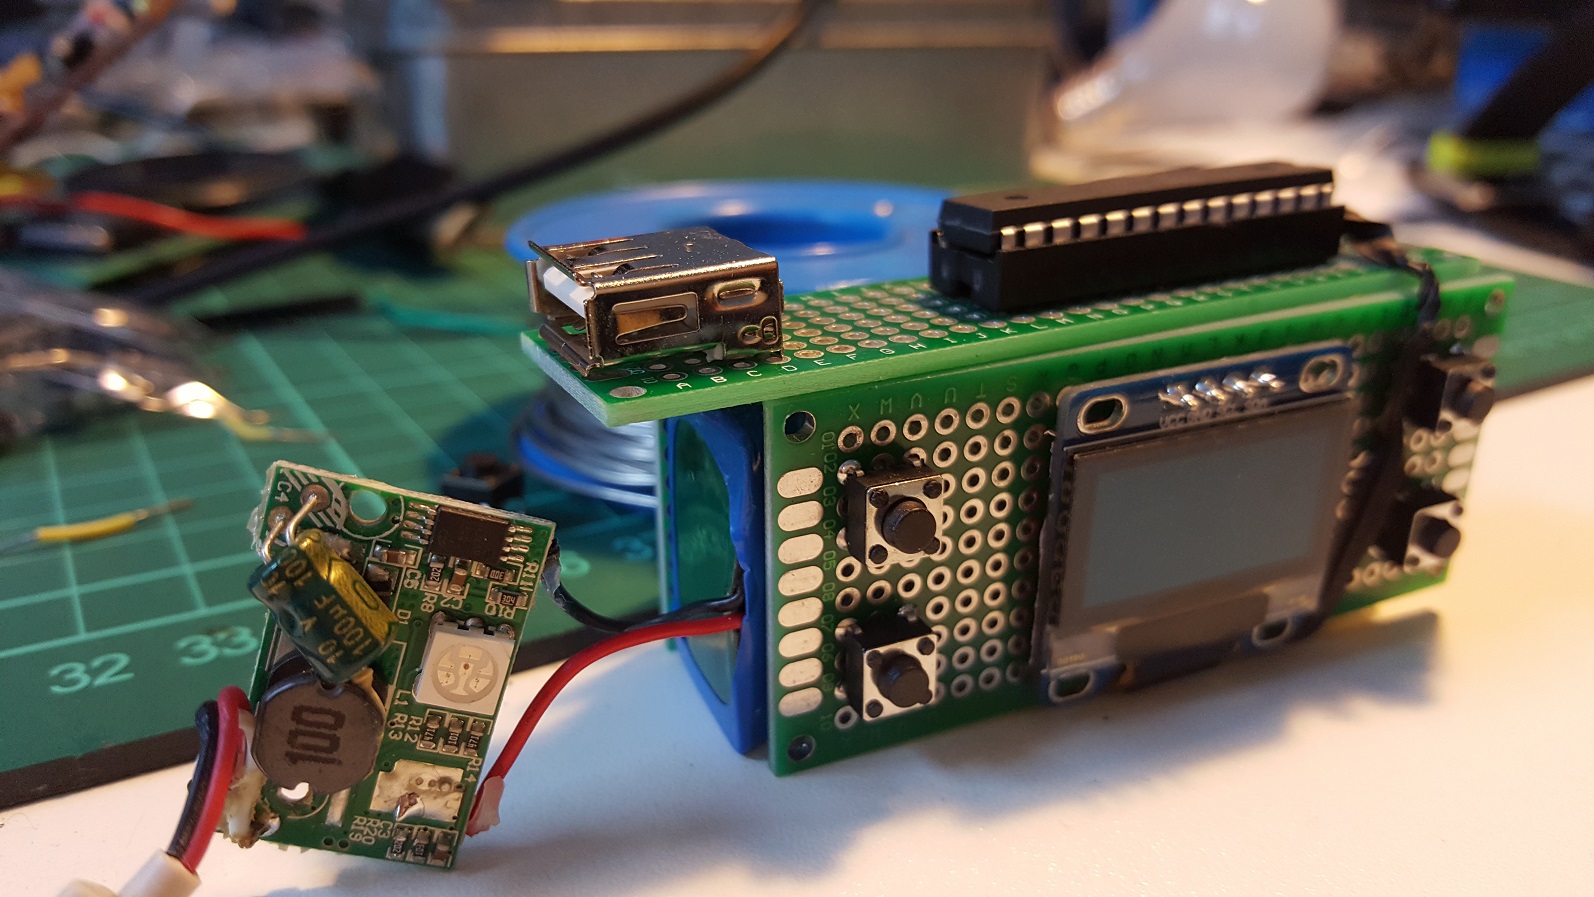
Yeah, so finally, here’s the first power up! The date / time is wrong because the third perf board with the RTC and the speaker are not connected yet, so the clock starts when the atmega is powering up: