so, the last couple of days i invested more time into 3d scanning the first version of the trashbot before really going into improving it. turns out that scanning a 3d object using skanect is more complicated than i thought.
i’ll report three different methods here:
build a rotating lego stand for the desktop
walk around the object to scan
build an arduino controlled stepper rotating stand
let’s see first what the scene to scan is:
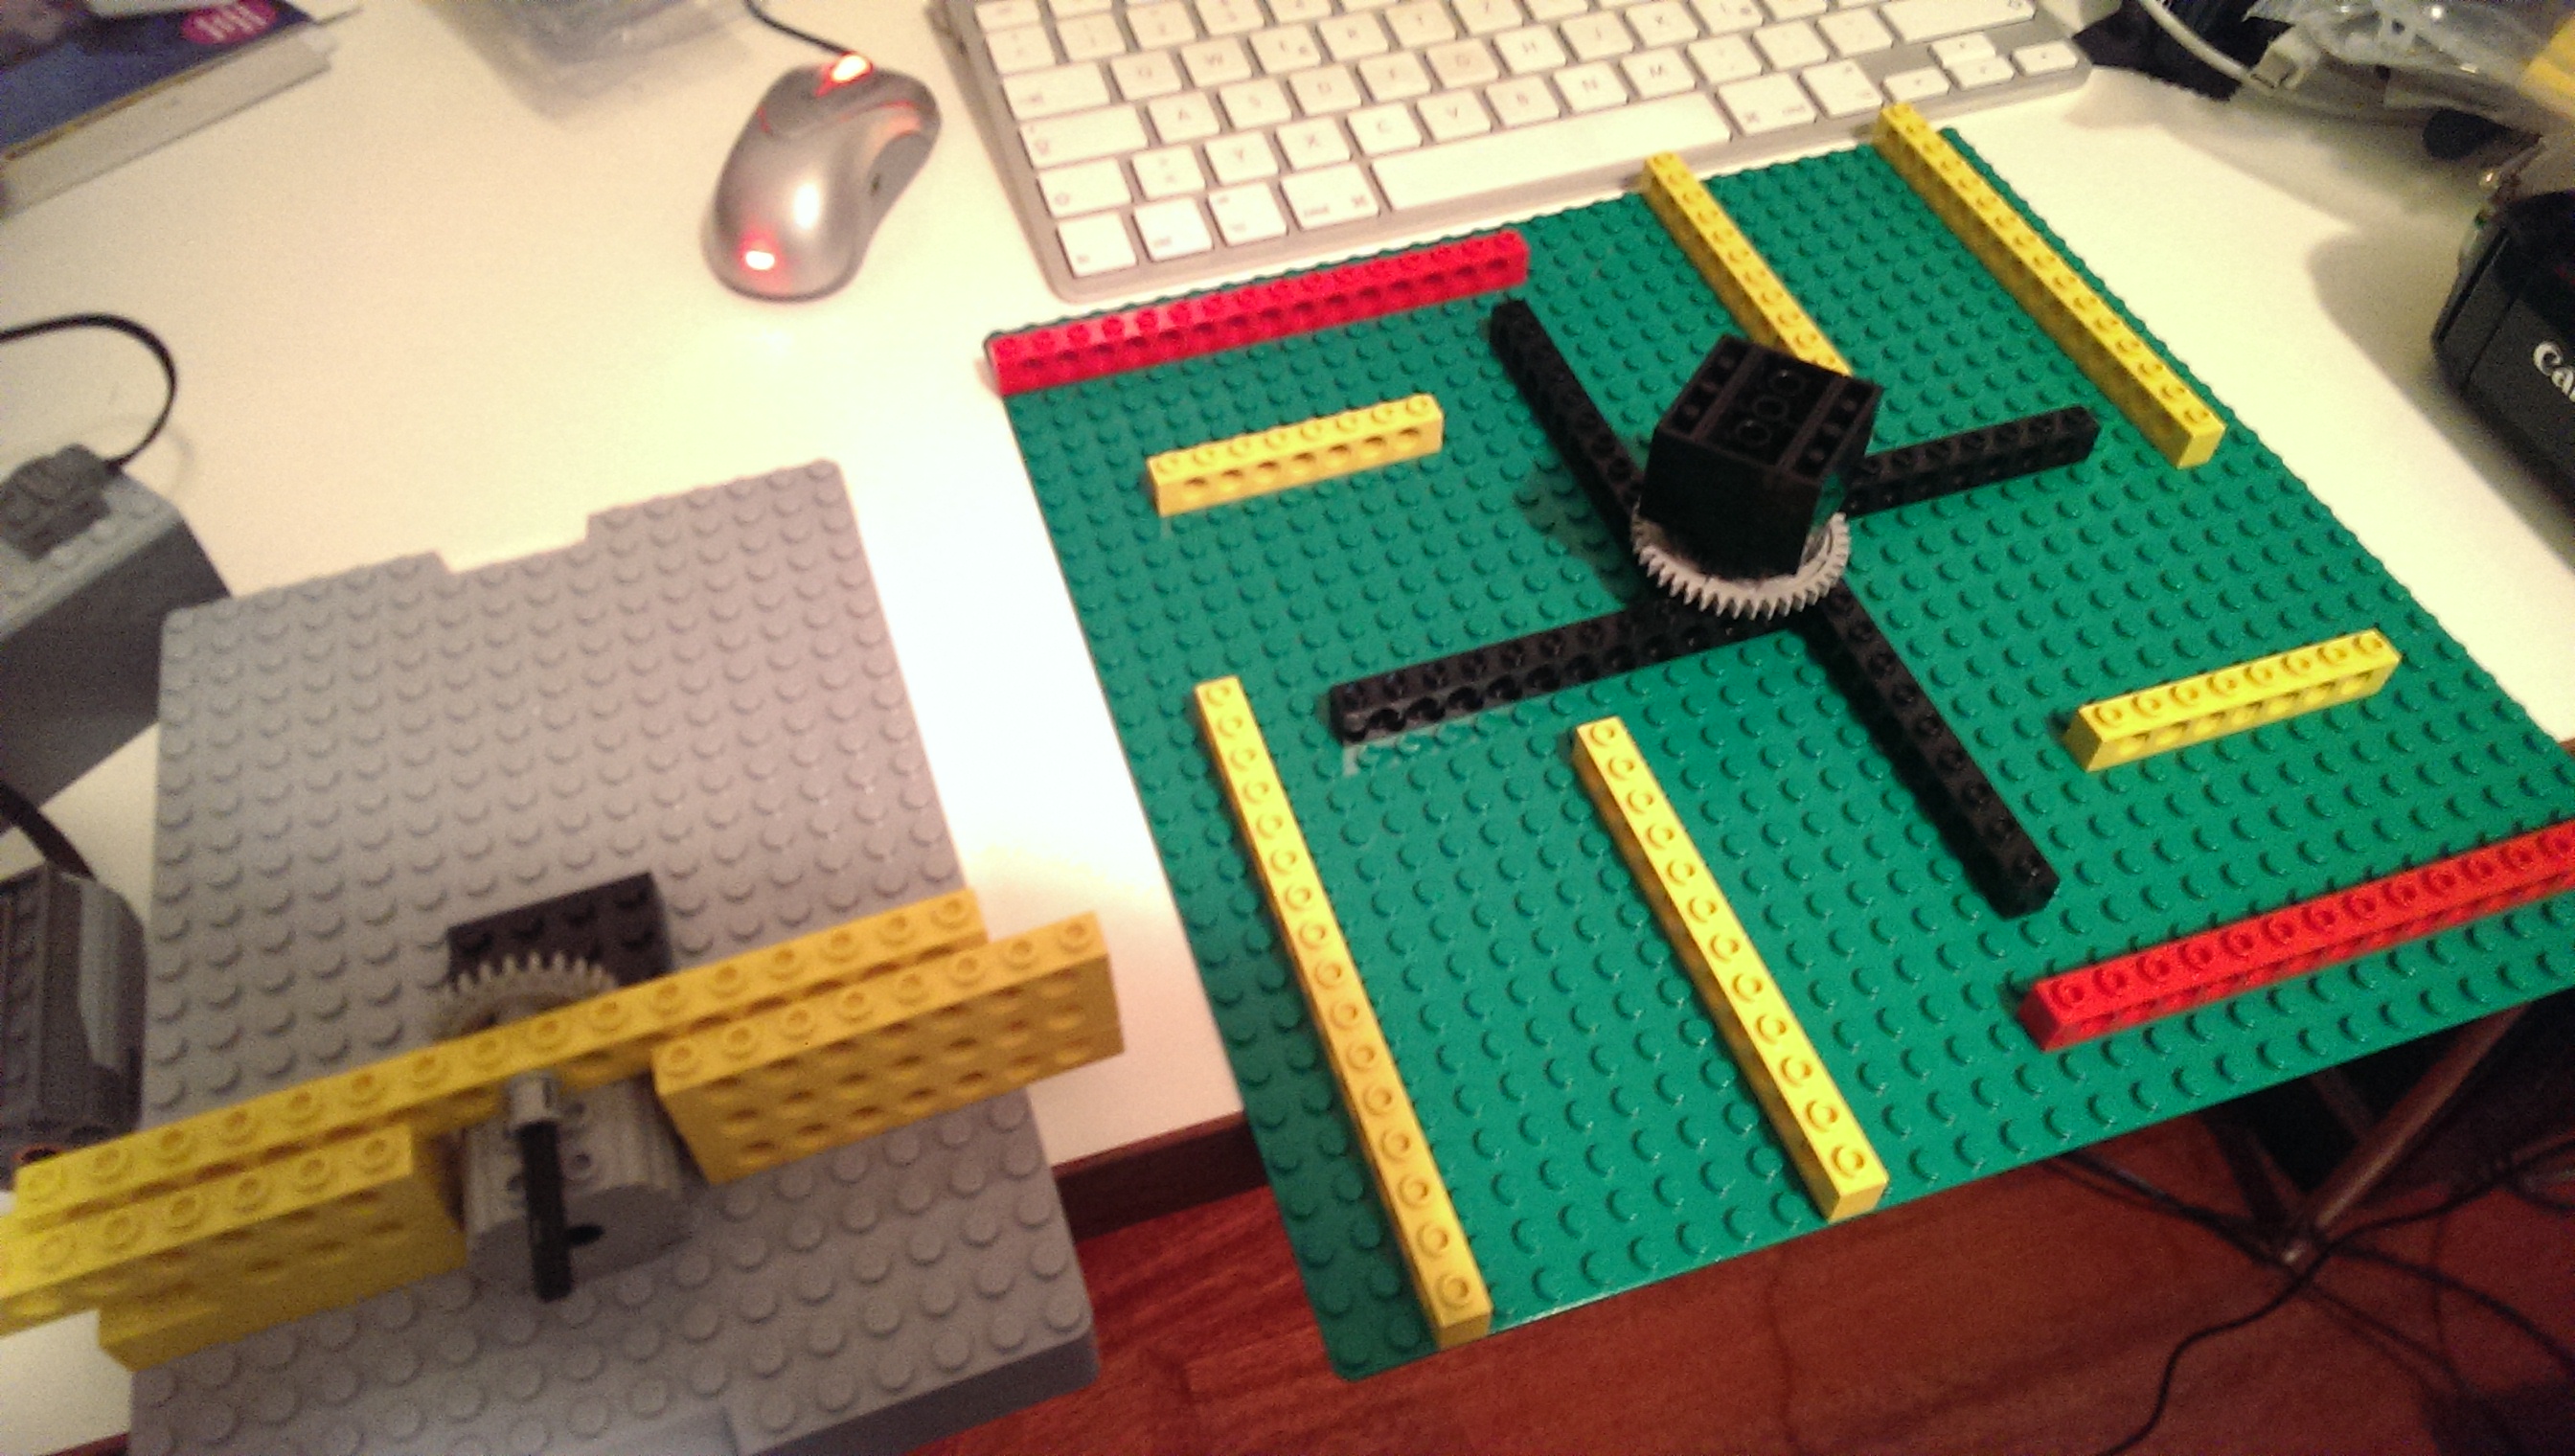
1) i thought i build a little rotating stand using lego, so i stole some legos from my kids and build something like this:
next, i scanned it, letting the motor run and went into analysis:
2) next, i decided to actually put the robot on a stand that doesn’t move and move the camera around instead, also assuming that different heights may add information and get a more complete picture:
okay, cut the video to not bore you too much with it. i think the result is more interesting:
(yeah, that’s our garden plants in the background, we already had some snow in germany…)
finally, i found this skanect tutorial and thought, that obviously, the rotating stand is finally the way to go:
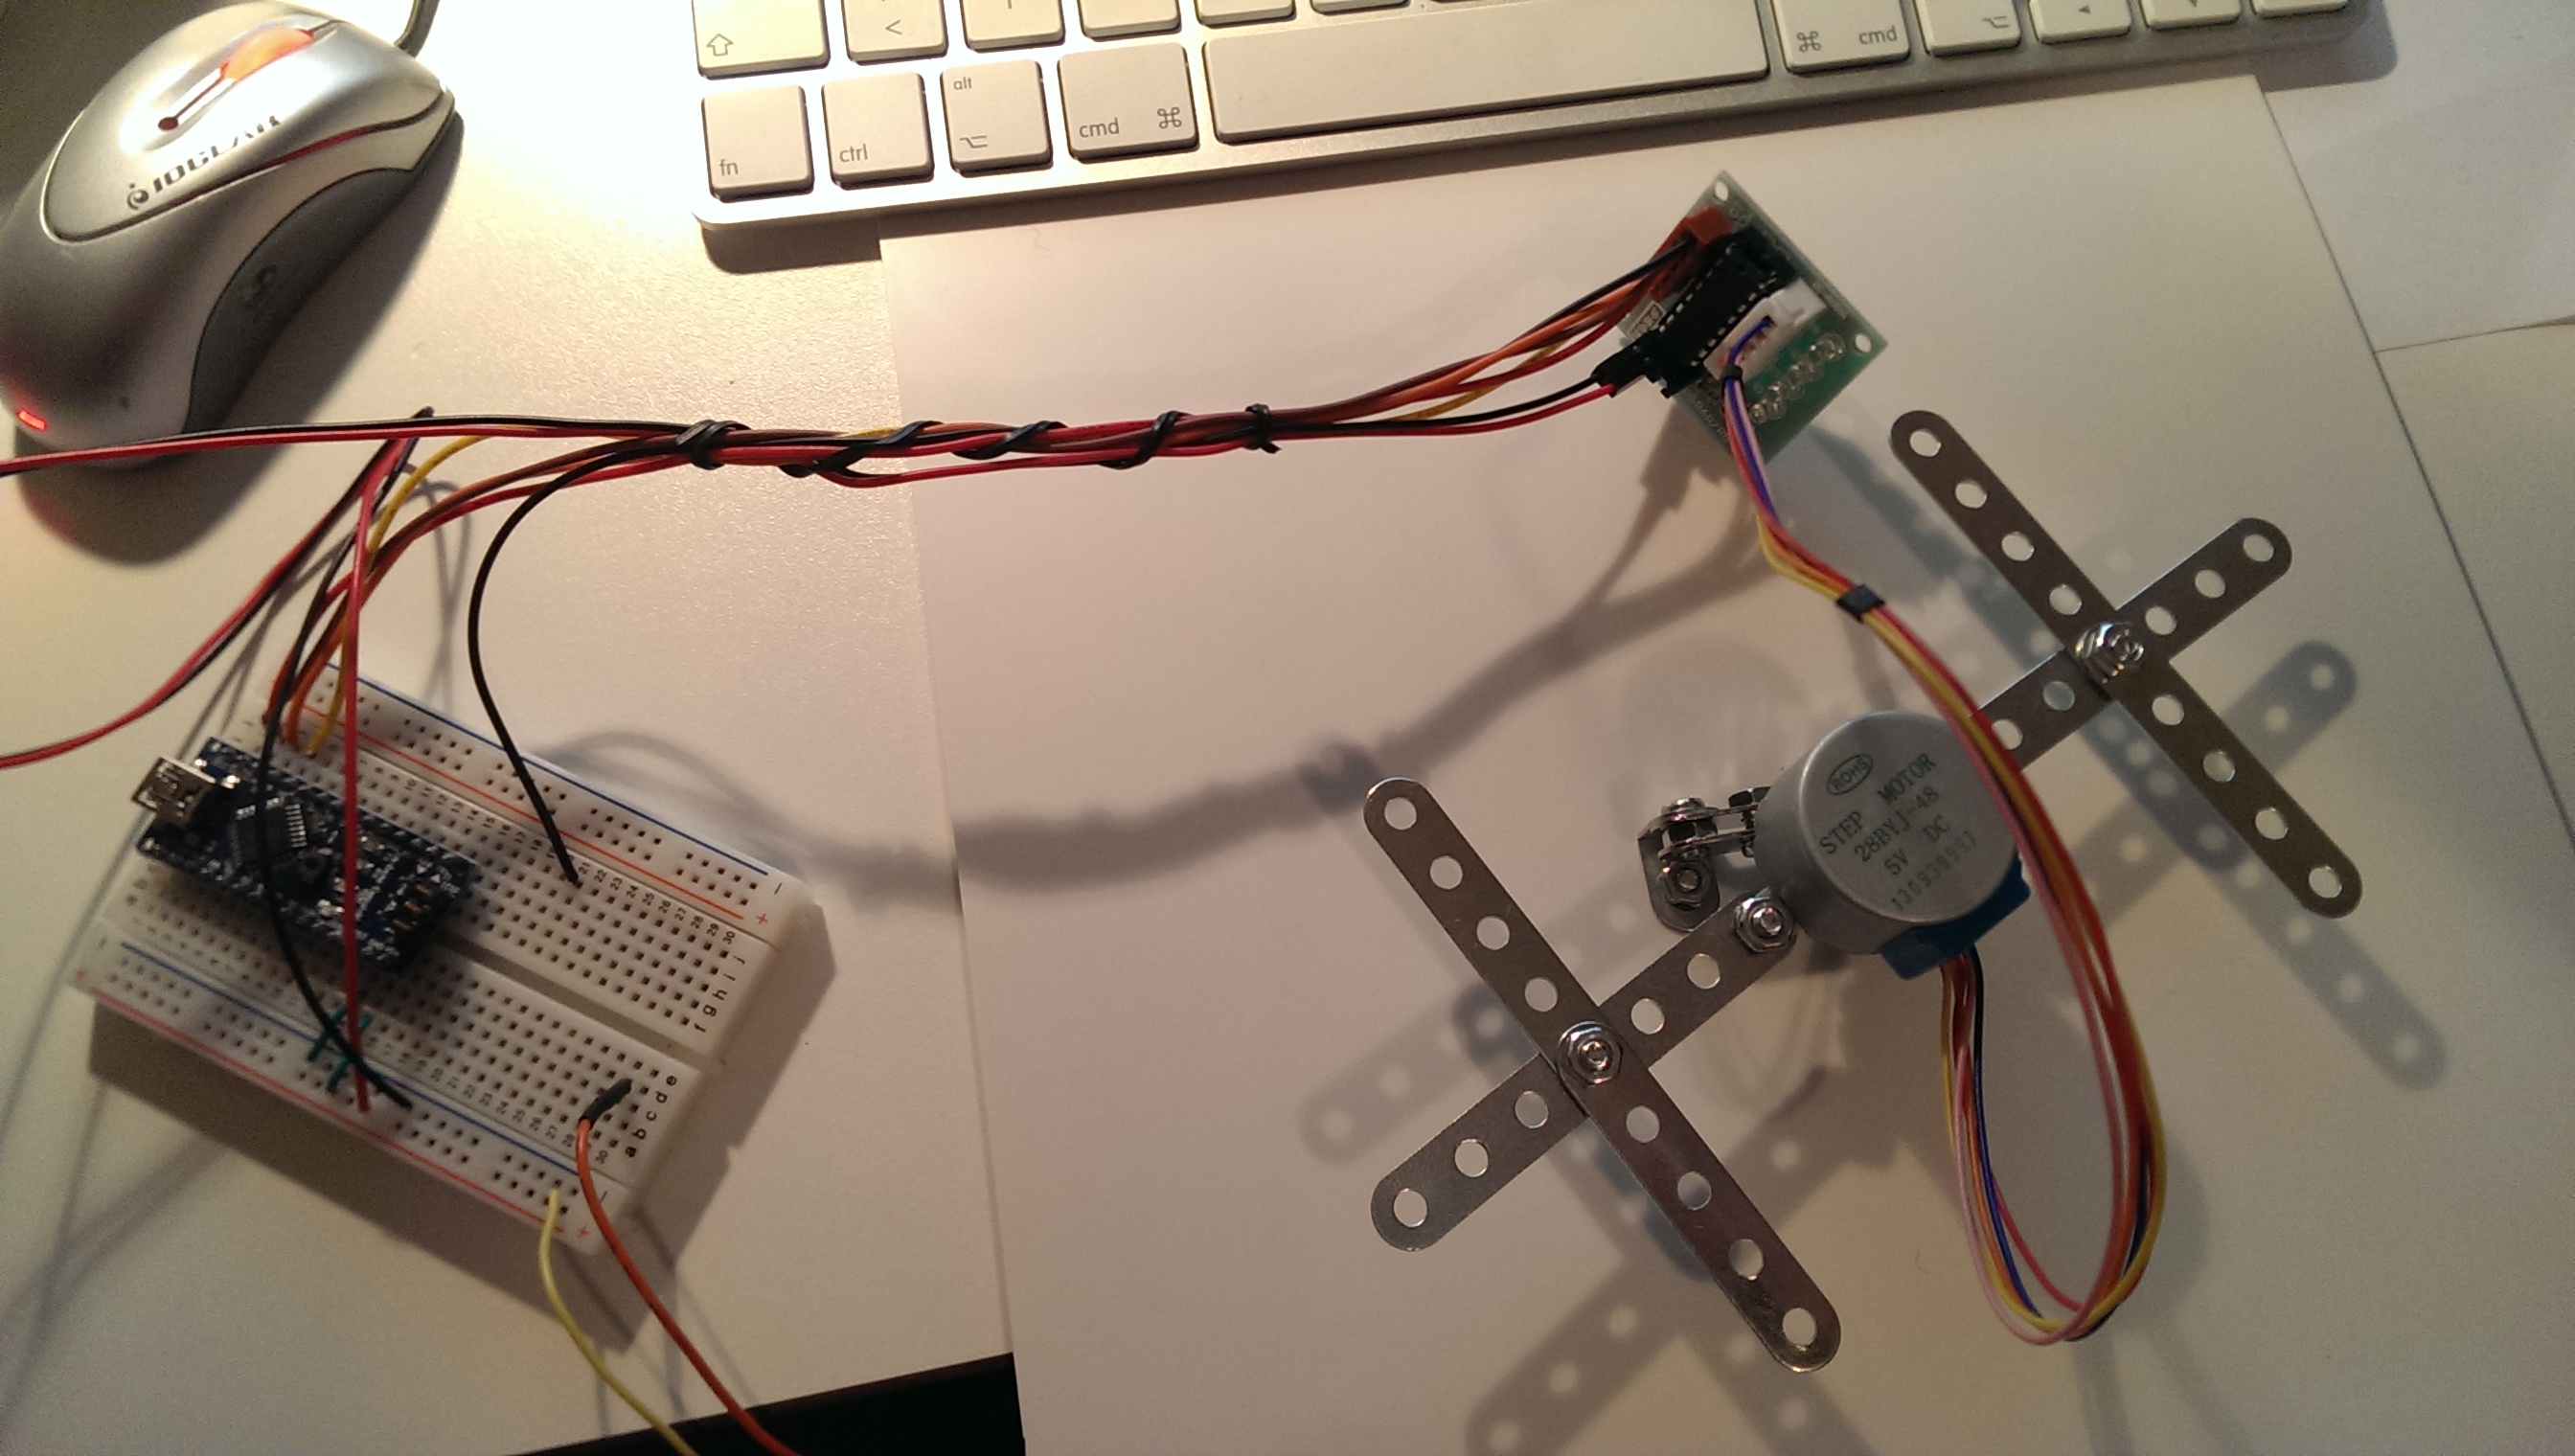
3) so i built a little step-motor / arduino driven rotating stand so i could control the rotation speed (check out this blog entry on a MUCH better stepper library for arduino) much better than with the lego and isolated the object from nearby objects.
okay and here’s the result (sorry for the audio quality, don’t know what went wrong):
that’s currently my last attempt. i think for now, i got the best results by manually scanning the bot and not using the rotation / stepper.
after the complicated start with ROFI, i decided to build my own biped from scratch but never really found the time and focus to do it. but then i came across “bob the biped” by bajdi over on letsmakerobots and i fell in love. immediately.
this guy has really done a great job designing a simple, working and cure biped that really is charming. the design principles fascinated my from the first second. he just used four servos, to on each side connected by an L upside down. the foot servo is used to shift the center of gravity, the hip servo is used to move to bot forward. the other side is working in a mirrored fashion, preparing the next move, so to speak.
also, the software is really nice as it produces the gait pattern parametrically and he also shared the source code. the gait pattern is actually one of the things that were too complicated with ROFI, esp since the original inventor’s design also included arduino, android and c# software.
so, okay, i decided to build my own interpretation of the core design of bob, of course i don’t have a 3d printer yet, but to me the casing is just icing on the cake, i need to understand the mechanics, gravity implications and dynamics of the gait.
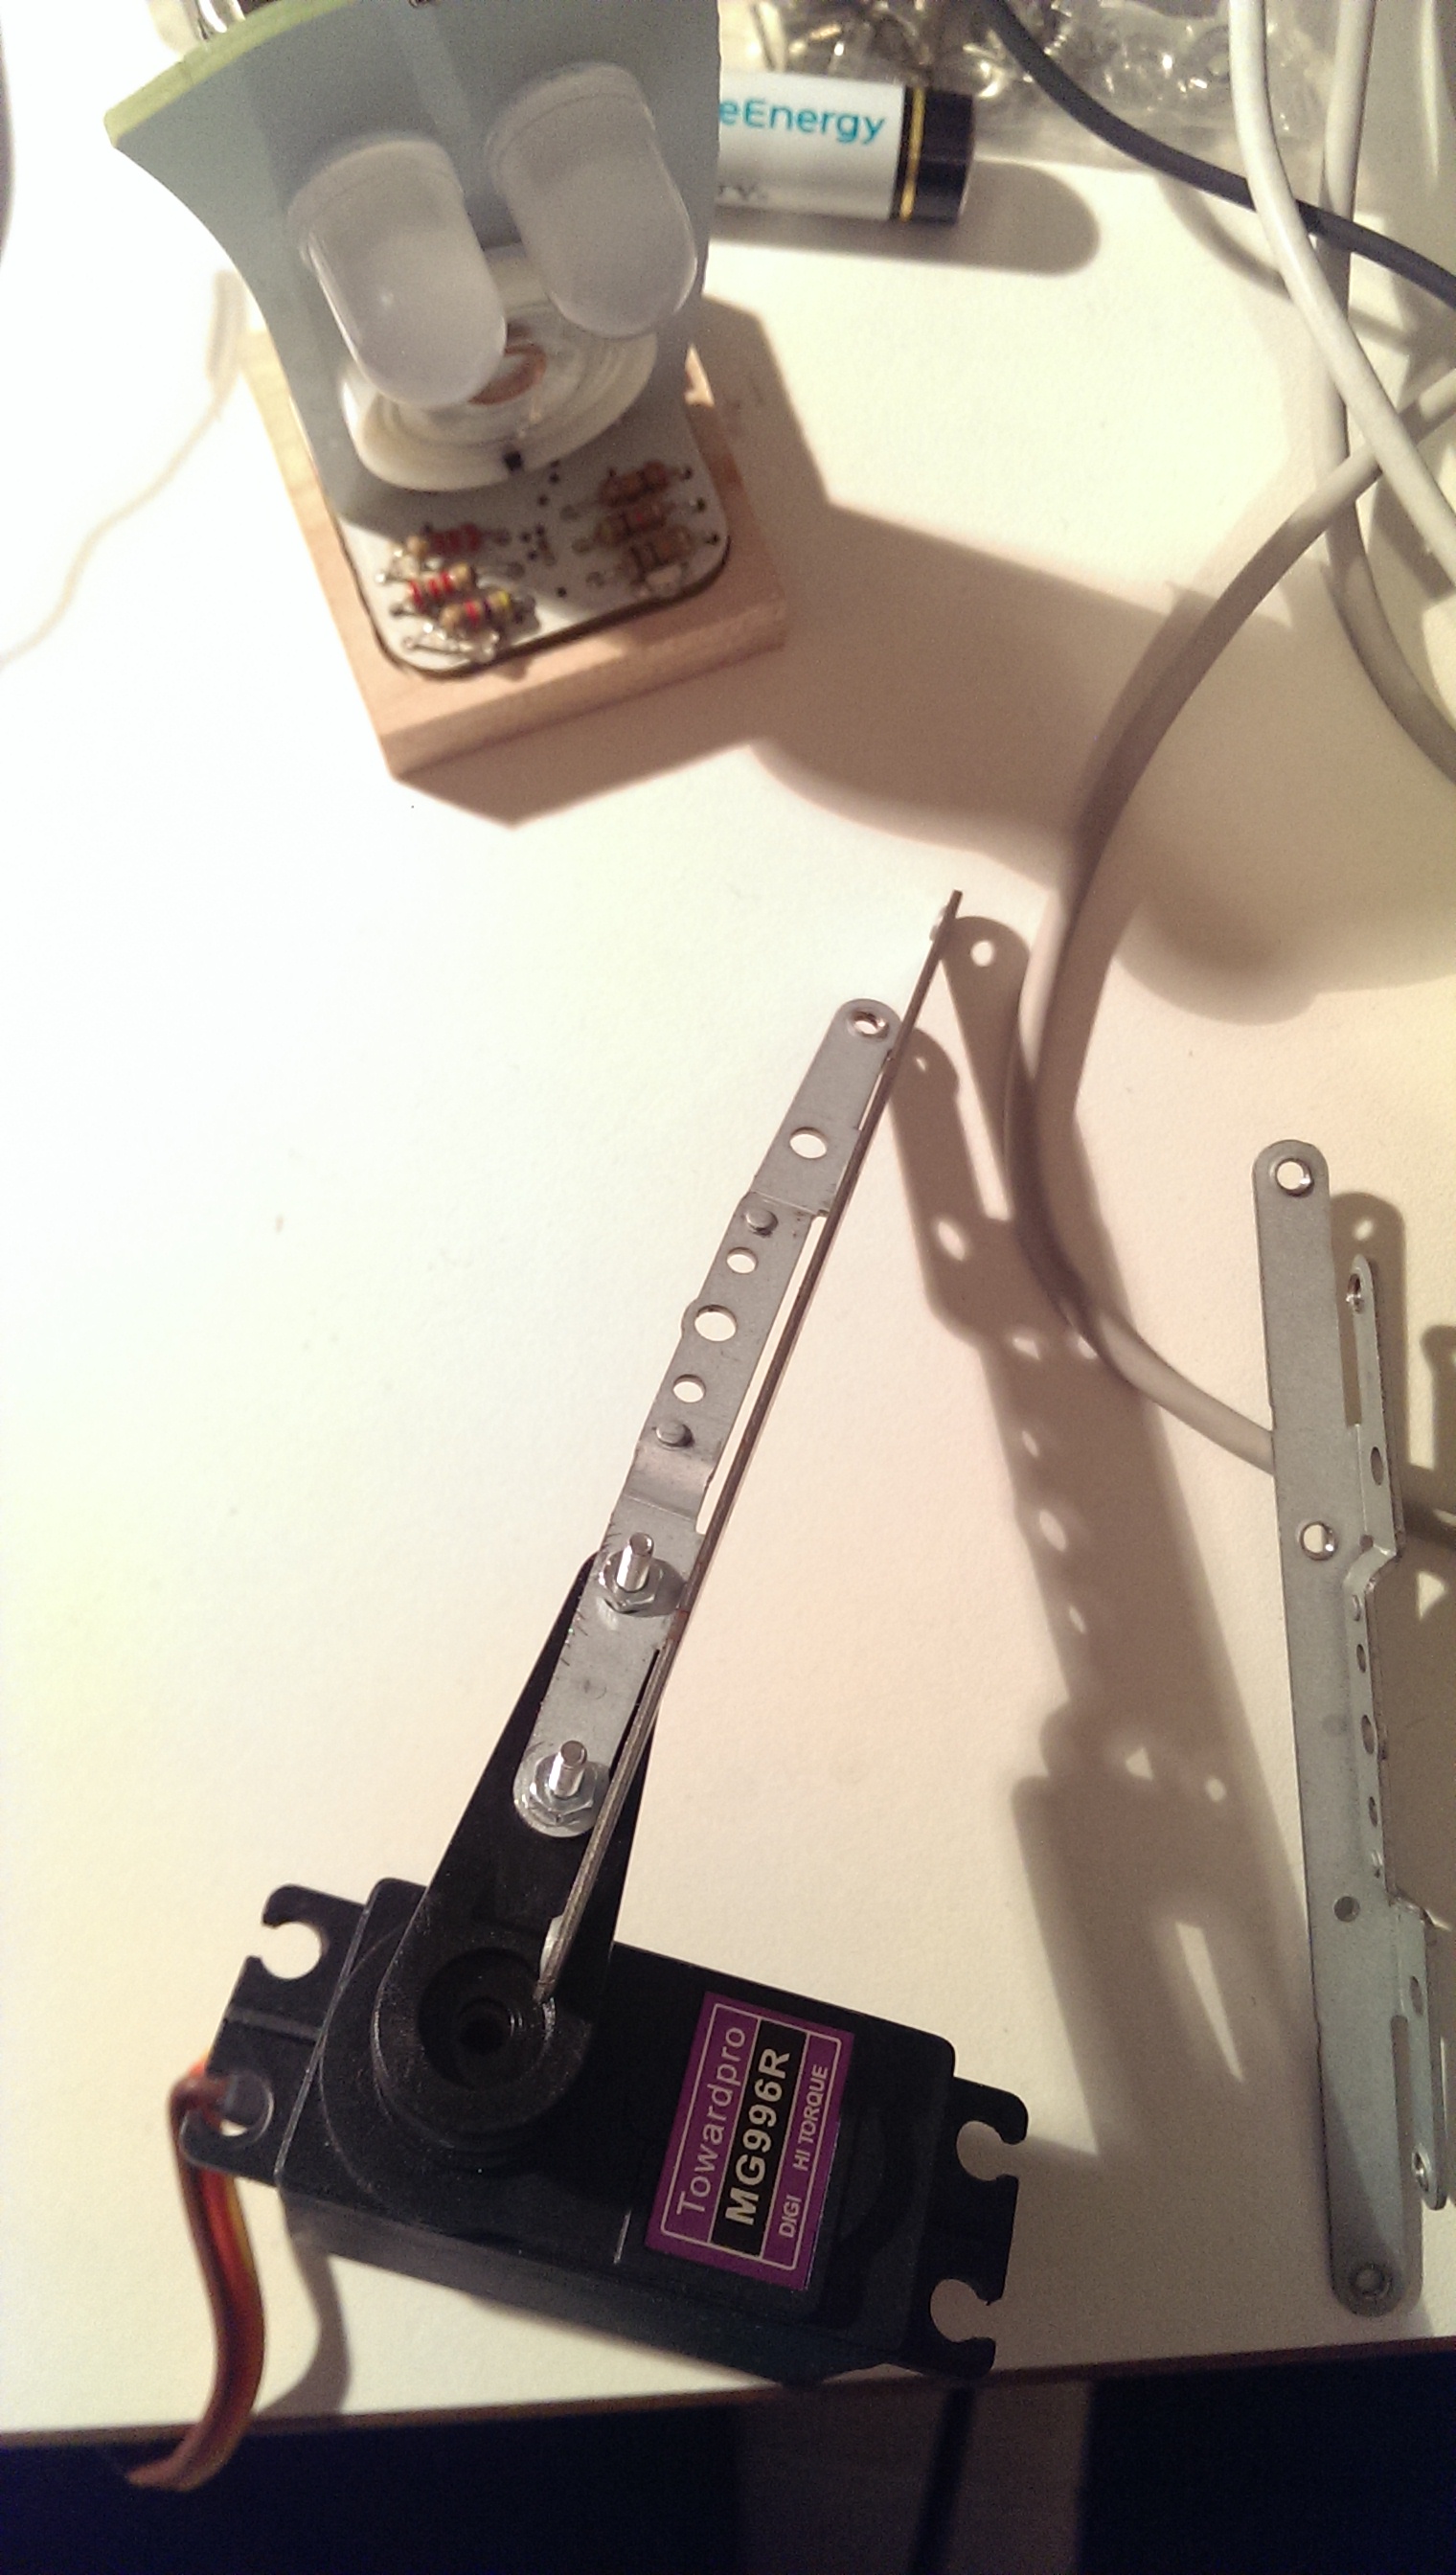
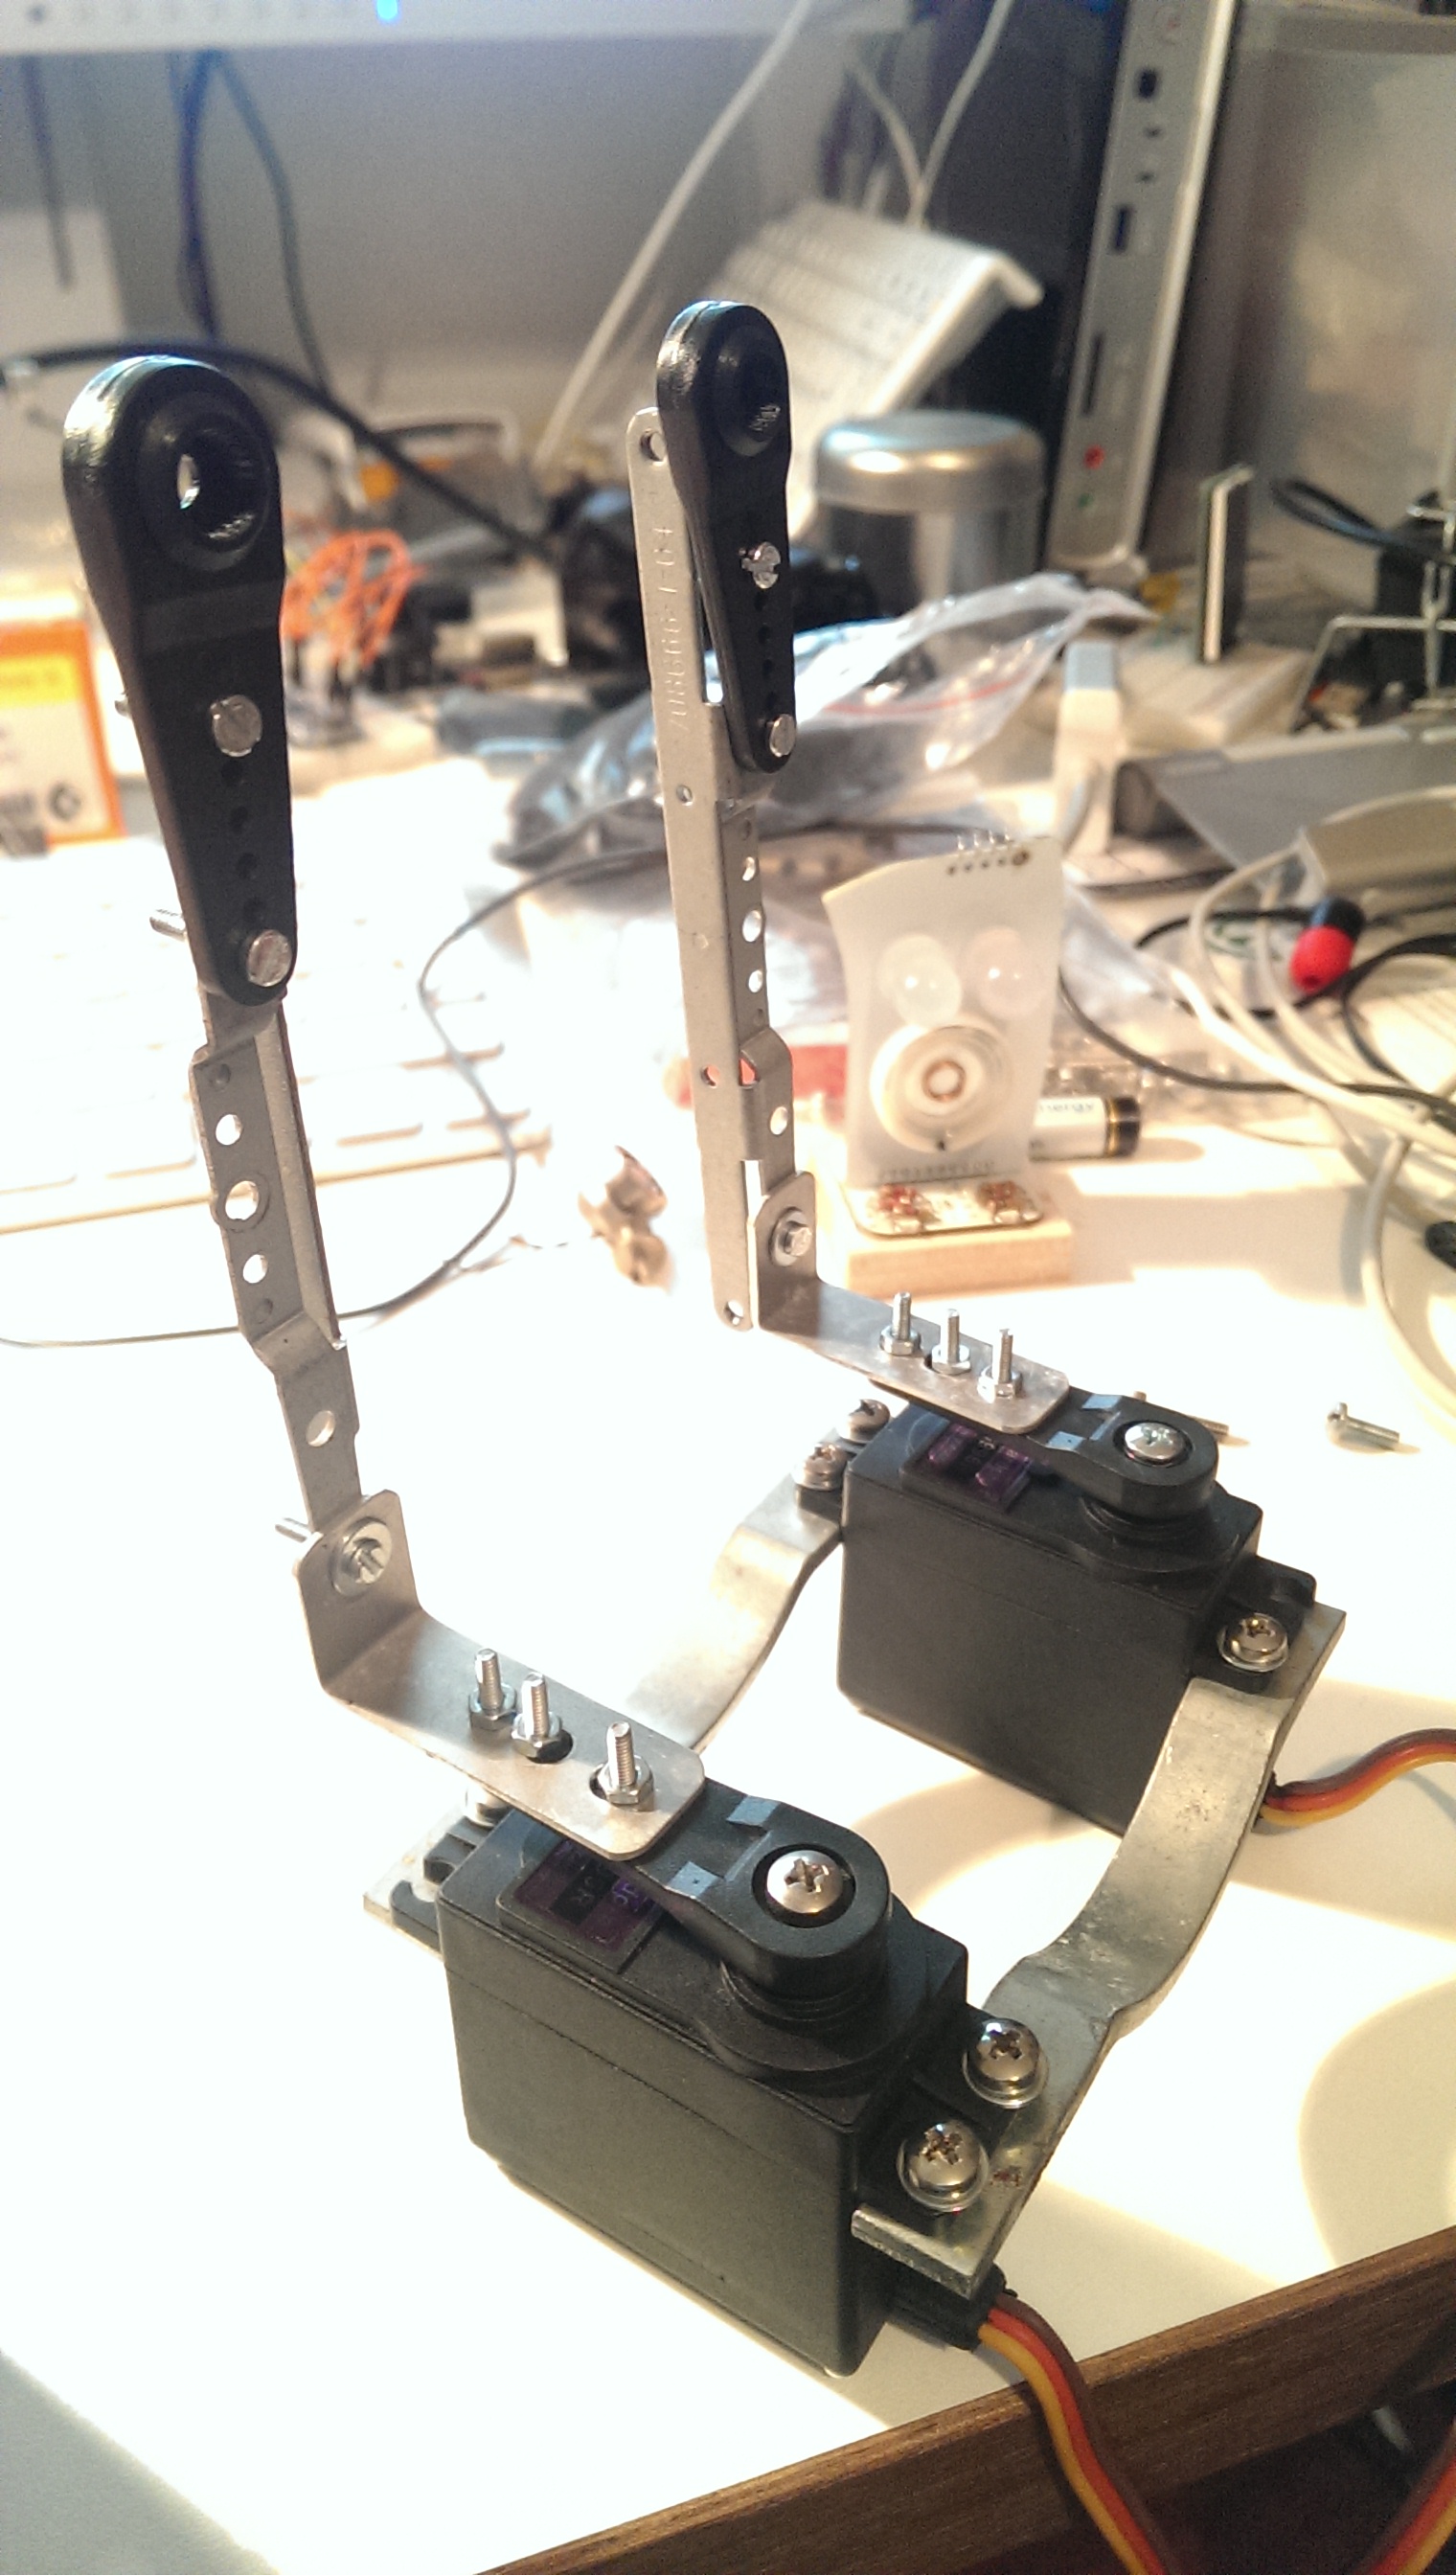
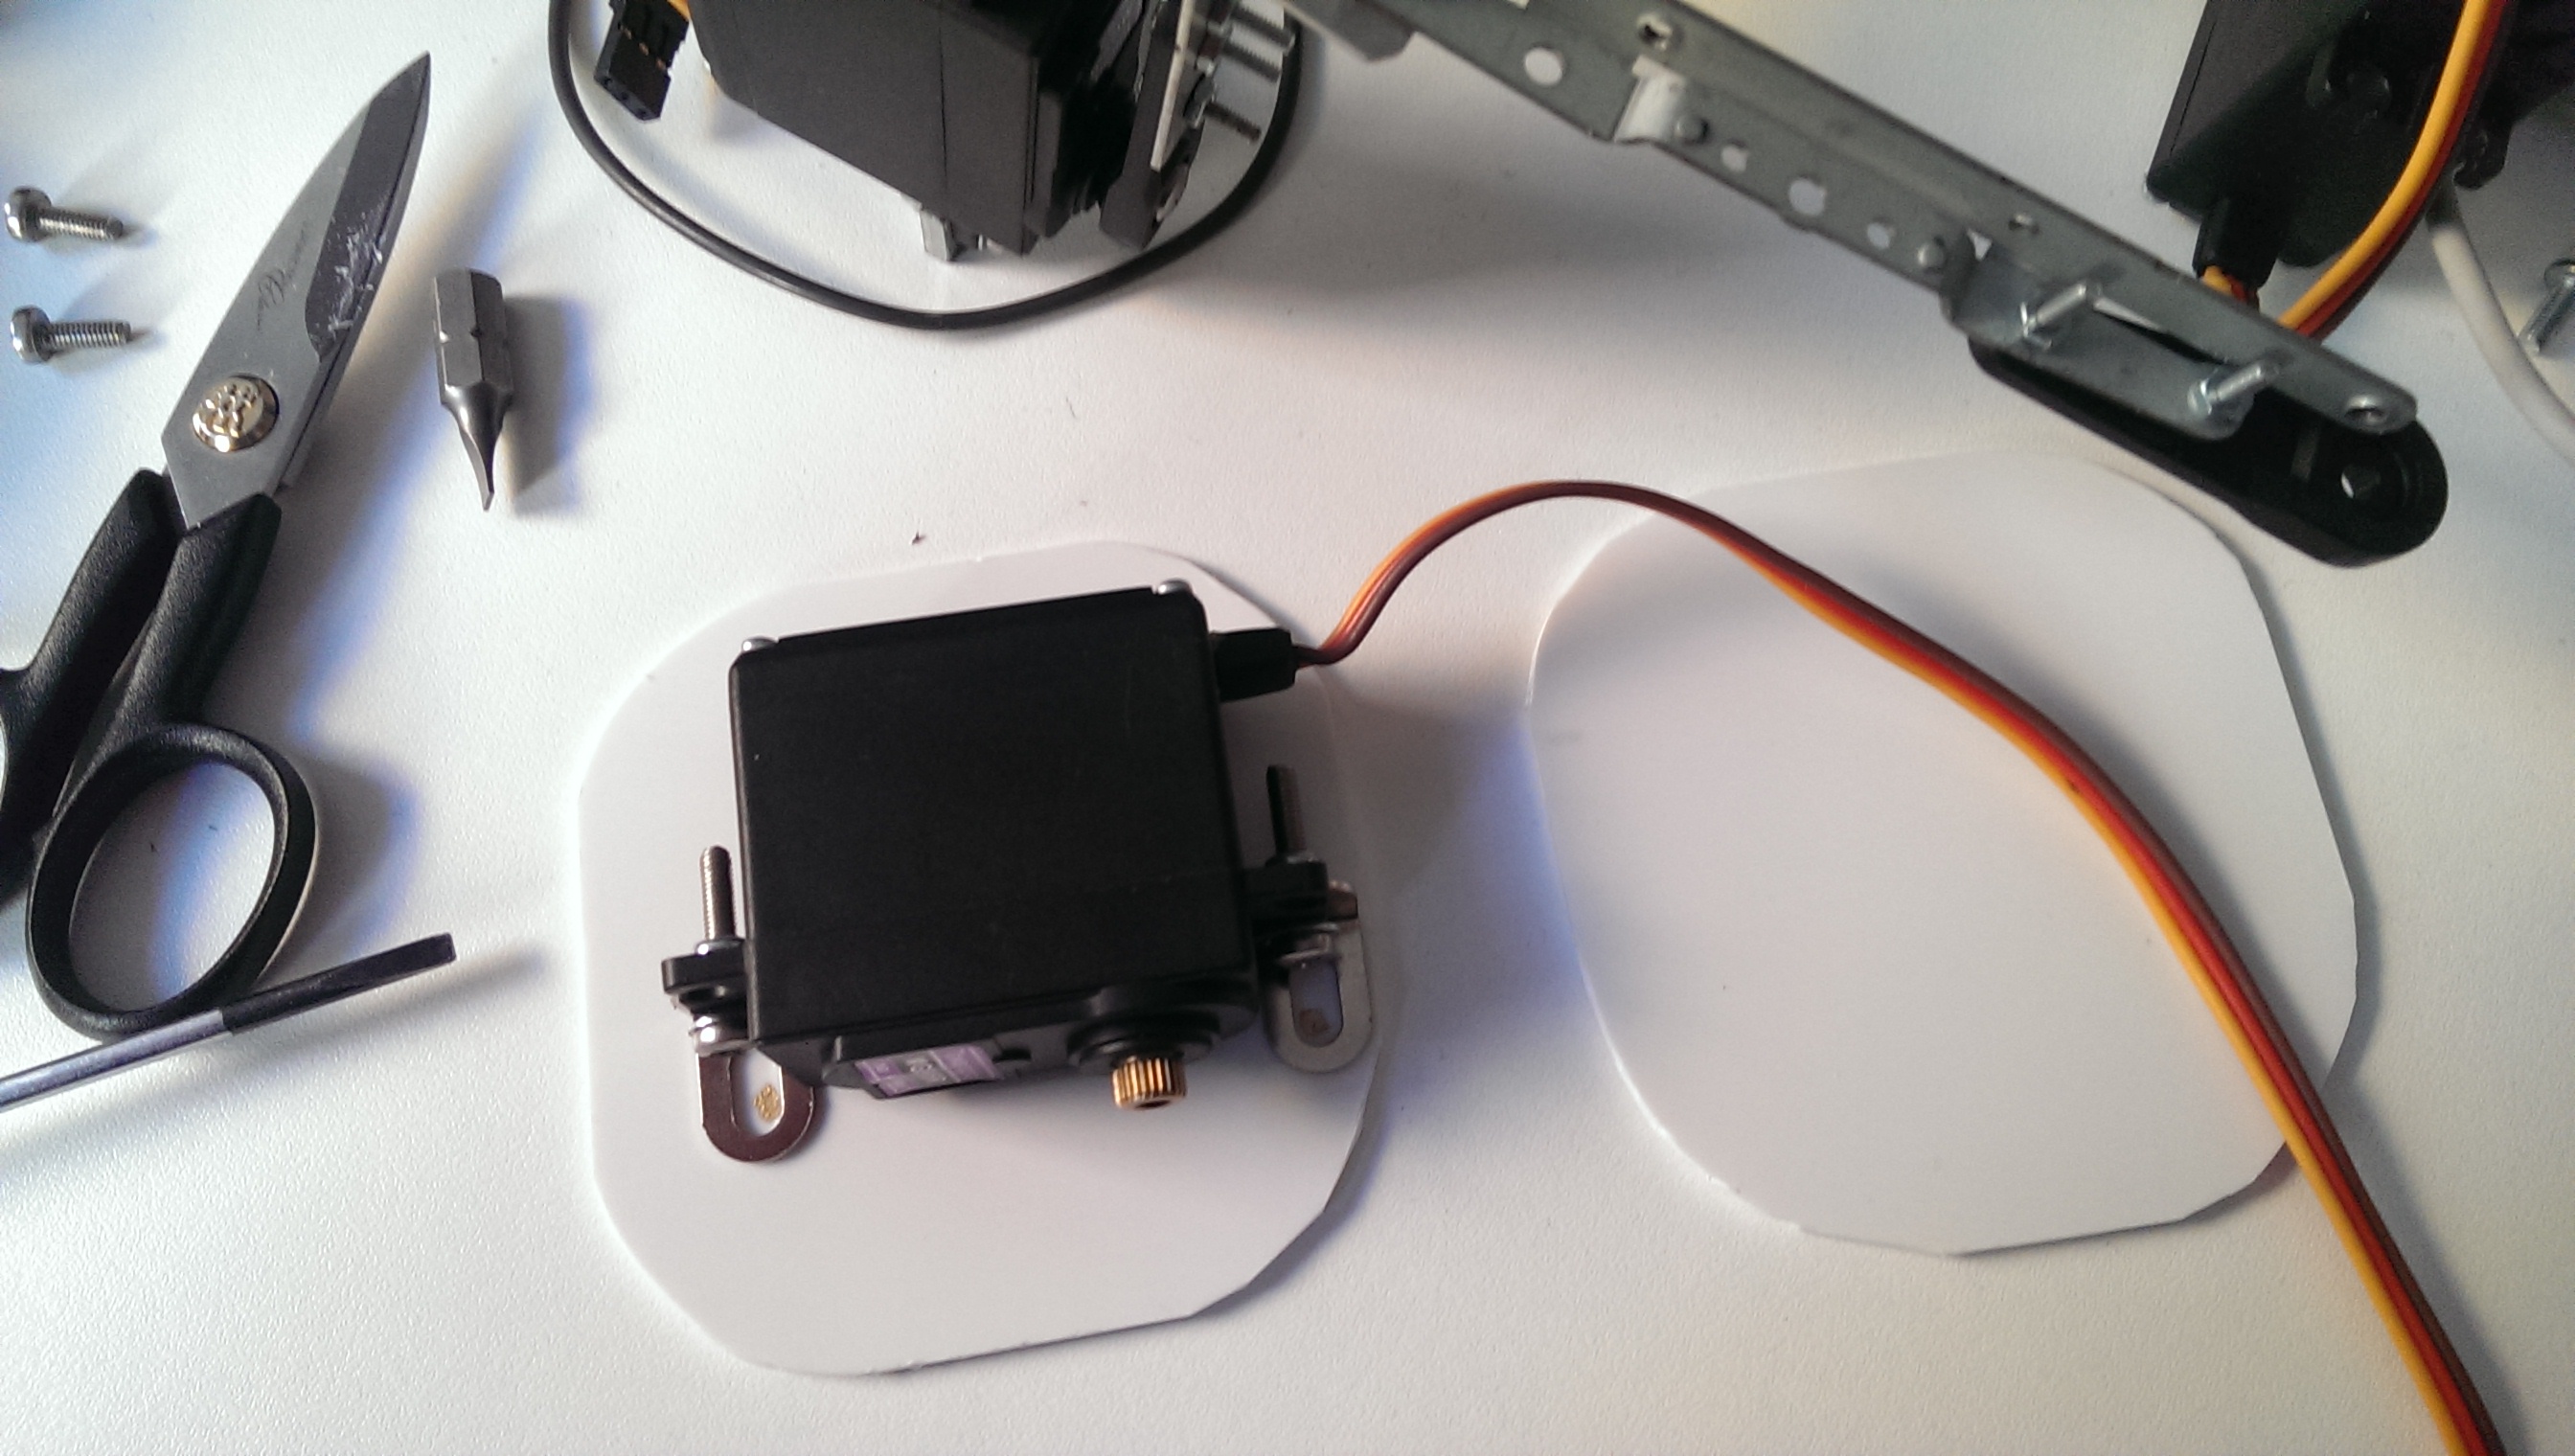
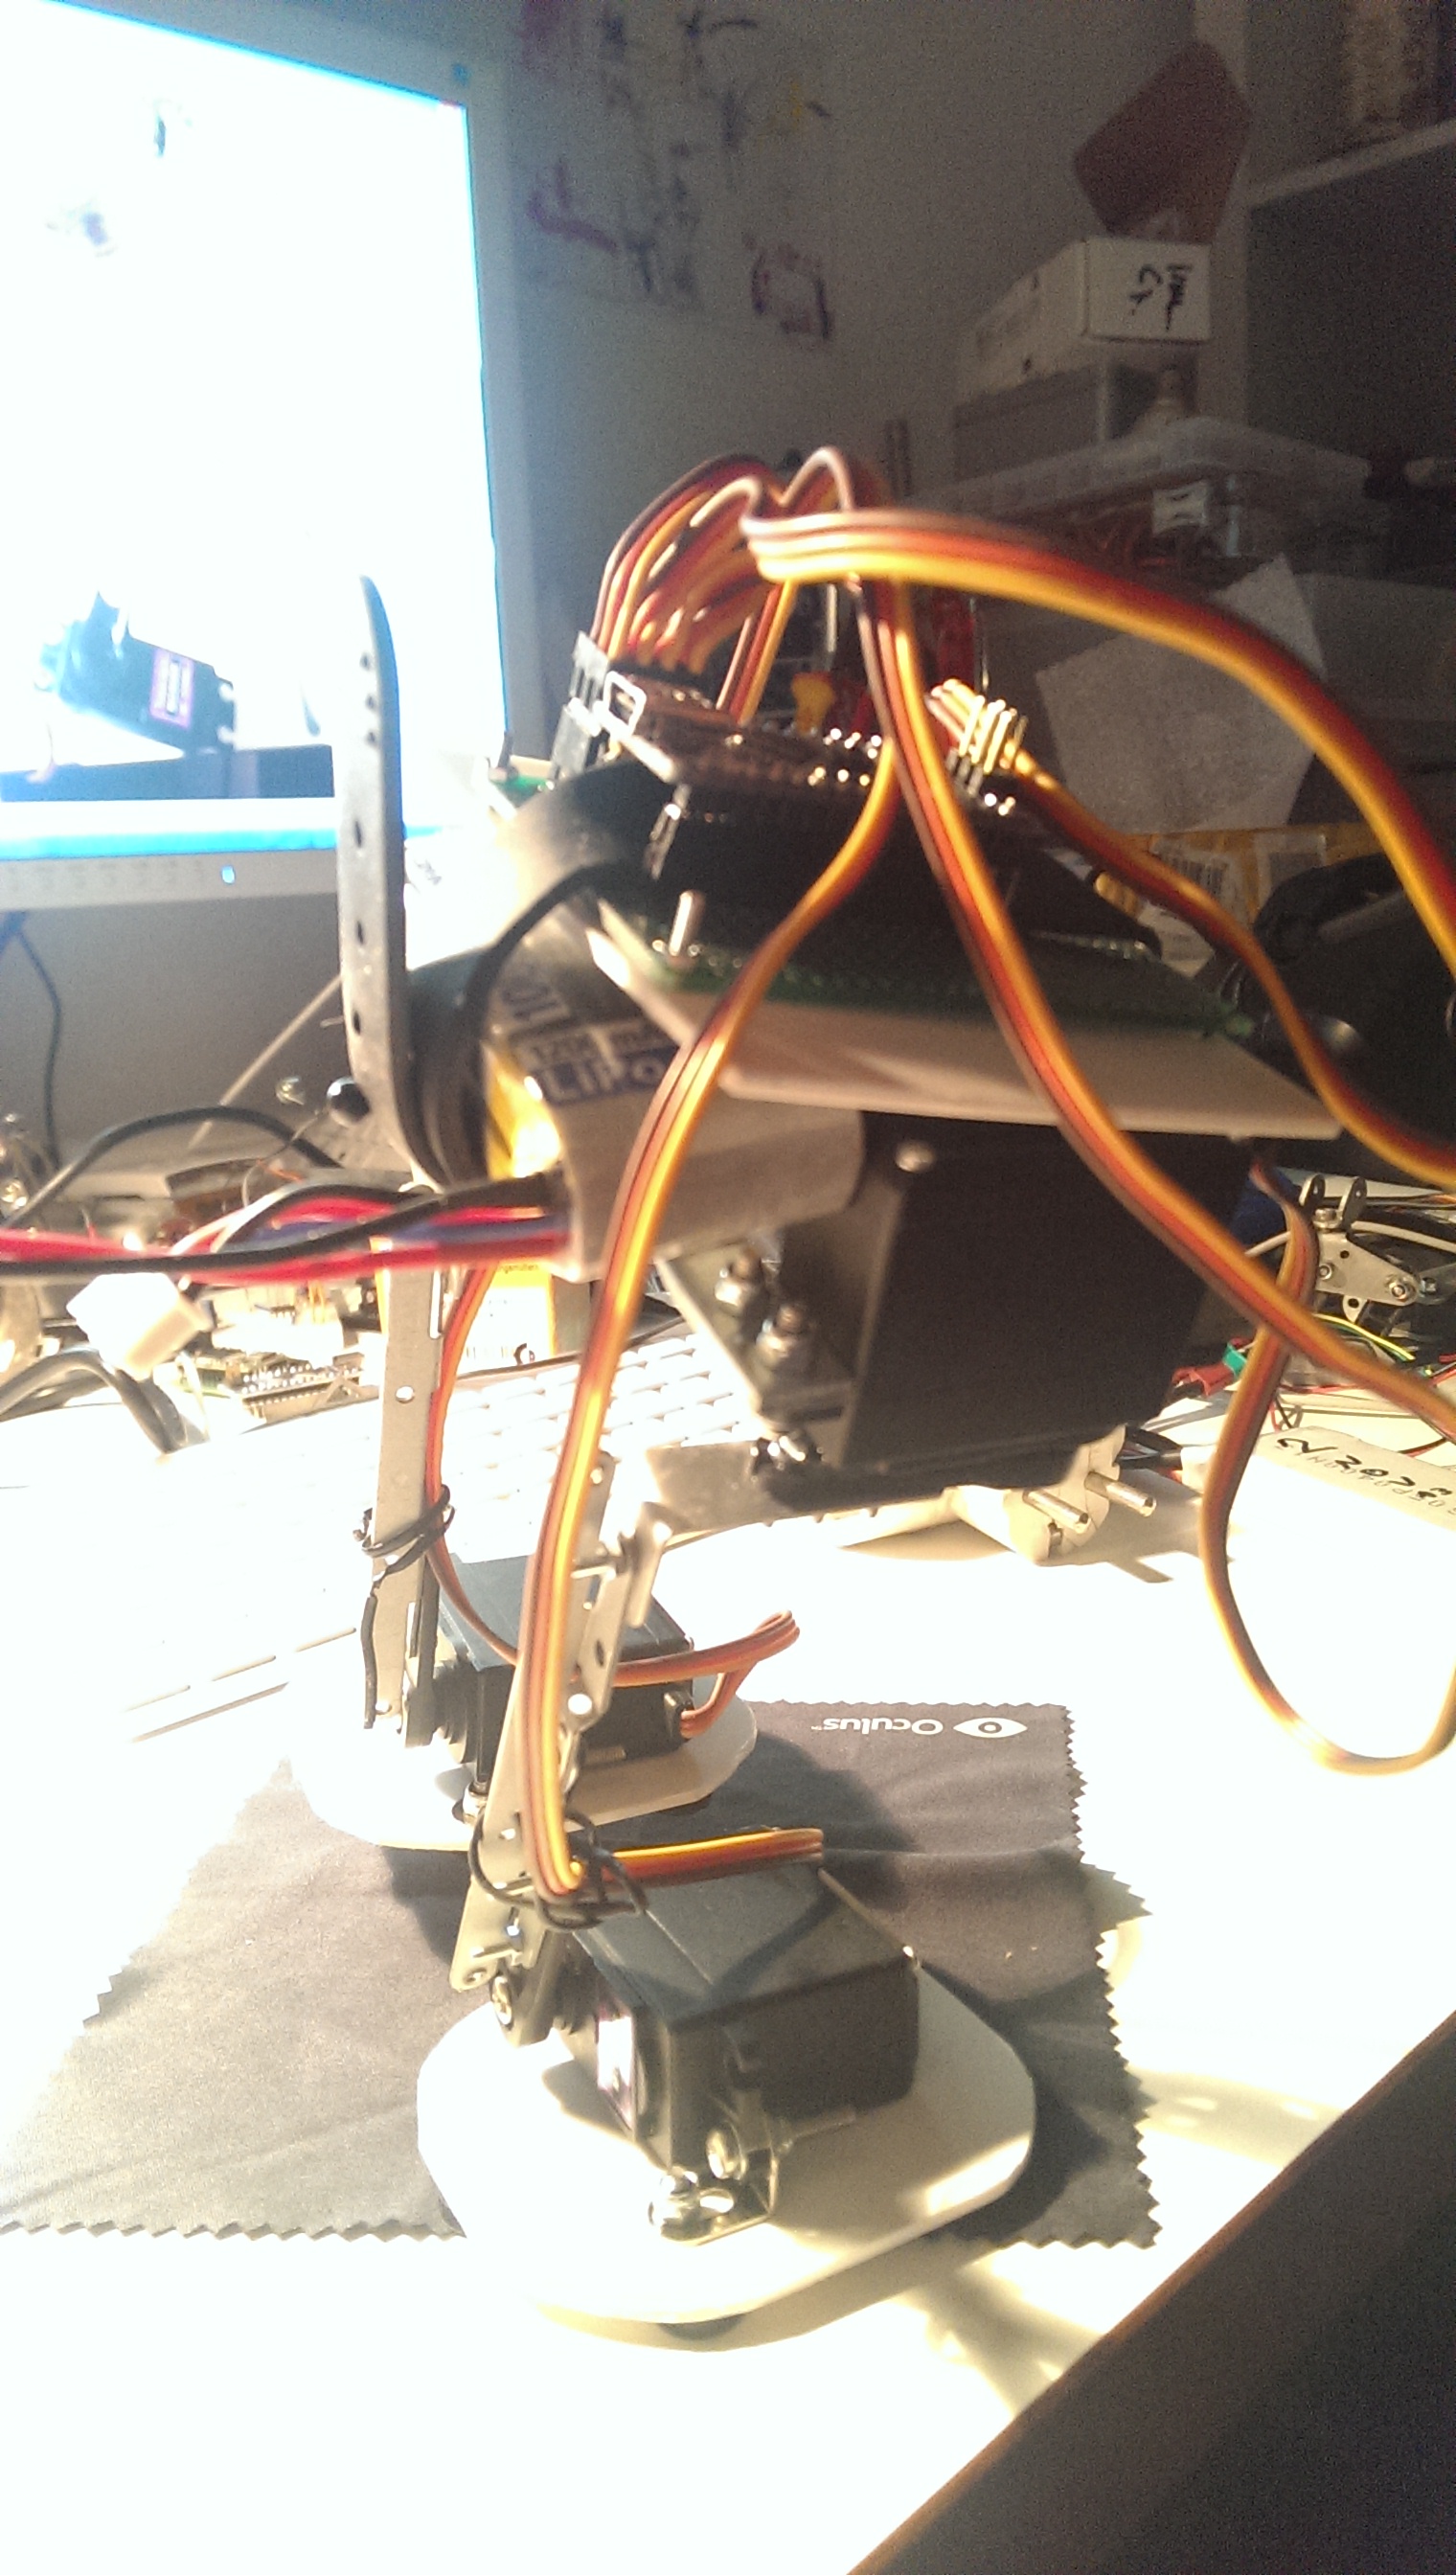
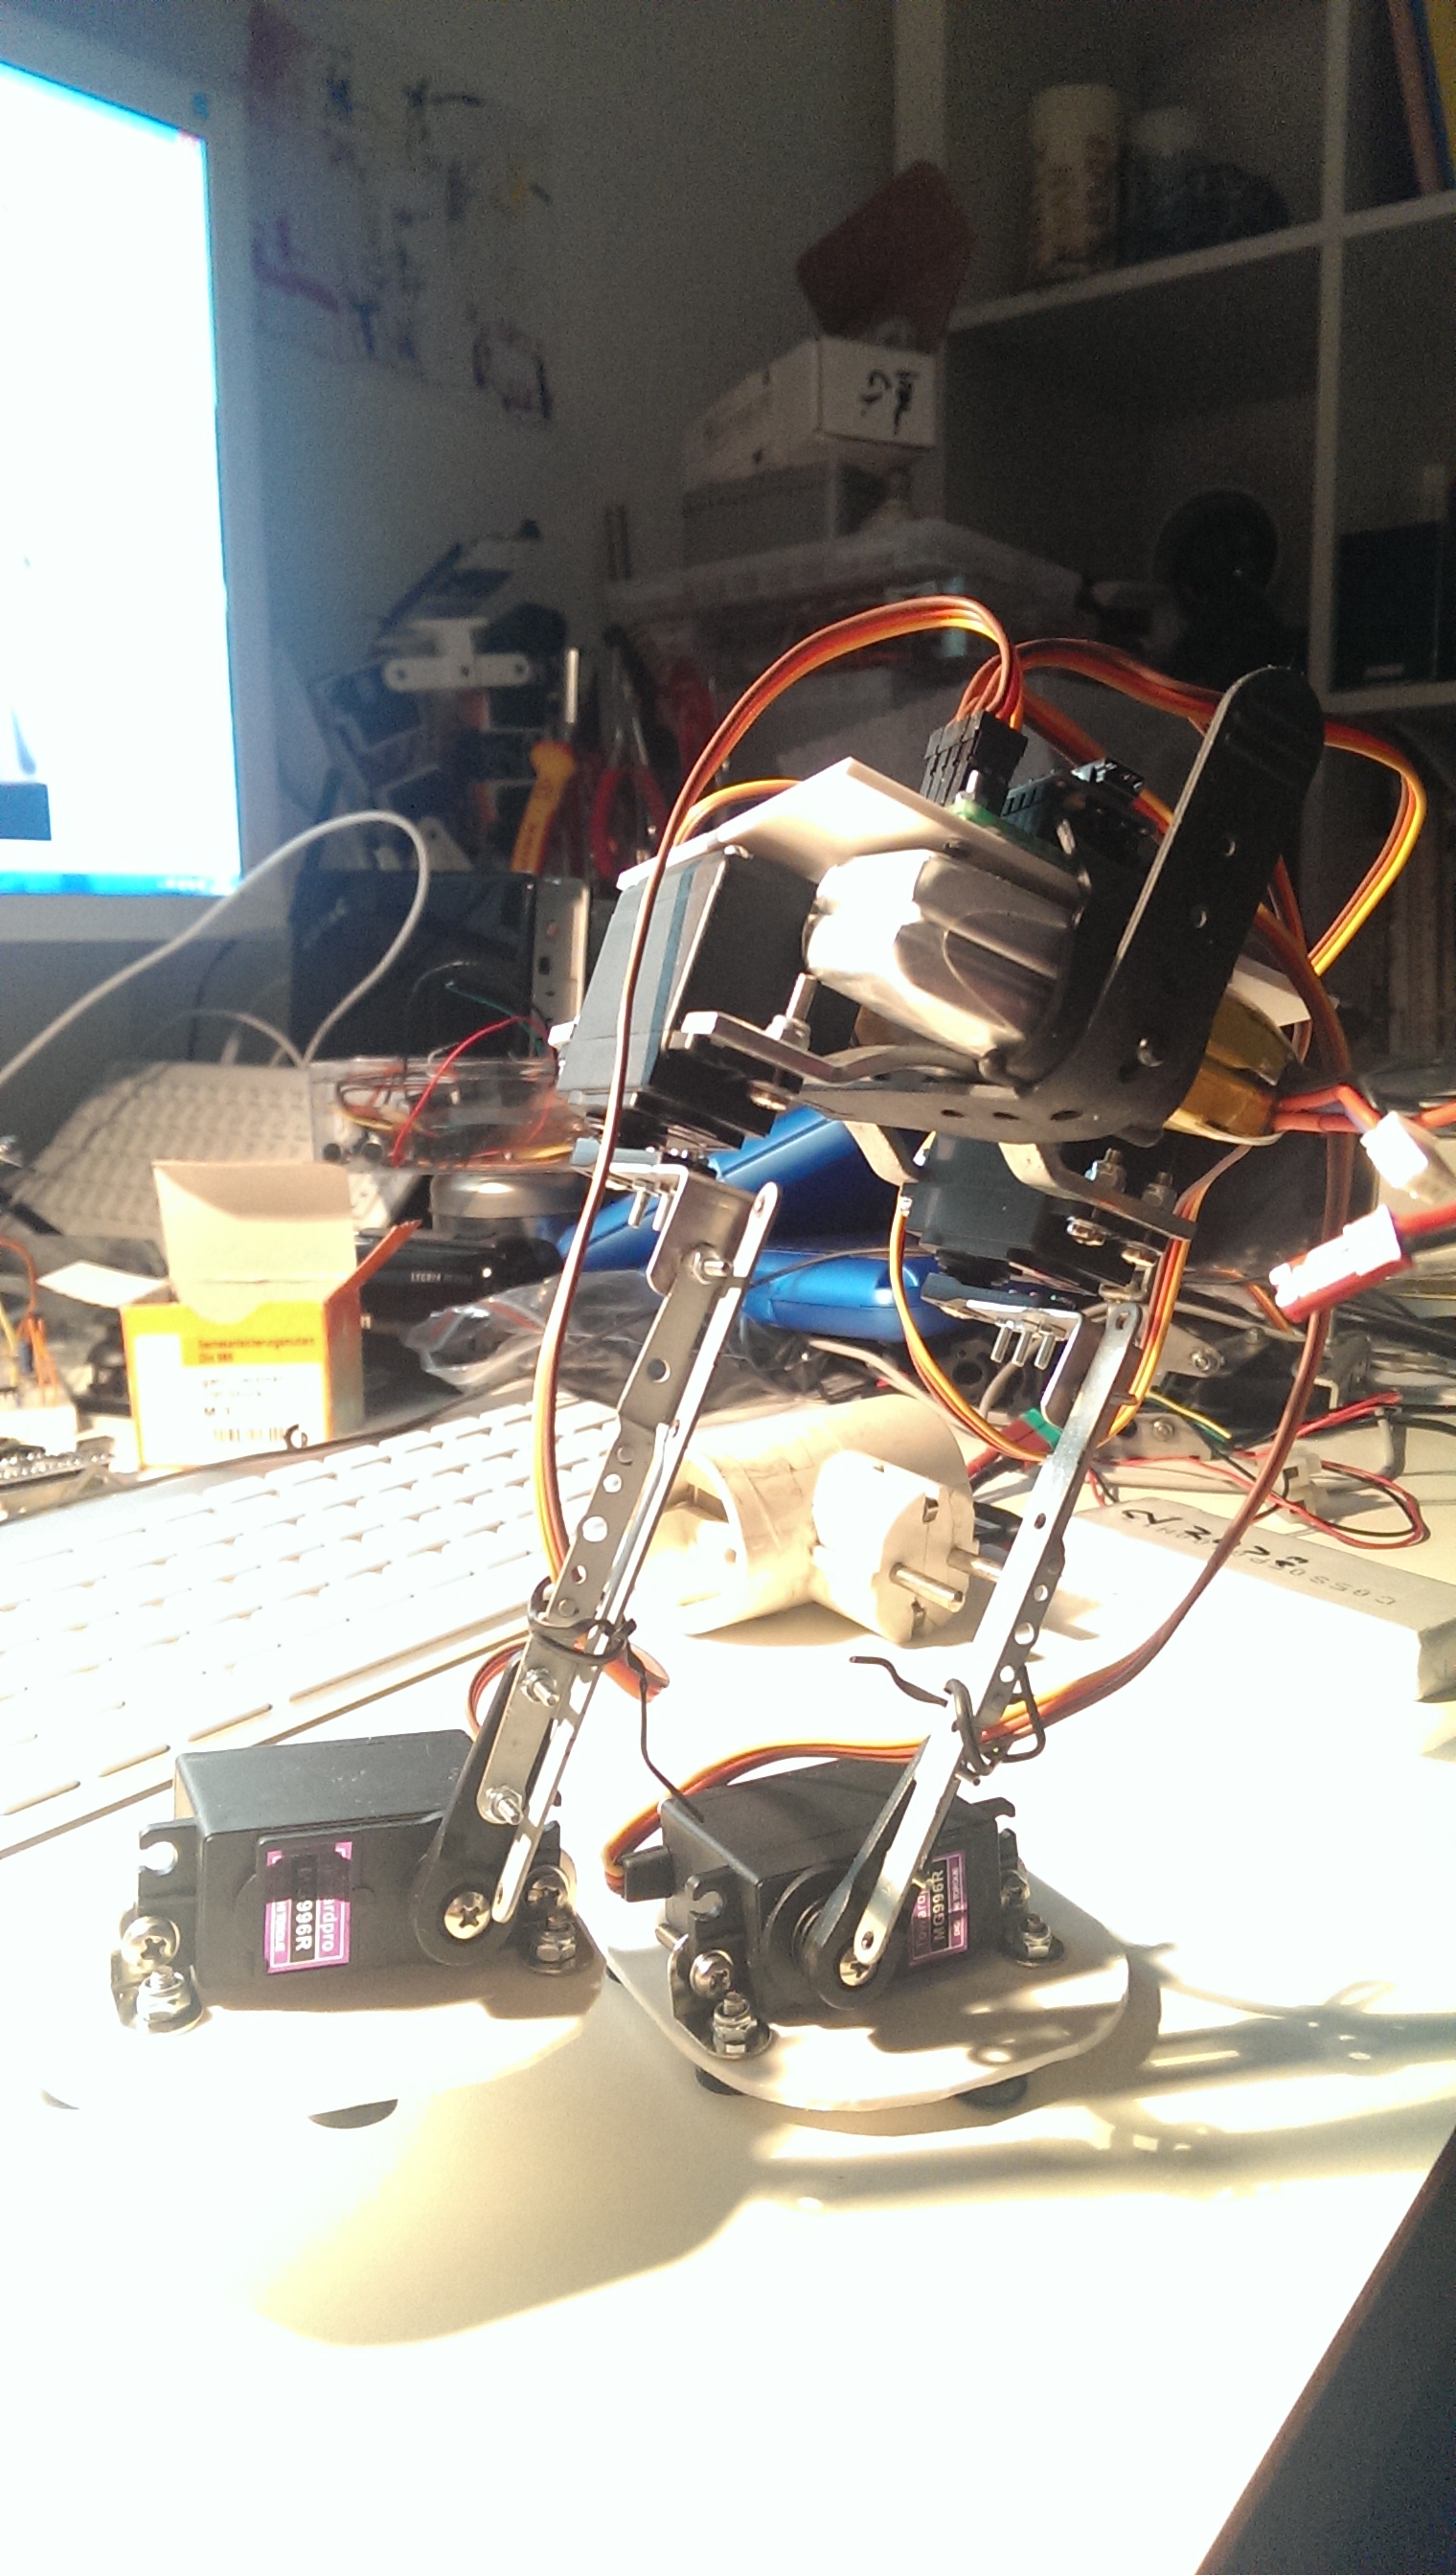
here’s how i started, one foot servo (nice mg996r, metal gear machine) connected to a hard-drive holder from an old pc:
next, i attached an L shaped metal piece i had floating around to the servo horn of the hip:
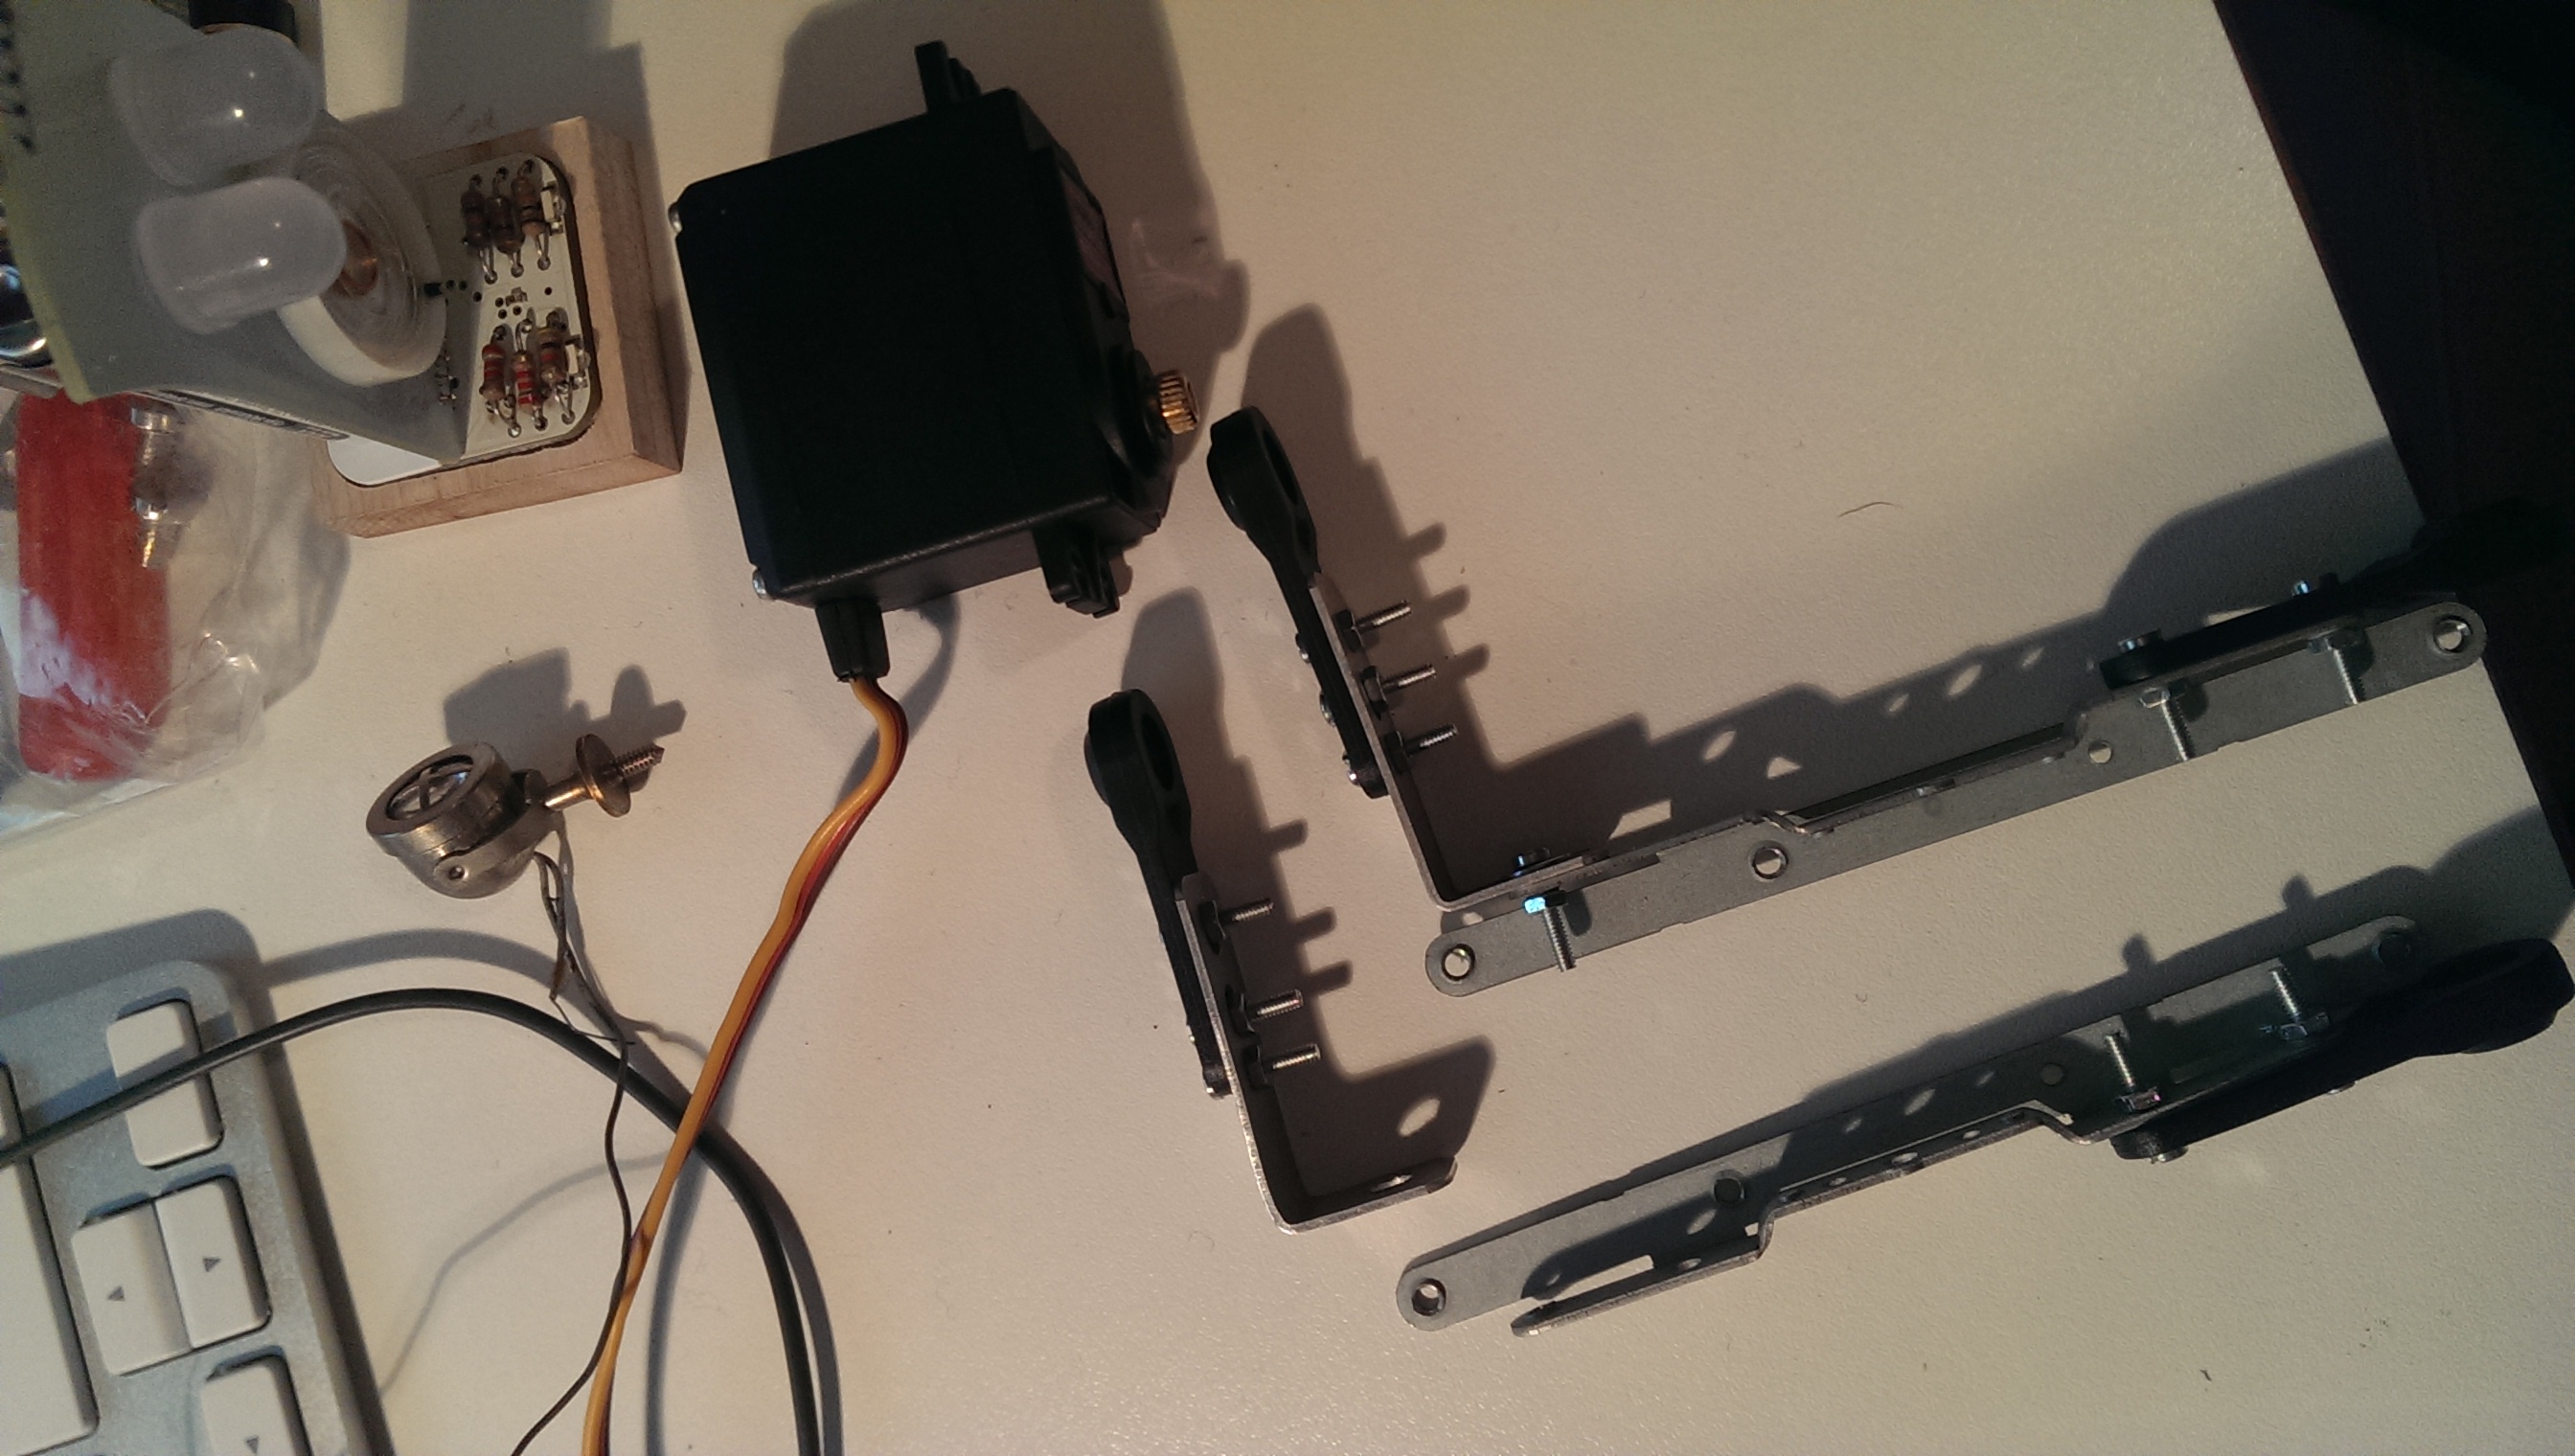
then, i found some metal pieces that had fortunately the holes drilled in the right distance to actually fit the servos’ holes:
now i coulddo a test connection of legs and hips (in the end you have to decompose the ensemble again to center the servos before finalising the build up):
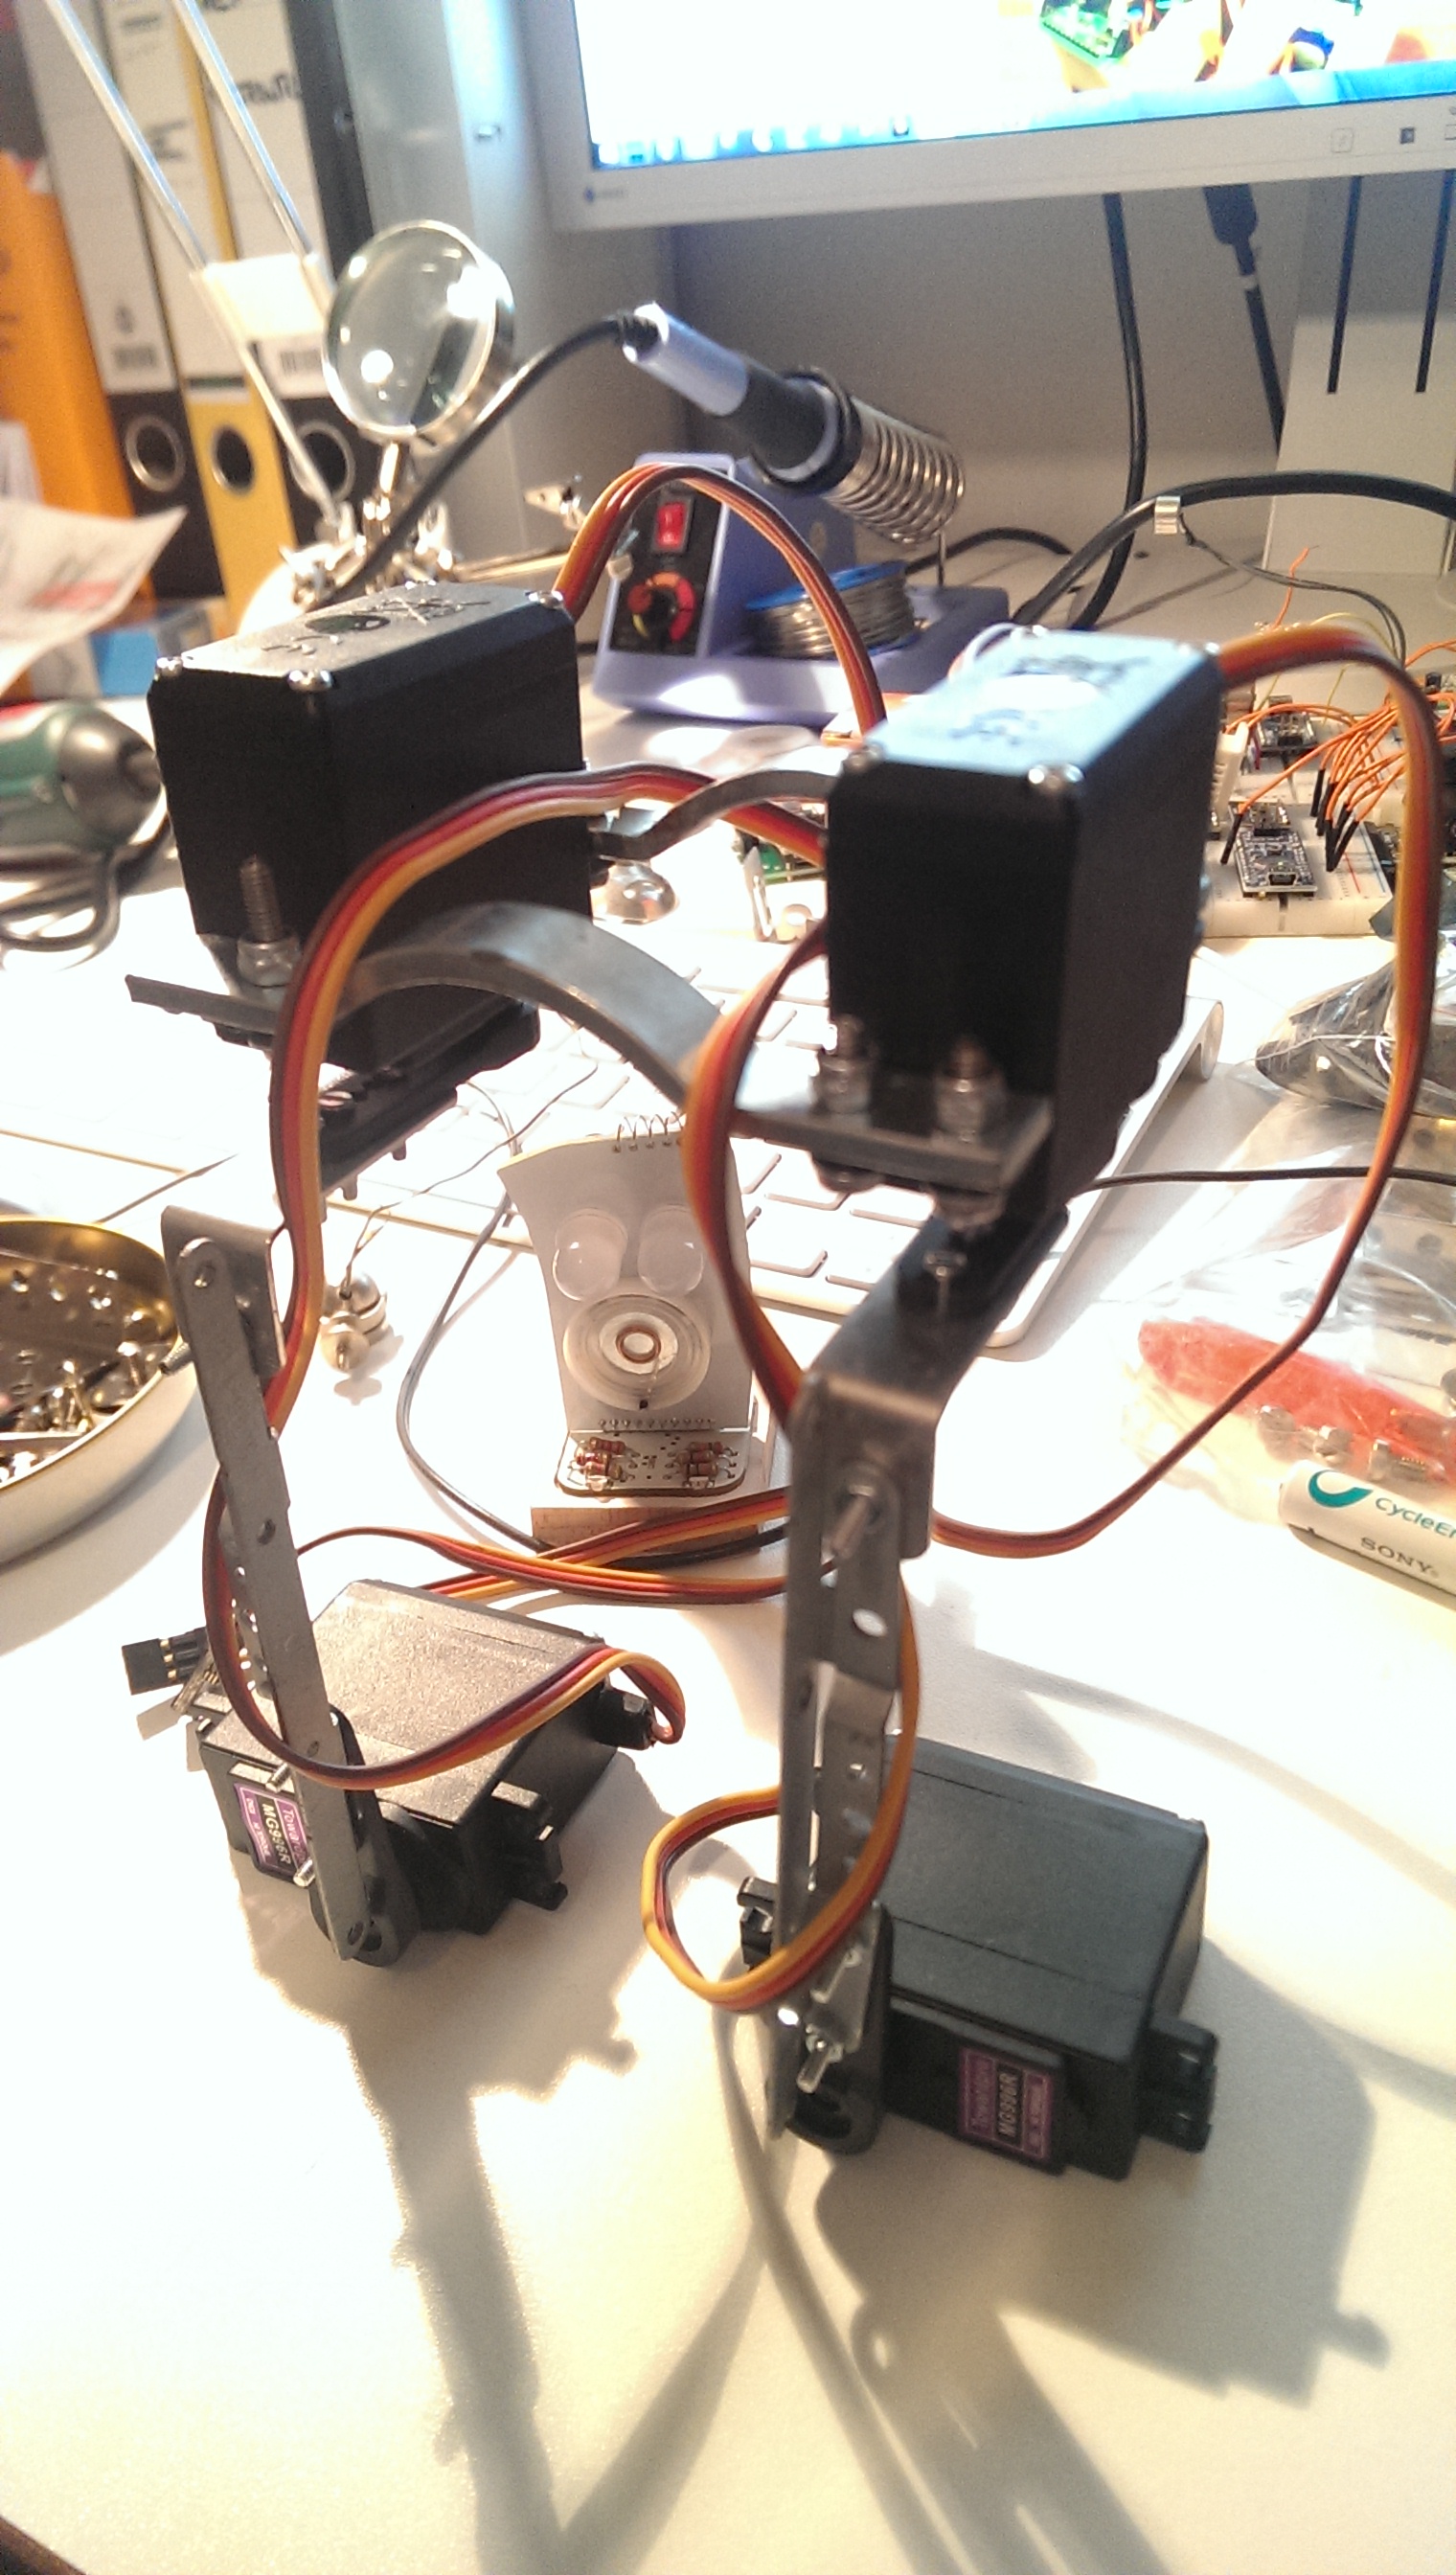
now i could add the foot servos and voilá we have a standing prototype:
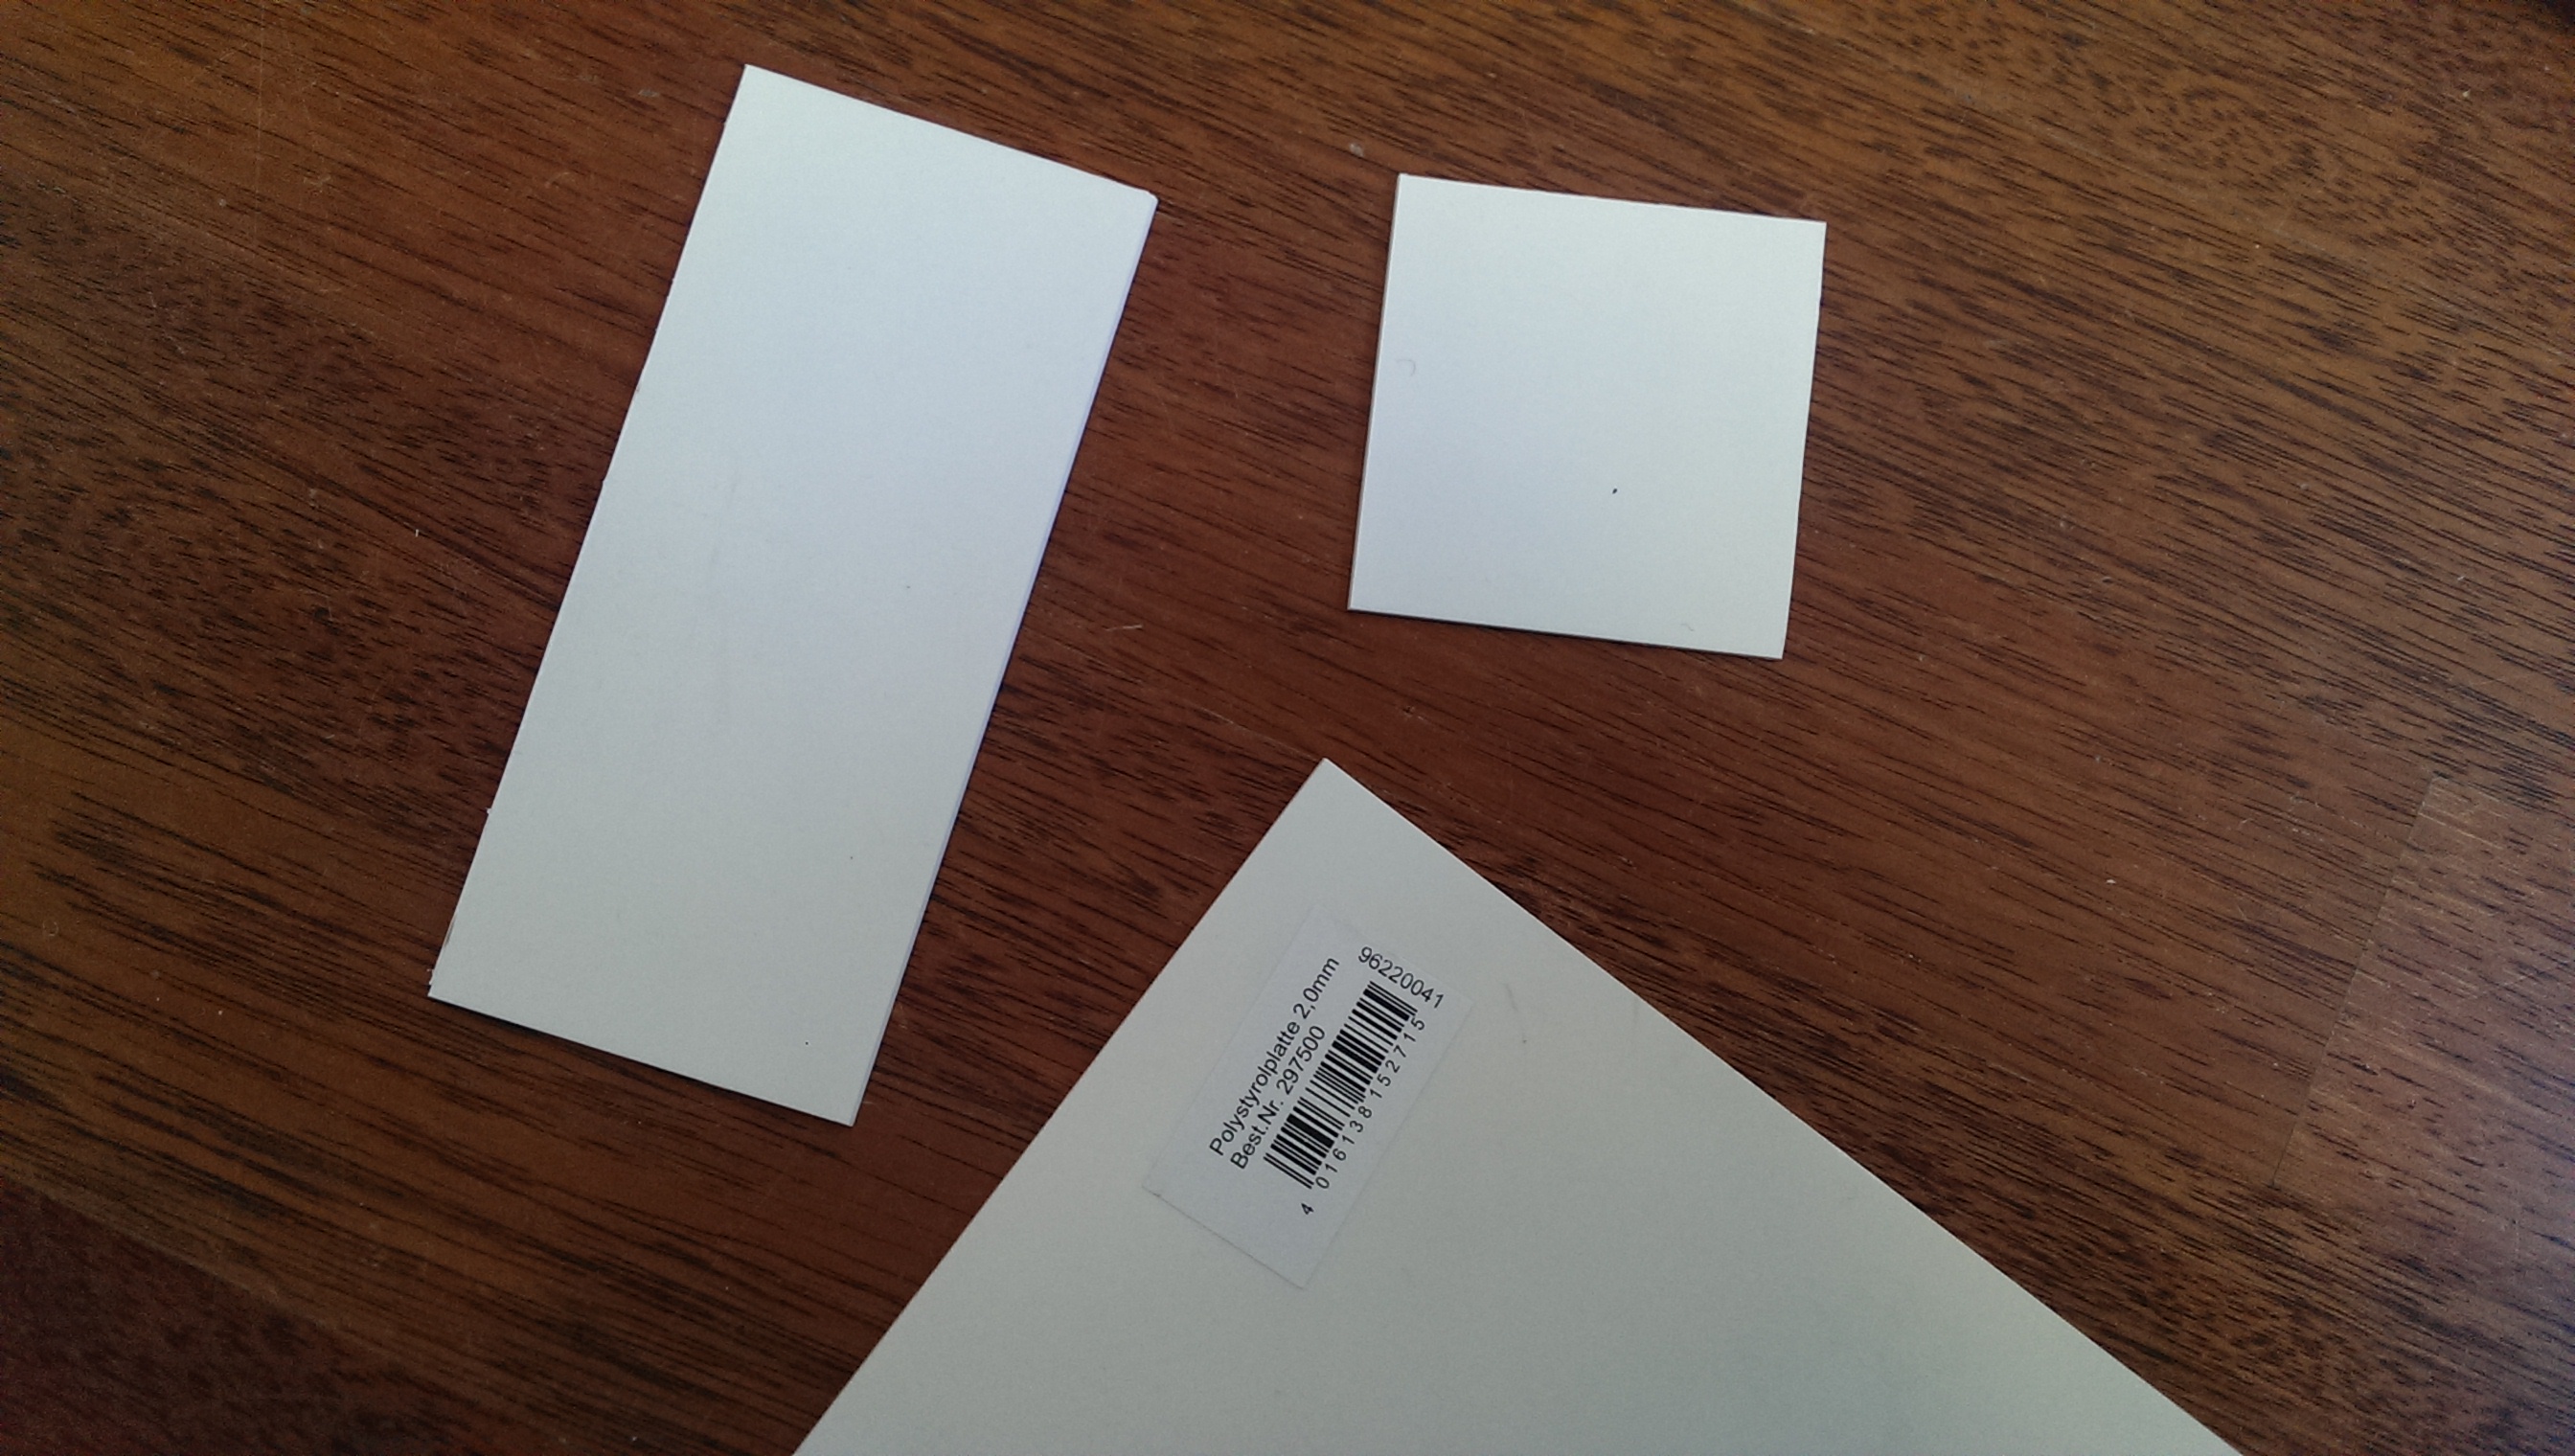
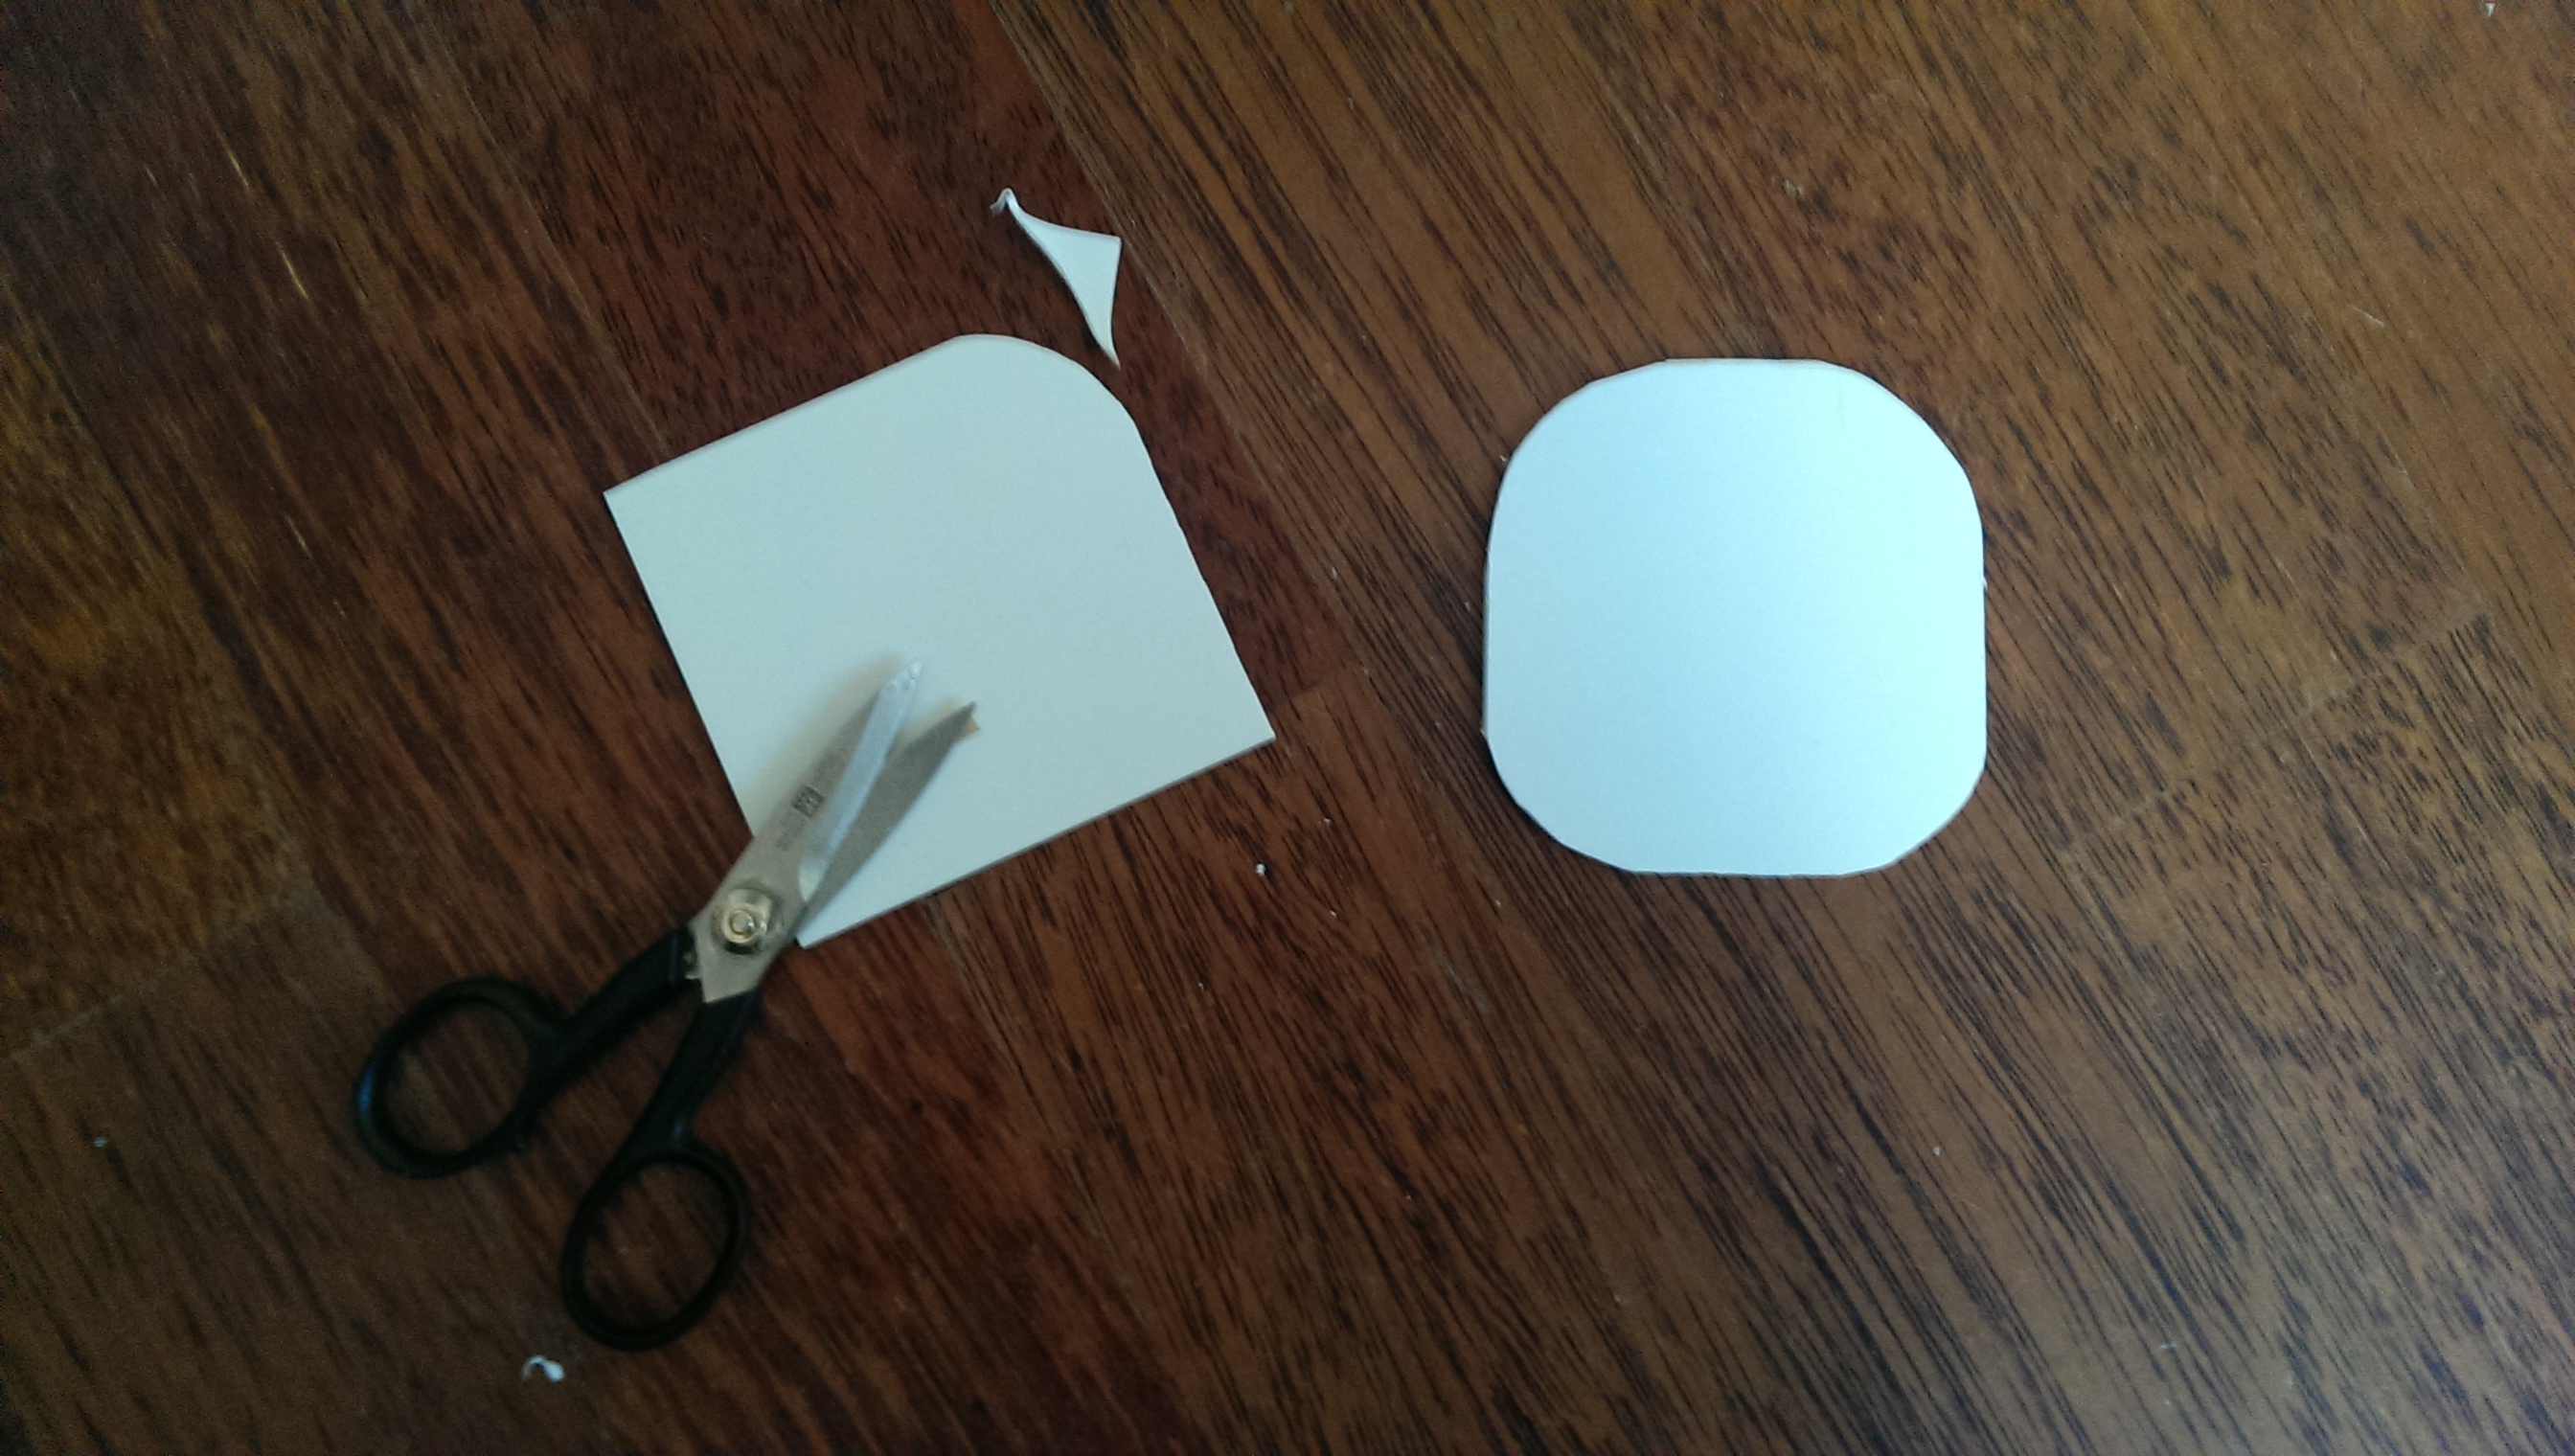
of course the hard plastic of the feet is slippery, so i needed to add more “footage” as well as extend the standing area, so i cut out some feet from polystyrol which is hard enough to support stuff but soft enough to be cut with a knife (or actually sliced and then broken):
and finally attached the feet servos to them with little screws and L shaped metals i had found:
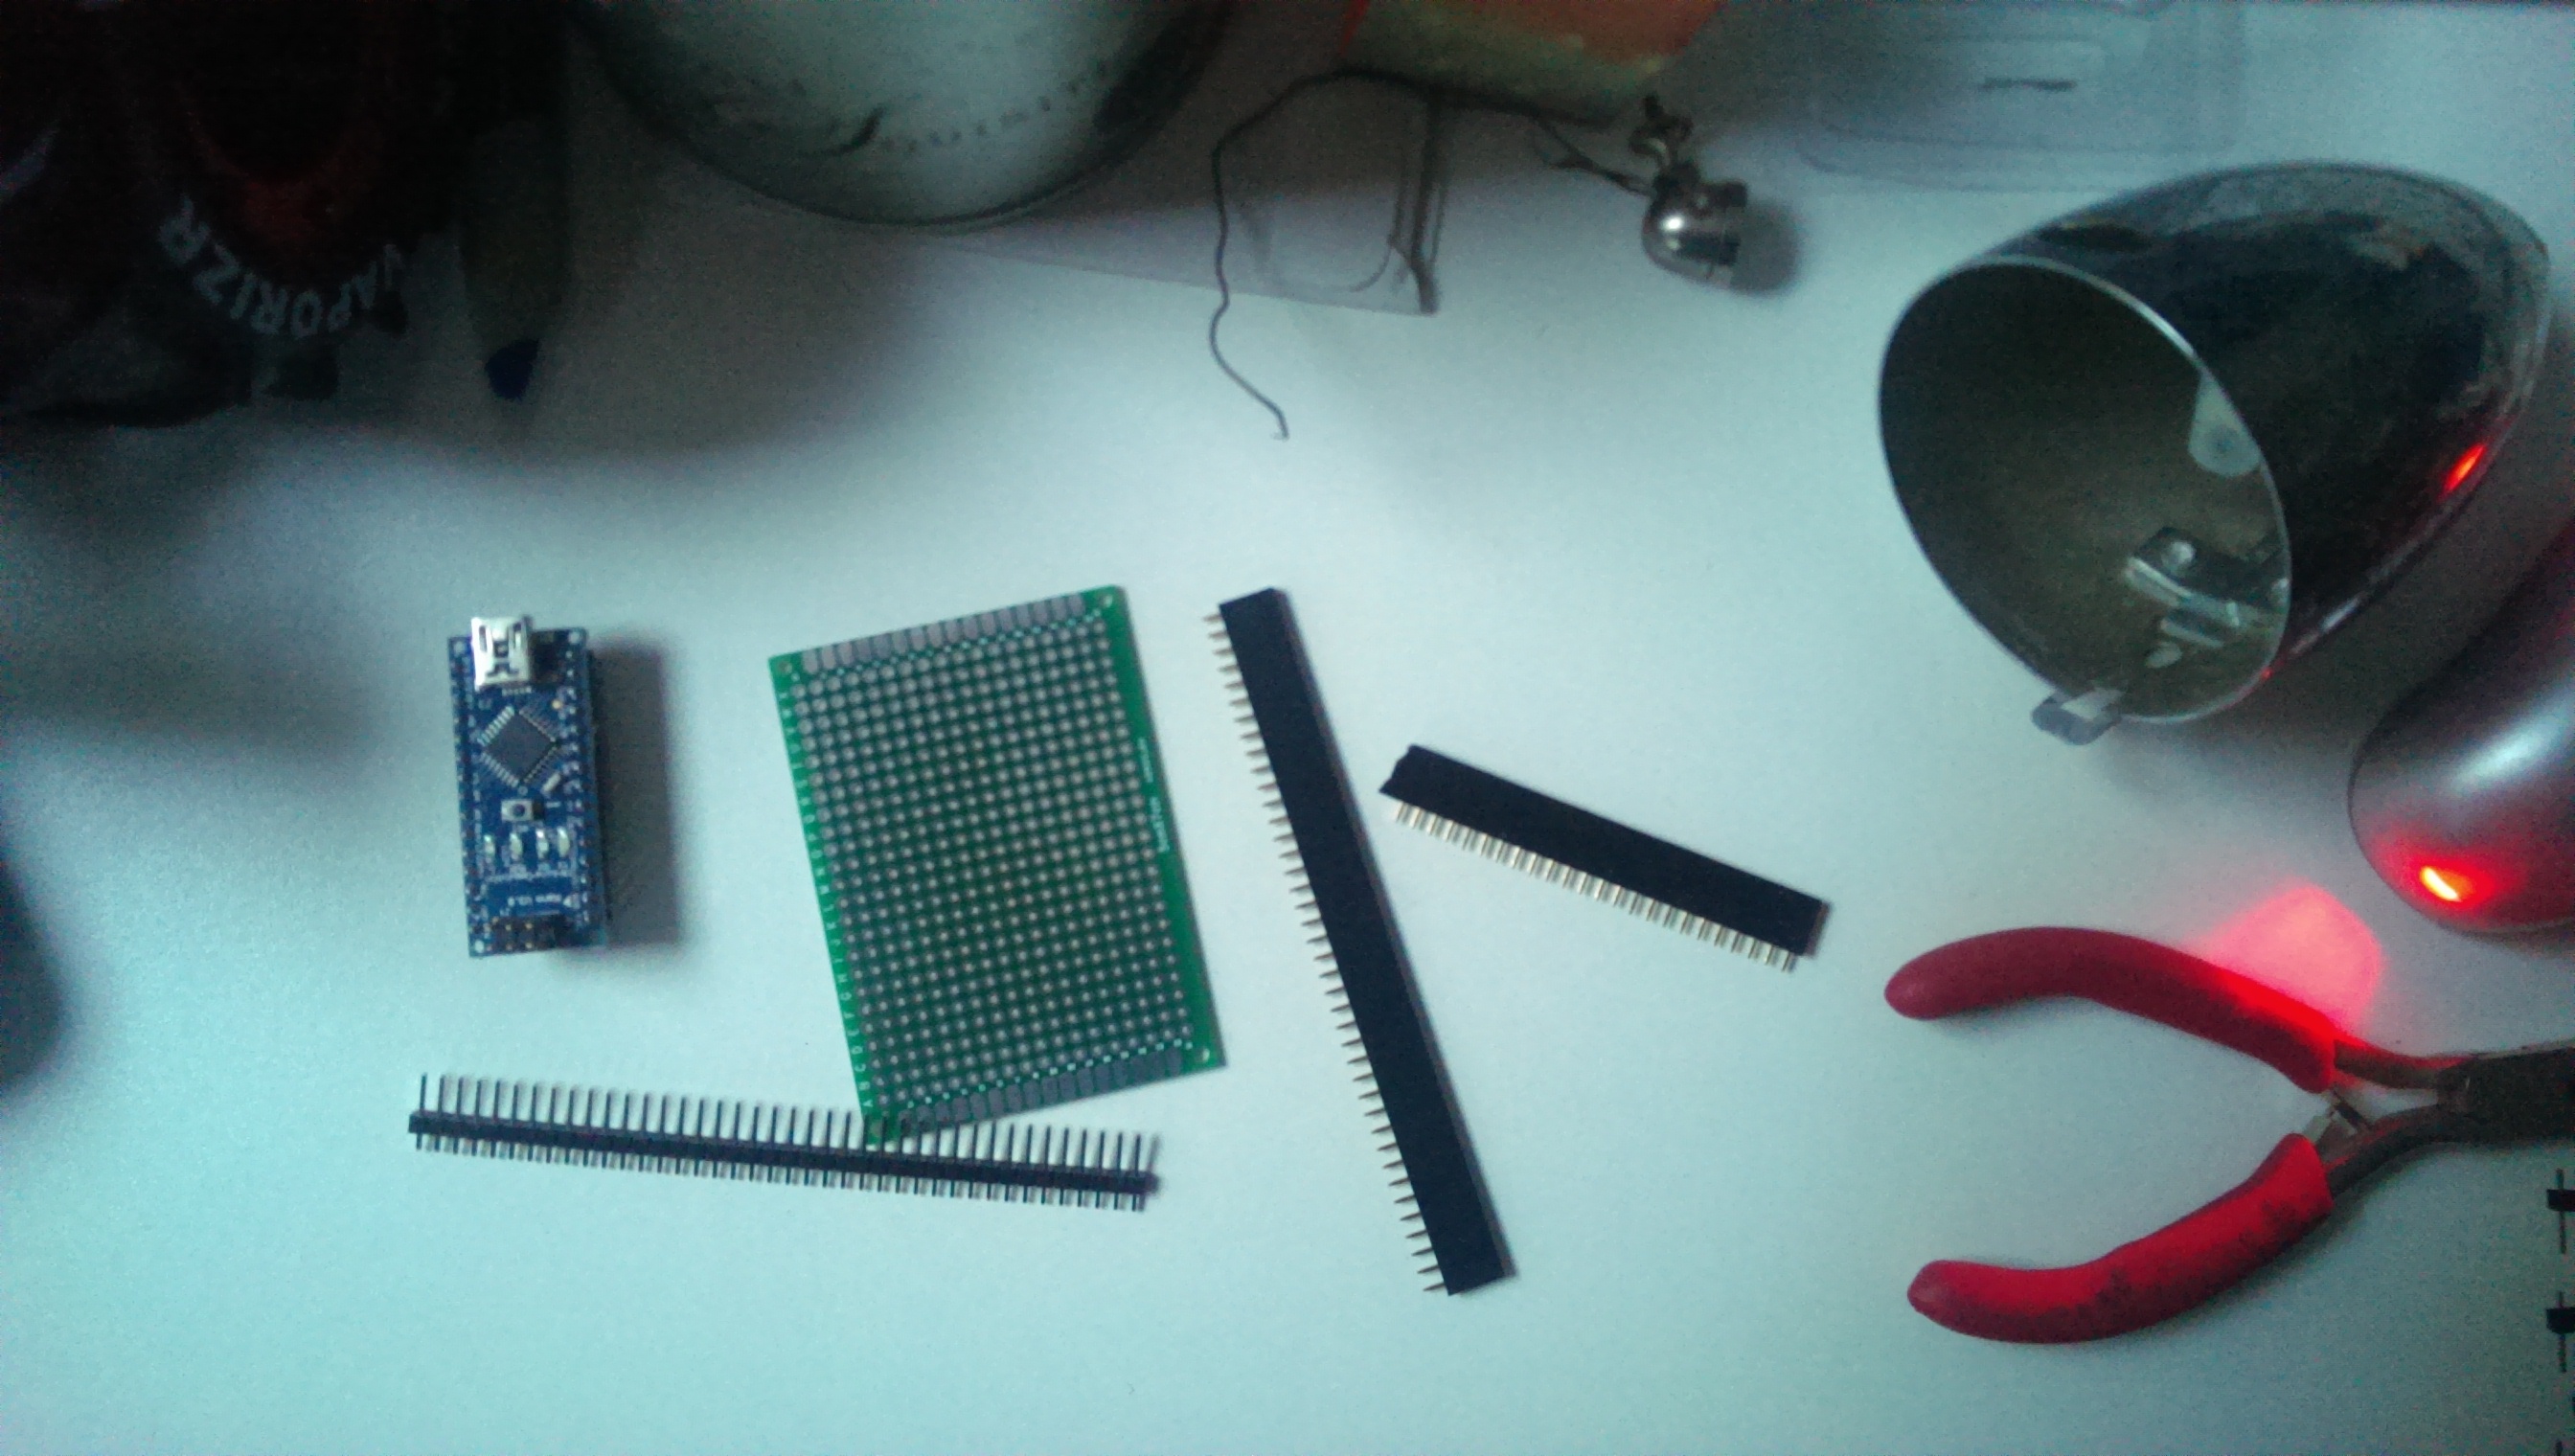
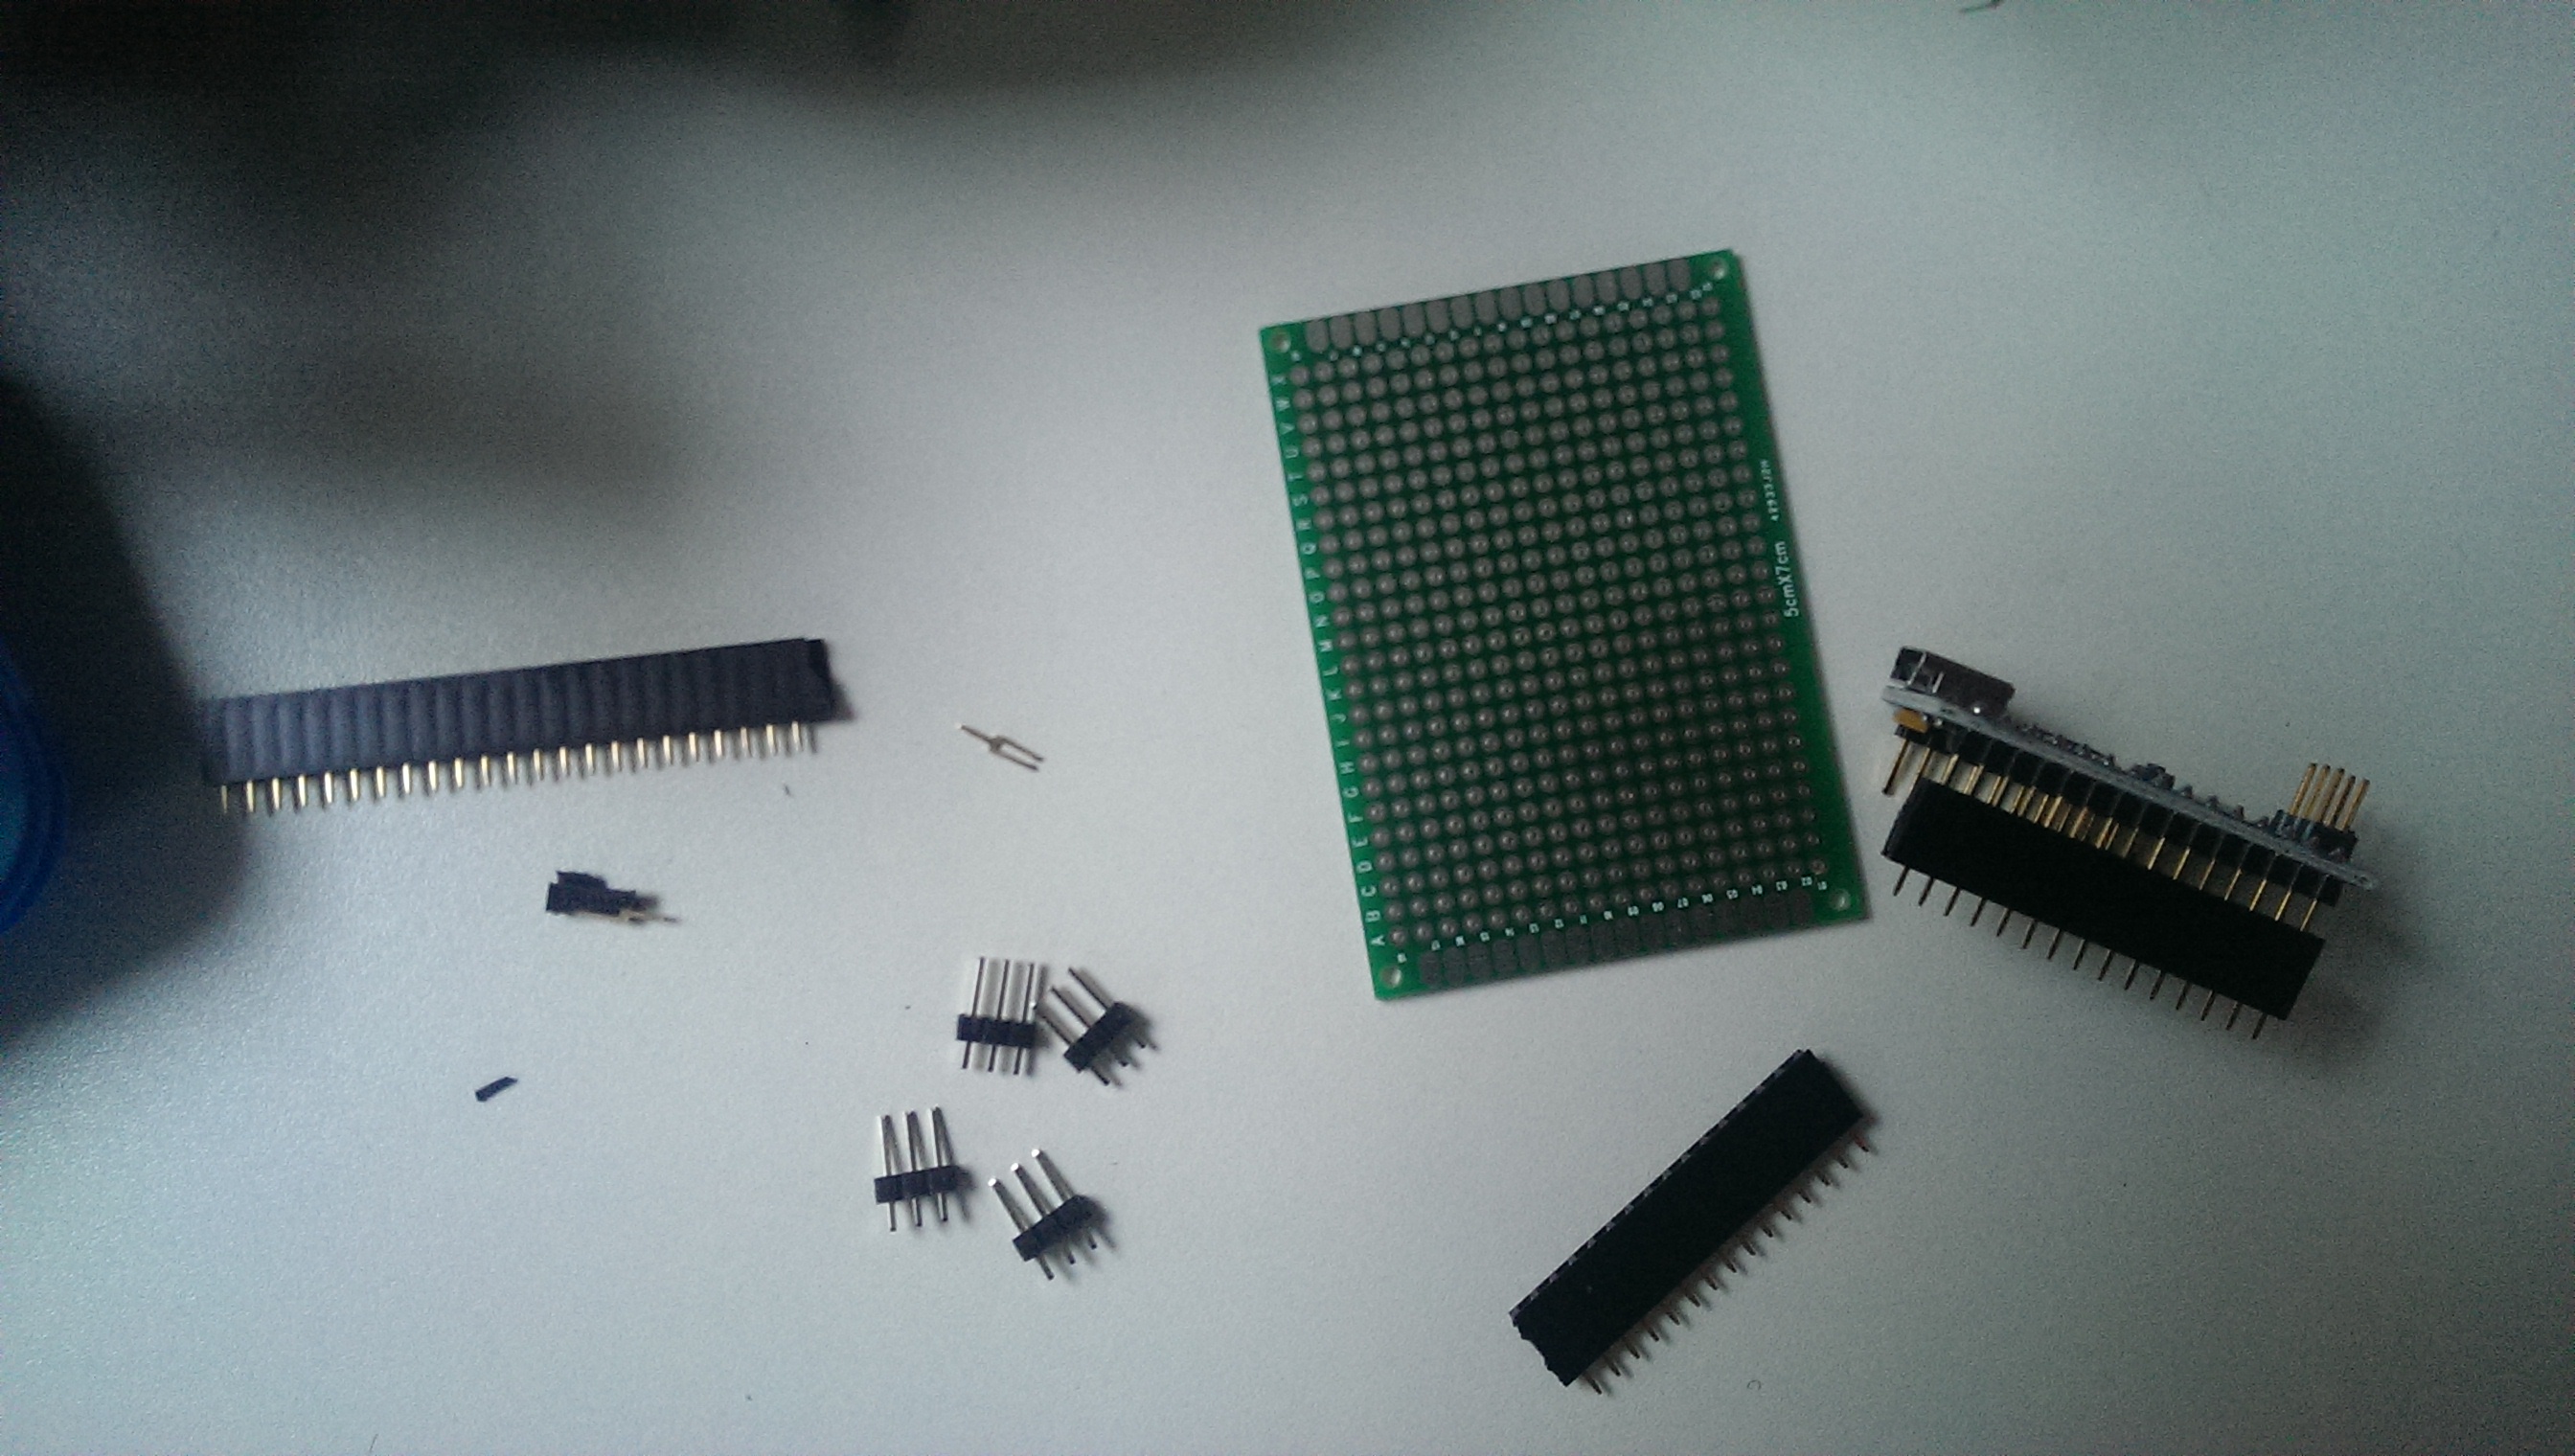
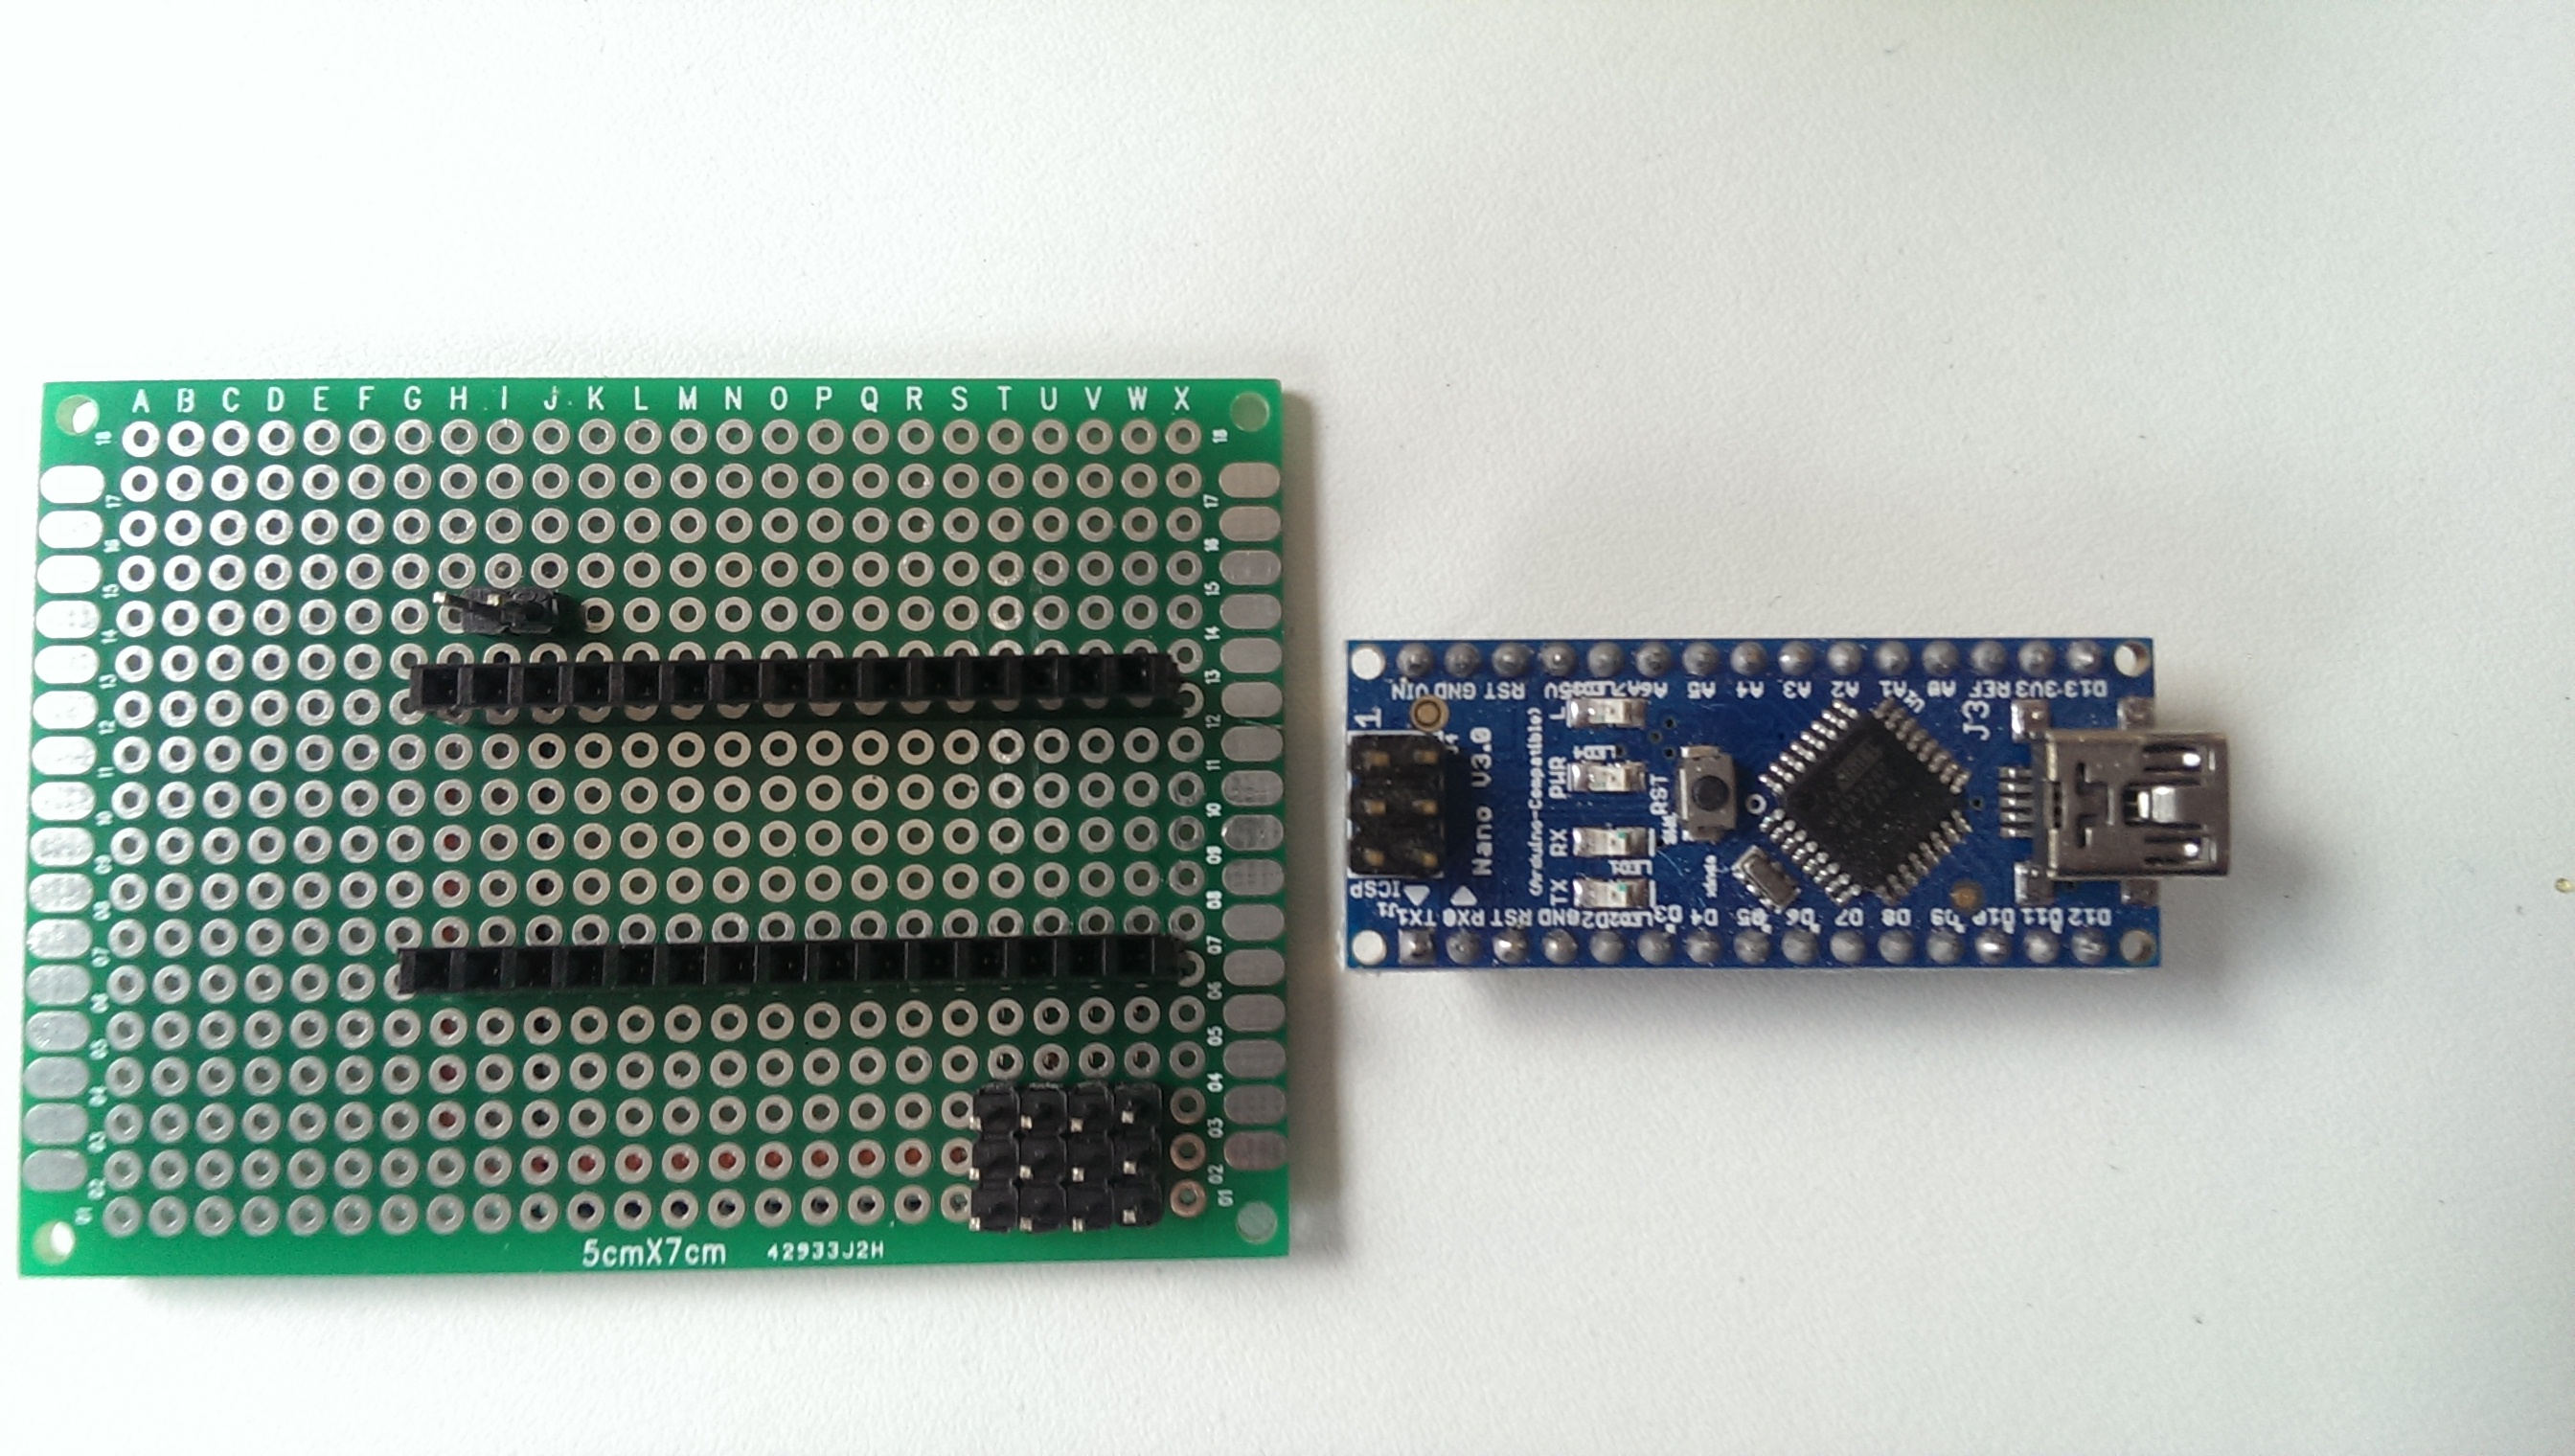
next, it was time to build some electronics. this time, i didn’t want to use the breadboard, i actually roughly know how the layout should look like so, i chose this time circuit boards and connector strips i had found at amazon:
cut them into the right pieces to fit the arduino nano and four triple plugs of the servos plus some lipo connection:
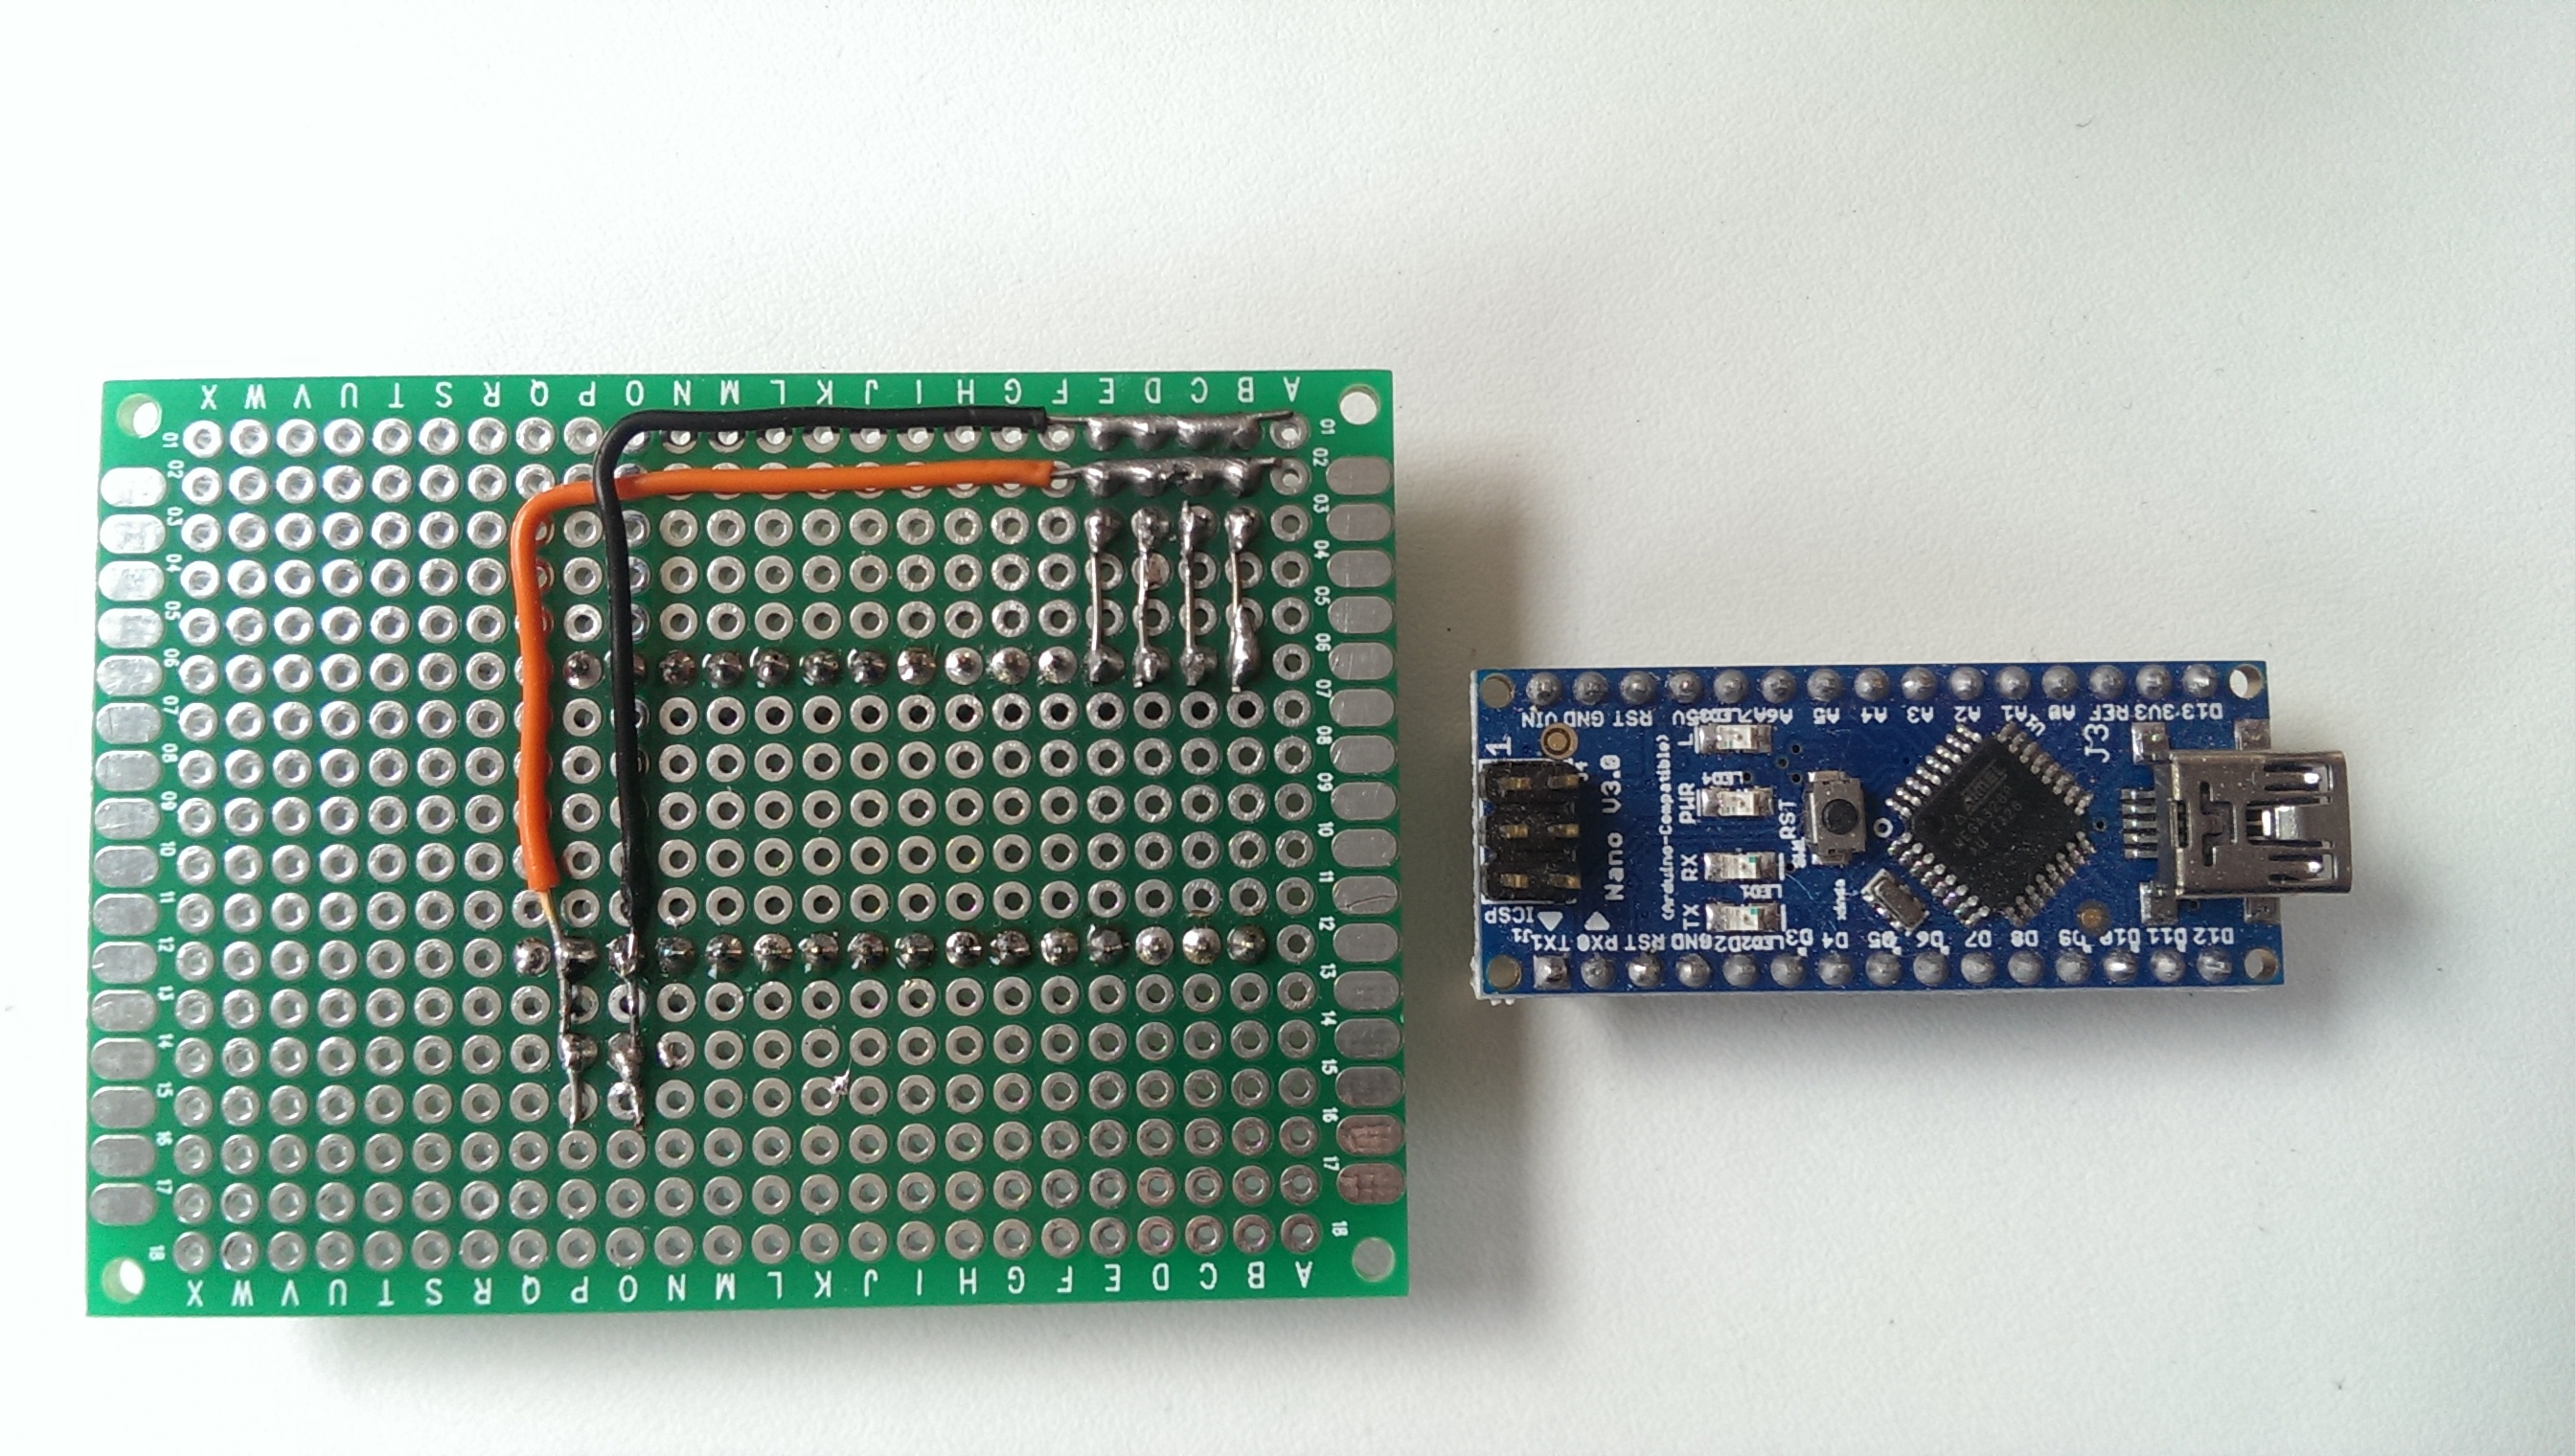
minimal circuit design (the nano can be powered by up to 12v, the lipo has 7.4, so i can power the servos and the nano with the same battery, i left out the bec for the moment):
as you can see the upper part gets power and gnd from the battery (on the lower part), that’s also powering vin and gnd of the arduino nano. here’s the front (top battery in, middle nano, lower right servos):
here’s the final bot from the side (some polystyrol to save the circuit from shorts by the metal hip) and the lipo attached to the front. as you can see, he can stand on one foot, which is the most important feature…
first key learning: long legs imply delicate balancing of the upper part. not very elegant. this is why the “bob” is so elegant, short legs, less risk to fall over…
here’s mr trashbot from the front (electronics and lipo attached with a rubberband, for fast component exchange and re-engineering. we’re learning!):
finally, here’s the little guy walking. not too elegant as the long legs and the heavy metal gear servos make the legs shaking. and some software issues i guess (number of animation frames vs playback duration should be fine tuned, letting him walk faster will let the shakes become stronger in amplitude and let him fall more easily.)
i did a couple of tricks to the original source code. for example, i split the max angles the servos would do between hips and feet. this means that the feet can do larger angles than the hips. furthermore, i also gave the feet different max angles depending on whether they are up (less) or down (more). my feeling was that this way i would get the center of gravity close to the standing foot’s center.
but here’s really room for experimentation.
i think i’ll stiffen the legs next, possibly also add a gyro to the circuit and let the gait pattern adjust dynamically according to the shakes the hardware does so that he’ll move more slowly when the shakes become too strong. let’s see. finally, i may also add bluetooth for visualising the gyro’s recording to learn a bit more.
or add knee servos. in that way, the lifted leg could retract a bit which would pull the center of gravity a bit more inwards. but it would also add weight. hm… decisions, decisions. what would you suggest?
there will be one day that i’ll build one of these BOB cuties.
i started my robotics career with an attempt to build a ROFI made from 12 servos (below is not my incarnation, i’ll do a dedicated post about my learnings on that one…): Continue reading →
eins meiner persönlichen highlights war völlig unerwartet rolf-dieter klein zu treffen. in meiner kindheit habe ich oft seine sendung im ndr gesehen in der er versucht hat klein-computer in deutsche wohnzimmer zu löten. grosse klasse und eine der inspirationen für mich damals.
erinnert sich heute noch jemand daran? 68020er prozessor. sensationell.
die leute von www.bitsnkids.de haben sich auf die fahnen geschrieben, computer, medien und elektronik kind-gerecht zu vermitteln. ein unterstützenswertes projekt, speziell, weil es hier in münchen angesiedelt ist.
besonders spannend finde ich osmo, das über ipad sieht, was das kind tut und damit feedback liefern kann.
eins der projekte, die ich auch gerne mal basteln wollen würde ist eine kamera führung, die mit drei servos entlang drei achsen geschieht. die servos werden durch die kopf orientierungsdaten der oculus rift gesteuert, die aufnahme der kamera kommt in der rift an.
im vorliegenden projekt wurden dynamixel servos genommen, ca 30€ das stück, die seriell vernetzt werden, was die komplexität verringert. allerdings war nur eine 2d kamera drauf bzw nur ein kamera chip, nicht zwei, sodass wohl im rift kein echter 3d eindruck entstehen konnte.
darüberhinaus war dazwischen ein relativ langsamer laptop, sodass die latenzen nicht wirklich überzeugt haben dürften. schade eigentlich, denn latenzen sind meines erachtens wesentlich wichtiger für einen lebendigen eindruck in der virtuellen realität.
hier das video dazu:
der mensch hier hat das etwas ernsthafter betrieben, nur zum vergleich:
eins der inspirierendsten projekte auf der make munich war “plants and machines” die ein aquaponisches system entwickeln, das arduino kompatibel ist (ein bisschen raspberry pi ist auch dabei), aber die sensorik mit einem bus verbindet, um die verkabelungskomplexität zu reduzieren.
leider hatten die jungs kein demosystem dabei, sodass das publikum nicht so recht darauf aufmerksam werden konnte. der aktuelle prototyp hat wohl beim reisen etwas gelitten und nachdem das system in wenigen wochen komerziell verfügbar sein soll und man nicht mit halbfunktionierenden systemen erschrecken wollte. von der generellen reiseunfähigkeit der fische mal abgesehen.
ich finde das ein sehr spannendes projekt, das mir auch etwas offener scheint als ein ähnliches projekt auf kickstarter, das dieses jahr gescheitert ist (keine aquaponik, sondern “nur” automatisches gewächshaus):
ich bin immer an solchen projekten interessiert. spannend finde ich auch public lab’s infrarot kamera, die das pflanzenwachstum dokumentiert:
das ding liegt auch bei mir daheim rum und will endlich an einen netz-verbundenen raspberry pi gehängt werden um den untergang unseres gartens zu dokumentieren…
wer sich noch mehr für urban farming interessiert, wird auch meinem pinterest board fündig.